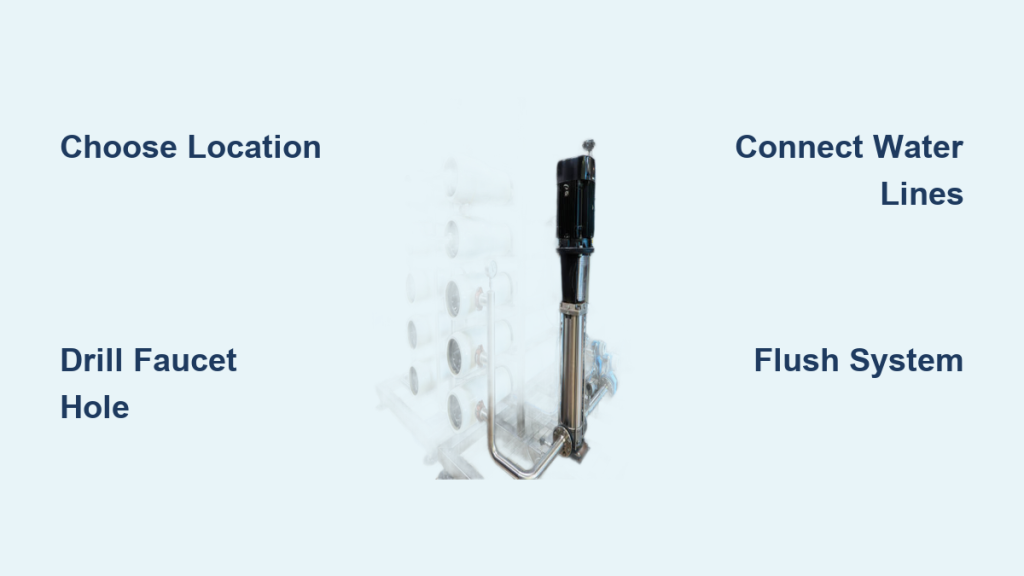
Installing a reverse osmosis system gives you clean, great-tasting water straight from your tap while eliminating the need for bottled water. A properly installed RO system removes up to 99% of contaminants, including lead, fluoride, nitrates, and microorganisms. This guide walks you through every step, from choosing the right location to flushing the system and testing water quality.
You will learn how to connect plumbing lines, avoid common mistakes, and ensure long-term performance. Let’s get started with preparation and location selection.
Choose the Right Installation Location
Picking a suitable spot ensures easy access, reliable performance, and system longevity. The location you choose affects everything from filter changes to overall system efficiency.
Under-Sink Placement Tips
Most homes use under-sink RO systems because they connect directly to the kitchen faucet. Confirm these requirements before starting:
- At least 2 feet × 2 feet of clearance under the sink
- Access to the cold water shut-off valve
- A nearby drain pipe above the P-trap for the waste line
- Room for a 3–4 gallon storage tank, typically placed behind or beside the unit
Avoid placing the system in unheated areas where freezing could damage components.
Alternative Locations
If cabinet space is tight, consider these options:
- Install in the basement beneath the sink, routing tubing through the floor
- Use a utility closet or garage for larger setups, especially whole-house units
- Position near the main water line or water heater for whole-home RO systems
Ensure all locations have freeze protection, electrical access if needed, and proper drainage.
Gather Tools and Components
Having everything ready prevents delays and errors during installation. Preparation is key to a smooth process.
Required Tools
- 7/8-inch diamond-coated hole saw (for granite or quartz countertops)
- ¼-inch drill bit (for drain saddle)
- Adjustable wrench
- Screwdrivers
- Tube cutter or scissors
- Teflon tape
- Tire pressure gauge (to check tank air charge)
Core System Components
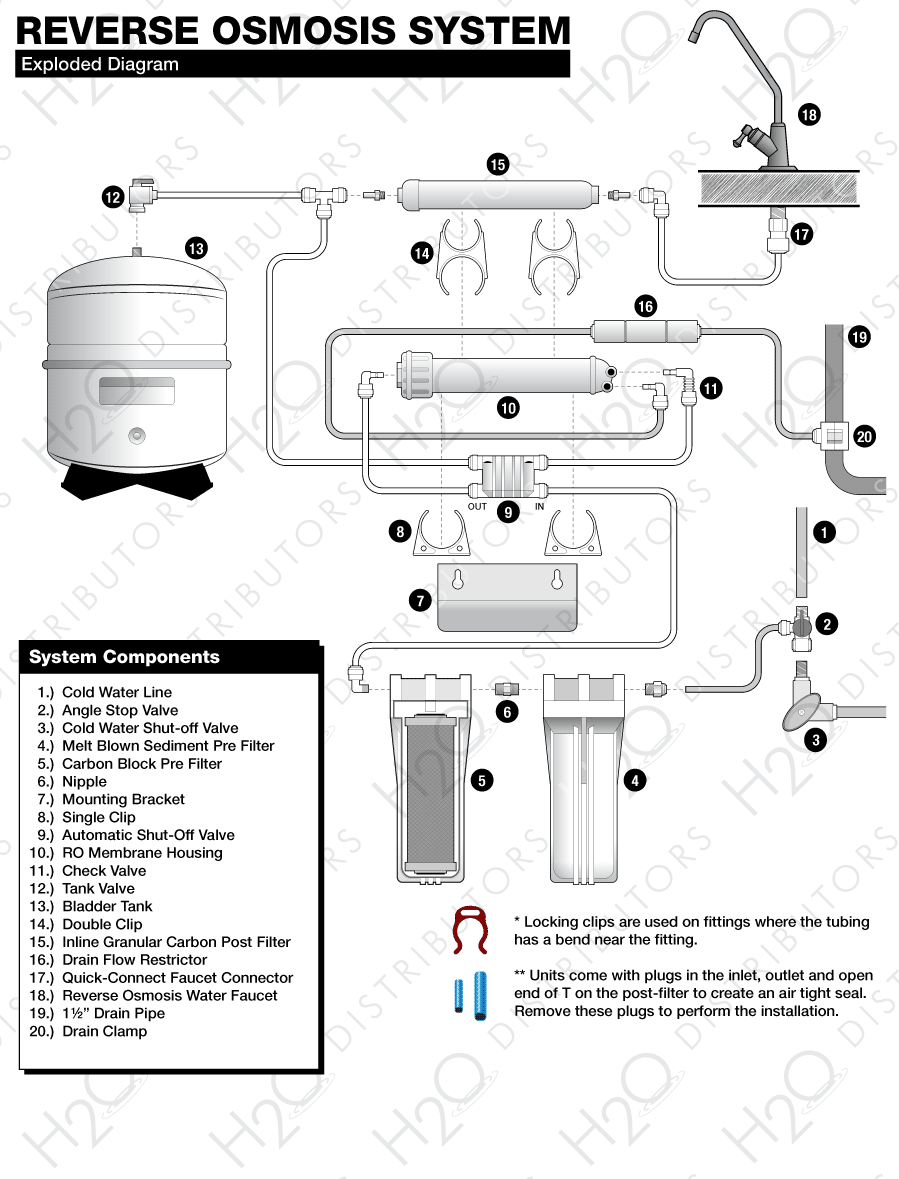
A standard five-stage RO system includes these key parts:
- Sediment filter (5–10 micron)
- Carbon block filter
- RO membrane (TFC)
- Post-carbon filter
- Storage tank (pre-charged to 5–8 psi)
- Dedicated RO faucet
- Color-coded tubing: red/orange (supply), blue/white (product), black/gray (drain)
Optional components include remineralization filter, UV light, booster pump, or permeate pump.
Drill the Faucet Hole
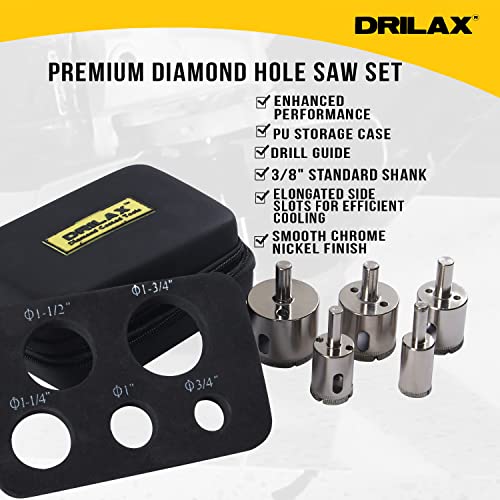
Creating the faucet hole requires careful marking and the right tools for your countertop material.
Mark and Verify the Spot
Choose a location on the countertop or sink deck near the edge, avoiding existing plumbing below. Use a straw or wire to probe downward and confirm clearance. Mark the center point for a 7/8-inch (22 mm) hole.
Cut the Hole Safely
For stainless steel or laminate countertops, use a standard hole saw with light pressure. For granite, quartz, or stone countertops, use a diamond-coated hole saw with water cooling, or have it professionally drilled. Run slowly to prevent overheating. Clean all debris after drilling.
Install the RO Faucet
The dedicated faucet dispenses your purified water and requires proper mounting and connection.
Mount the Faucet
Insert the faucet stem through the hole from above. From underneath, slide on the gasket, lock washer, and mounting nut. Tighten by hand first, then with a wrench. Do not over-tighten, as this can crack plastic components.
Connect Product Water Line
Before securing the faucet fully, attach the blue or clear 1/4-inch tubing to the faucet stem. Push it in until it clicks into the quick-connect fitting. Set aside for now; final connection comes after system setup.
Connect to Cold Water Supply
The feed water adapter connects your RO system to the home’s cold water line.
Install the Feed Water Adapter
Follow these steps to install the feed water connection:
- Shut off the cold water supply valve under the sink
- Open the kitchen faucet to relieve pressure
- Disconnect the riser tube from the shut-off valve
- Wrap 3 layers of Teflon tape (counter-clockwise) on the threads
- Screw on a swivel feed water adapter (T-fitting)
- Reconnect the riser tube to the top port of the adapter
Attach Supply Line
Connect the orange or red 3/8-inch supply line from the RO system to the side port of the adapter. Ensure all connections are snug but not over-tightened, as plastic fittings can crack.
Set Up the Drain Line
The drain line removes concentrated wastewater from the RO process.
Install the Drain Saddle
Locate a straight section of drain pipe above the P-trap (PVC or metal). Drill a ¼-inch hole using a drill bit or self-piercing saddle. Insert the saddle’s barb through the hole. Slide the rubber gasket over the barb and secure with the locking nut.
Never install below the P-trap, as this creates a siphon risk and can contaminate your water supply.
Connect Waste Tubing
Attach the black or gray ¼-inch drain tubing from the RO system’s drain port to the saddle. Maintain an air gap between the saddle and the drain to prevent backflow contamination.
Mount the RO Unit and Storage Tank
Proper mounting and tank preparation ensure system stability and correct operation.
Secure the System
Use included brackets to mount the RO unit vertically on the cabinet wall. Keep it accessible for filter changes. Ensure the unit is level and stable.
Prepare the Storage Tank
Check the storage tank’s air pressure using a tire gauge at the air valve. It should read 5–8 psi when empty. Add or release air as needed to maintain proper pressure. Place the tank upright near the RO unit, avoiding heat sources like dishwashers or water heaters.
Connect All Tubing Lines
Push-to-connect fittings make tubing installation straightforward without glue or clamps.
Follow Color Codes
Use this guide to connect tubing correctly:
- Red or orange tubing connects from feed adapter to RO inlet
- White or blue tubing connects from RO outlet to storage tank inlet, then from tank outlet to dedicated faucet
- Black or gray tubing connects from drain port to drain saddle
Insert Tubing Correctly
Cut tubing ends cleanly with a tube cutter to avoid burrs. Push tubing fully into each fitting until it clicks. To remove tubing, press the collar and pull out. Avoid kinks or tight loops in any line.
Install Filters and RO Membrane
Proper filter and membrane installation ensures effective filtration and prevents damage.
Insert Pre-Filters
Remove caps from sediment and carbon filter housings. Insert cartridges, but do not remove plastic wrapping until ready to use. Hand-tighten housings only. Do not use tools, as this risks cracking the housing.
Install the RO Membrane
Apply food-grade silicone or glycerin to the O-ring to maintain a proper seal. Slide the TFC membrane into its housing. Orientation does not matter for this component. Reassemble the housing and hand-tighten.
Never touch the membrane surface, as oils from your skin can damage it and reduce performance.
Sanitize and Flush the System
Initial sanitization and flushing remove manufacturing residues and ensure clean water from day one.
Initial Sanitization
Remove all filter cartridges from their housings. Add ½ teaspoon of unscented household bleach to the sediment housing. Reinstall the housing without the filter inside. Turn on water supply and let run for 15 minutes to sanitize lines. Shut off water and drain completely.
Reinstall Filters and Flush
Insert all filters back into their housings. Turn on water supply slowly. Open the RO faucet and let water flow until clear and odor-free, which typically takes 1–30 minutes depending on system size. Fill and drain the storage tank twice before drinking the water.
Start-Up and Leak Check
Proper start-up procedures and leak inspection protect your investment and ensure safe operation.
Power On Systems With Pumps
For systems with booster pumps or UV lights, plug into a grounded 110V outlet. Confirm the pump runs smoothly. Never operate the system dry, as this causes irreversible damage.
Inspect for Leaks
Run the system for 10 minutes and visually check all fittings, filter housings, drain saddle, and tank connections. Tighten any drips slightly. Over-tightening actually causes leaks in plastic components, so tighten just enough to stop dripping.
Test Water Quality and Performance
Testing confirms your system is working correctly and producing clean water.
Measure TDS Rejection
Use a TDS meter to test incoming water (for example, 350 ppm). Test RO water after 24 hours of operation. A properly functioning system should read under 35 ppm, indicating 90%+ rejection. Low rejection indicates a faulty membrane or seal that needs attention.
Check Flow Rate
A standard 50–100 GPD membrane should fill a cup (about 8 oz) in approximately 1 minute when the tank is full. Slow flow may indicate clogged pre-filters, low feed pressure, or a faulty automatic shut-off valve.
Verify pH Levels
RO water is naturally 1–2 points lower than source water due to mineral removal. If pH drops below 6.5, consider adding a remineralization filter to protect copper plumbing and improve taste.
Optimize for Low Pressure or Hard Water
Some homes need additional equipment to get the best performance from their RO system.
Boost Feed Pressure
If your home’s water pressure is below 40 psi, install a booster pump on the supply line. Alternatively, use a permeate pump (no electricity needed) to reduce waste and improve efficiency.
Prevent Membrane Scaling
For hard water or high TDS applications, add a water softener upstream. Install an anti-scalant injection system by filling the tank with RO water, adding Hyper-Guard Plus 7000 per the dosage chart, and connecting the injection pump to the dosing port. This prevents calcium buildup that shortens membrane life.
Maintain Your RO System
Regular maintenance keeps your system producing clean water for years.
Replace Filters on Schedule
Follow this replacement schedule for optimal performance:
- Sediment filter: every 6–12 months
- Carbon filters: every 6–12 months
- RO membrane: every 2–5 years
- Post-carbon filter: every 12 months
- UV bulb: every 12 months
Test TDS annually to monitor membrane health and replace the membrane if rejection drops significantly.
Care for the Storage Tank
Check air pressure yearly, maintaining 5–8 psi when empty. Drain and sanitize every 3–5 years to prevent bacterial growth. Replace the tank if water tastes stale or flow slows noticeably.
Troubleshoot Common Issues

Knowing how to diagnose problems saves time and money on repairs.
No Water from Faucet
Check these common causes first:
- Is the tank shut-off valve open?
- Is tubing kinked?
- Is the storage tank empty?
- Are filters clogged?
Low Production or High Waste
These issues often stem from:
- Faulty ASO valve that fails to stop flow when tank is full
- Clogged flow restrictor causing improper waste ratio
- Low feed pressure requiring booster or permeate pump installation
Leaks at Fittings
Try retightening or reseating tubing. Replace cracked housing or worn O-rings. Remember that over-tightening plastic components causes leaks rather than fixing them.
Bad Taste or Odor
Replace the post-carbon filter. Flush the system again to remove any residual particles. Sanitize if water has been stagnant, such as after vacation.
Frequently Asked Questions About Installing Reverse Osmosis Systems
Can I install a reverse osmosis system myself, or do I need a professional?
DIY installation is feasible for under-sink point-of-use systems if you have basic plumbing skills. Whole-house systems typically require professional installation due to electrical requirements and complex plumbing connections.
How long does it take to install an under-sink RO system?
Most under-sink installations take 2–4 hours for first-time installers. Professional plumbers typically complete the job in 1–2 hours. Factor in additional time for sanitization and flushing, which can add another hour.
What water pressure is required for an RO system to work properly?
RO systems require minimum feed water pressure of 35–40 psi, with optimal performance at 40–60 psi. Systems operating below 40 psi benefit from booster pump installation to maintain proper filtration and flow rates.
How often should I replace the RO membrane?
The RO membrane typically lasts 2–5 years, depending on feed water quality and maintenance. Test TDS rejection annually. Replace the membrane when rejection drops below 80% or when water quality noticeably declines.
Does RO water need additional treatment to be safe?
RO water is safe to drink directly from the system. However, RO removes minerals that give water a flat taste. Adding a remineralization filter improves taste and raises pH to protect copper plumbing from acidic water damage.
Key Takeaways for Installing Your Reverse Osmosis System
Installing a reverse osmosis system is a rewarding project that delivers clean, great-tasting water for drinking, cooking, and cooking. The process requires careful attention to plumbing connections, proper sanitization, and thorough testing to ensure optimal performance.
Remember these critical points during installation. Choose a location with adequate space, proper drainage, and access to cold water. Use color-coded tubing and push-to-connect fittings for leak-free connections. Always sanitize and flush the system before drinking the water.
Maintain your system by replacing filters on schedule and testing water quality regularly. Address low pressure with a booster pump and hard water with a softening or anti-scalant treatment. With proper installation and maintenance, your RO system will provide pure water for years to come.