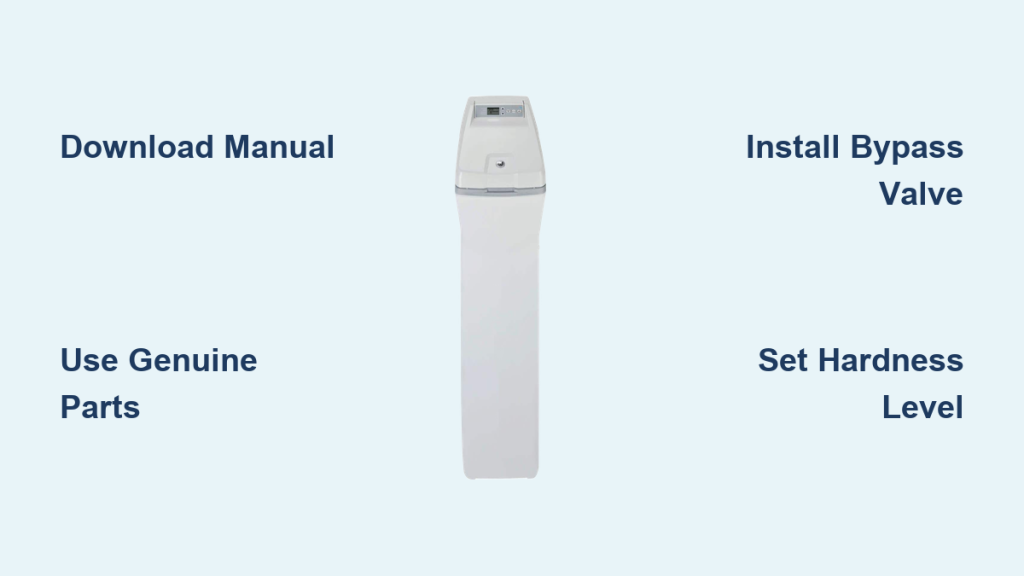
Spotted dishes and dry skin often signal hard water issues that damage your home appliances over time. Installing a GE water softener like the GXSH40V model removes these minerals effectively.
This guide explains how to install GE water softener units using official documentation and genuine parts. You will learn the exact steps to prepare your site, connect plumbing, and program settings for optimal performance.
Download Official Installation Instructions PDF
You cannot safely install this unit without the specific technical manual provided by the manufacturer. GE requires users to download the official Installation Instructions PDF from their support portal before beginning any work.
Access the Correct Manual Online
Visit the GE Appliances support website and search specifically for “GXSH40V Installation Instructions.” This downloadable file contains essential plumbing diagrams, electrical specifications, and safety warnings not found in general articles. Without this document, you risk making incorrect connections that could void your warranty or cause water damage.
Verify Document Authenticity and Date
Check that the manual matches your unit’s serial number and manufacturing date range of 2012 to 2026. GE updates these documents for different production years, so an outdated guide might list incompatible parts or steps. Look for the revision date on the first page and cross-reference it with the tag on your specific softener unit.
Watch Model-Specific Support Videos
Visual learners benefit significantly from seeing the assembly process before handling tools. GE provides a library of support videos specifically designed for the GXSH40V model to complement the written manual.
Locate Step-by-Step Tutorials
Search for “GE GXSH40V installation video” or navigate to the All Support Videos section on the official website. These clips demonstrate unboxing procedures, bypass valve assembly, control head programming, and proper drain hose routing. Watching these helps you avoid common mistakes that DIY installers frequently make during their first attempt.
Focus on Bypass Valve Assembly
One of the most critical visual steps involves assembling the bypass valve correctly. A misaligned valve can cause significant leaks or allow hard water to bypass the softening process entirely. The video guide shows exactly how to orient the inlet and outlet ports, secure the handle, and test for smooth operation before you pressurize the system.
Confirm Pre-Installation Site Requirements
Proper preparation prevents costly errors and ensures your new system functions efficiently. You must verify your installation site meets all mechanical, spatial, and utility requirements before cutting any pipes.
Check Water and Power Supply Needs
The GXSH40V requires a cold water supply line, typically ¾-inch in diameter, to function correctly. You also need a nearby grounded electrical outlet (120V) for the control head and a drain location within 20 feet. Ensure the drain point is no more than 8 feet above the unit to allow proper wastewater flow during regeneration cycles.
Inspect Included Components Carefully
Unpack the unit and confirm all parts are present before starting the installation process. Your box should include:
* Main softener tank with resin bed
* Brine tank for salt storage
* Bypass valve assembly kit
* Drain line tubing
* Overflow safety float
* Owner’s manual and installation guide
Contact GE Customer Care immediately if any part is missing or appears damaged during inspection.
Use Genuine GE Parts Only
To maintain system performance and keep your warranty coverage valid, you must use original GE parts during installation. Generic components often fail to meet the specific engineering standards of this unit.
Avoid Universal or Aftermarket Kits
Generic bypass valves, tubing, or adapters may not seal properly with the GXSH40V proprietary connections. Using non-approved parts can lead to leaks, error codes, or inefficient regeneration cycles that waste salt and water. Visit the GE Parts and Accessories Store online to order exact replacements if your original kit is incomplete.
Replace Damaged Seals Immediately
Inspect all rubber O-rings and gaskets on the bypass valve and control head before assembly. If any seals appear cracked or stiff, replace them with genuine GE seals immediately. Lubricate these parts lightly with food-grade silicone grease to ensure watertight joints without damaging the rubber.
Follow Plumbing Connection Steps
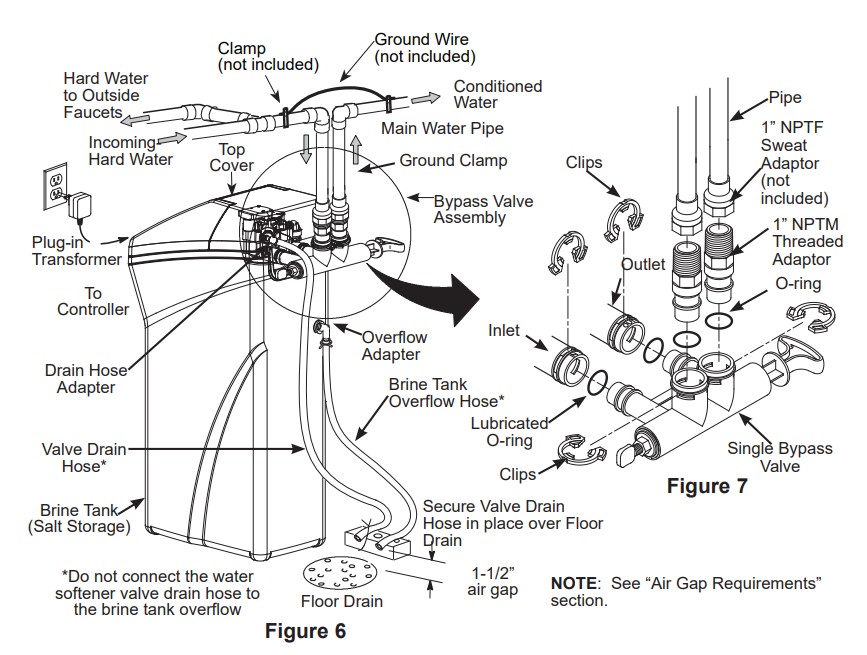
With documentation ready and parts confirmed, you can begin the physical installation of your water softener. All specific plumbing steps must come from the official manual, but the general sequence remains consistent for most homes.
Shut Off Main Water Supply
Turn off the home’s main water valve completely before starting any work. Open a nearby faucet to relieve pressure in the lines, which prevents flooding when you cut into the pipe. Ensure the area around your work zone is dry and clear of obstacles.
Install Bypass Valve on Supply Line
Cut into the cold water line where the softener will connect to your home plumbing. Install the bypass valve following the orientation diagram in your manual precisely. Use appropriate pipe sealant or Teflon tape on threaded joints, and use crimp rings for PEX piping or solder for copper lines.
Connect Inlet and Outlet Lines
Attach the inlet hose for unsoftened water and the outlet hose for softened water from the bypass valve to the softener. Double-check the flow direction arrows on the control head because reversing them damages the internal resin bed permanently.
Set Up Drain and Overflow Lines
Improper drainage can cause flooding or violate local building codes. You must install both the drain line and overflow tube correctly on the first try to ensure safe operation.
Route Drain Line to Safe Disposal Point
Use the included ½-inch PVC or flexible tubing to run the drain line from the control head to a floor drain or standpipe. The line must:
* Rise no more than 8 feet vertically from the unit.
* Include an air gap of at least 1 inch above the drain opening.
* Have no upward loops that could trap water and cause backflow.
Secure the tube every 24 inches with clips to prevent movement during operation.
Install Overflow Safety Float
Attach the overflow tube from the brine tank to a nearby drain or safe disposal area. This safety feature prevents saltwater spills if the fill cycle malfunctions or the tank overfills. Ensure the float moves freely inside the brine tank and do not kink or restrict the tube path.
Program Control Head Settings

After completing all plumbing connections, power up the unit and configure it for your specific water conditions. Proper programming ensures the system regenerates at the right time and uses salt efficiently.
Plug In and Power On
Connect the control head to a grounded 120V electrical outlet. The display should light up immediately, indicating the unit has power. If the screen remains blank, check your circuit breaker and test the outlet with another device.
Set Water Hardness Level
Use the GE Water Softener FAQs to find your local water hardness in grains per gallon (gpg). Enter this value into the control panel accurately, as incorrect settings waste salt or fail to soften water effectively. For example, if your water tests at 18 gpg, input “18” exactly.
Choose Regeneration Type
Select between demand-initiated regeneration (DIR) or time-initiated regeneration based on your household needs. DIR is more efficient for most homes as it regenerates based on actual water usage. Set the regeneration time to a low-use period like 2:00 AM to avoid water pressure issues.
Test System and Flush Resin Bed
Before declaring your installation complete, you must perform a full system test to ensure everything works correctly. This step verifies there are no leaks and that the unit softens water as expected.
Initiate Manual Regeneration
Run a manual regeneration cycle directly from the control panel. This process flushes manufacturing debris from the resin bed and ensures all valves operate smoothly. The entire cycle takes approximately 60 to 90 minutes to complete fully.
Check for Leaks and Flow
Inspect all connections for drips during and after the regeneration process. Confirm water flows into the brine tank during the fill phase and verify the drain line carries wastewater without backing up. Tighten fittings slightly if leaks appear, but avoid over-torquing plastic components.
Register Product and Activate Warranty
Finalize the installation by registering your unit with GE to secure your consumer protections. This step is essential for accessing future support services and warranty claims.
Complete Online Registration
Visit the GE Product Registration page and enter the model number GXSH40V, serial number, and purchase date. This activates your limited warranty and enables direct access to support teams if issues arise later.
Save Documentation Securely
Keep the installation manual, receipt, and registration confirmation in a safe place. You will need these documents for future service calls or warranty claims if the unit requires repair.
Consider Professional Installation Options
While DIY installation is possible, many homeowners prefer expert help for complex plumbing tasks. Professional installation ensures compliance with local codes and reduces the risk of errors.
Use GE-Certified Installers
Through the Customer Care portal, you can schedule Appliance Delivery, Installation & Removal services. Certified technicians bring specialized tools, follow local plumbing codes, and ensure correct electrical grounding. This service reduces the risk of leaks or damage to your home plumbing system.
When to Call a Pro
Choose professional installation if you lack plumbing experience or if local codes require permits. You should also hire a pro if no nearby floor drain exists or if the unit must be installed in a tight space. Professionals typically complete the job in 2 to 4 hours with minimal disruption to your daily routine.
Frequently Asked Questions About GE Water Softener Installation
Where can I find the official installation manual for GXSH40V?
You must download the official Installation Instructions PDF from the GE Appliances support website. Search specifically for model GXSH40V to get the correct diagrams and safety warnings required for proper setup.
What power requirements does the GE GXSH40V need?
The unit requires a standard 120V grounded electrical outlet located near the installation site. Never use extension cords for permanent appliances, and ensure the circuit is not shared with high-draw devices.
How high can I route the drain line for this softener?
The drain line must not rise more than 8 feet vertically from the unit to function correctly. It also needs an air gap of at least 1 inch above the drain opening to prevent backflow contamination.
Can I use generic parts for the bypass valve assembly?
No, you should only use genuine GE parts to maintain warranty coverage and proper function. Generic valves may not seal correctly with proprietary connections, leading to leaks or inefficient operation.
How do I determine the correct hardness setting?
Test your water supply to find the hardness level in grains per gallon (gpg) or parts per million (ppm). Enter this exact number into the control panel using the GE Water Softener FAQs as a reference guide.
What should I do if the display does not light up?
Check that the unit is plugged into a working 120V outlet and verify the circuit breaker has not tripped. If the outlet works but the screen remains blank, contact GE Customer Care for troubleshooting assistance.
Key Takeaways for Installing Your GE Water Softener
Installing a GE water softener requires careful planning, access to official resources, and strict attention to detail. Always start by downloading the Installation Instructions, using genuine GE parts, and watching support videos to avoid common pitfalls.
Whether you choose DIY or hire a professional, correct setup ensures years of soft water and appliance protection. Maintain your unit by checking salt levels monthly and rechecking hardness settings if your water quality changes.