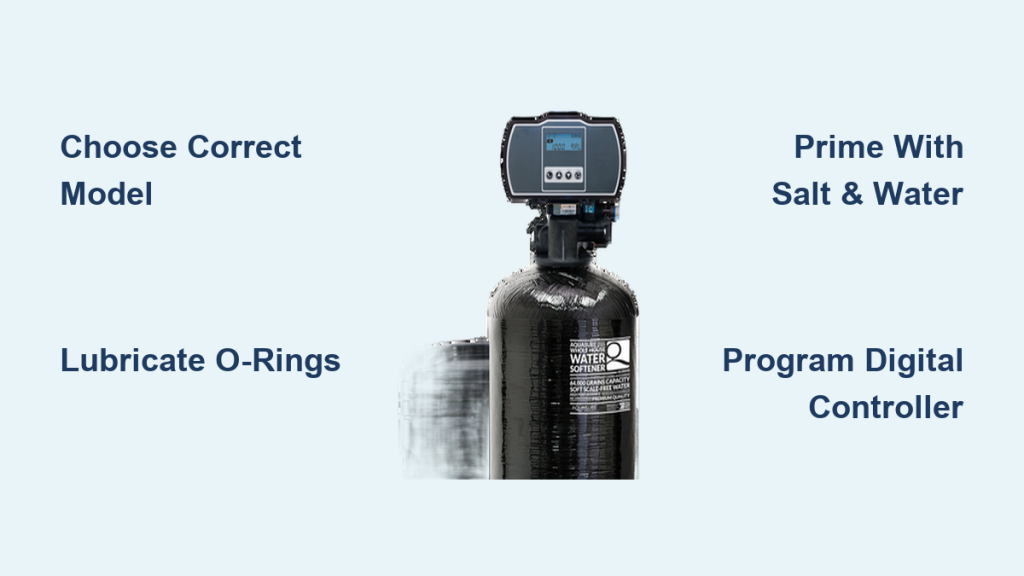
Dealing with dry skin, stubborn soap scum, and damaged appliances often means your home suffers from hard water. Installing an Aquasure water softener solves these issues by removing minerals like calcium and magnesium through a simple DIY process.
This guide details every step required to select the right model, assemble the valve, connect plumbing lines, and program the digital controller. You will learn how to avoid common leaks, ensure proper drainage, and activate your system for immediate soft water results.
Choose the Correct Aquasure Model for Your Home

Selecting the right grain capacity ensures your system handles daily demand without wasting salt or water. The Aquasure Harmony Series offers specific models tailored to household size and water conditions.
Match Grain Capacity to Household Size
The ideal model depends on your number of bathrooms and occupants. A system that is too small will regenerate too often, while one that is too large wastes resources.
- 32k Digital Metered: Best for 1–3 bathrooms and up to 4 people.
- 48k Digital Metered: Suitable for 2–4 bathrooms and up to 6 people.
- 48k Fine Mesh: Designed specifically for well water with high iron content.
- 64k with Pre-Filter: Built for large homes featuring 4–6 bathrooms.
Verify Water Pressure and Temperature Limits
Your water supply must meet specific parameters before installation to prevent damage to the unit. Testing your water hardness in grains per gallon (GPG) is essential for programming later.
- Pressure Range: Must be between 25 and 125 PSI. Install a pressure-reducing valve if pressure exceeds 80 PSI.
- Temperature Limit: Water temperature must stay between 32°F and 100°F.
- Cold Water Only: Never connect the unit after the water heater or allow hot water input.
Prepare a Safe Indoor Installation Site
Location selection is critical for warranty compliance and system longevity. The Aquasure water softener must remain indoors to avoid freezing temperatures that crack tanks.
Select an Indoor Location Near Main Line
Place the unit on a flat, level floor near your main water entry point. It must sit before the water heater to protect all plumbing and appliances from scale buildup.
- Avoid Freezing Zones: Do not install in unheated garages or areas prone to freezing.
- Shade Required: Keep the unit out of direct sunlight to prevent plastic degradation.
- Clearance Needs: Ensure 25 inches of vertical clearance for service and 6 inches of ground clearance if using a pre-filter.
Ensure Drain and Electrical Access
The system requires a nearby power source and a proper drainage method for wastewater created during regeneration cycles.
- Power: A grounded 120V outlet must be within 6 feet of the control head.
- Drain Access: Locate a floor drain, standpipe, or laundry tub nearby.
- Bypass Strategy: Route outdoor spigots to bypass the softener since softened water harms plants.
Assemble the Control Valve and Resin Tank

Proper assembly of the valve head prevents leaks and ensures the resin bed functions correctly. Follow these steps carefully to avoid damaging plastic threads.
Lubricate O-Rings with Food-Grade Grease
Apply food-grade silicone grease to specific rubber components to create a watertight seal. This step is vital for preventing leaks at connection points.
- Grease the large O-ring on the tank’s threaded fitting.
- Apply grease to O-rings at the base of the control valve.
- Lubricate dual O-rings on the bypass valve.
- Warning: Never apply grease to the threads themselves as this causes over-tightening.
Mount the Digital Control Head Securely
Align the control valve over the tank opening and thread it clockwise by hand. Use even pressure with both hands to ensure the riser tube inside aligns with the valve bottom.
- Slide the cone adapter onto the tank fitting and hand-tighten.
- Push down so the gray riser tube enters the valve head.
- Thread the valve clockwise until snug.
- Do not use tools to tighten the valve to avoid cracking the plastic.
Install Bypass Valve and Pre-Filter Components

The bypass valve allows water flow during maintenance, while the pre-filter protects the system from sediment. Correct installation here prevents future service headaches.
Secure the Bypass Valve to Control Head
The bypass valve connects directly to the back of the digital control head. Ensure it seats fully to prevent water from leaking around the connection point.
- Push the valve into the back of the head until it clicks.
- Secure the connection with provided metal plates and screws.
- Double-check that the valve is fully seated before proceeding.
Mount the Pre-Filter for 64k Models
If your system includes a pre-filter, install it before the softener in the water line. This component removes sediment before water reaches the resin tank.
- Mount the bracket to a wall stud using lag bolts.
- Maintain 6 inches of clearance below for filter changes.
- Wrap 1″ NPT fittings with 5–6 layers of Teflon tape.
- Hand-tighten fittings then snug gently with a wrench.
Connect Plumbing Lines to Main Water Supply
Connecting the unit to your home plumbing requires shutting off the main water and using proper fittings. This phase determines the structural integrity of your entire installation.
Shut Off Main Water and Relieve Pressure
Safety is paramount before cutting any pipes or disconnecting fittings. You must ensure no water pressure remains in the lines.
- Turn the main shutoff valve clockwise to close it.
- Open the lowest faucet in your home to drain remaining water.
- Turn off the well pump power if you are on a private well system.
Identify Inlet and Outlet Flow Direction
Correct flow direction is essential for the softener to function. Arrows on the valve body indicate the proper water path.
- Inlet: Arrow points toward the valve (connects to main supply).
- Outlet: Arrow points away from the valve (connects to house plumbing).
Apply Teflon Tape and Attach Fittings
All connections use 1″ male NPT threads. Prepare these threads properly to ensure a leak-free seal without damaging the plastic.
- Wrap 8–12 layers of Teflon tape clockwise on male threads.
- Use a 1¼” to 1″ adapter if connecting to older, larger home lines.
- Choose between copper pipes, SharkBite fittings, or braided stainless steel hoses.
- Avoid sharp bends in pipes to prevent stress on the valve body.
Set Up Drain and Brine Lines Properly

The drain line removes wastewater while the brine line draws salt solution. Both require specific routing to function safely and efficiently.
Install Drain Line with Air Gap
The drain line must discharge wastewater without creating a siphon risk. An air gap prevents sewer gases or backup water from entering your softener.
- Connect the 1/2″ drain tube to the control head port.
- Use the orange locking clip to secure the hose firmly.
- Route the line to a floor drain or standpipe.
- Maintain a 1.5-inch air gap above the drain flood level.
- Use 3/4″ hose if the drain run exceeds 20 feet.
Connect Brine Line to Safety Float
The brine line delivers salt water to the resin bed. Secure connections here ensure the system regenerates properly.
- Locate the 3/8″ brine line port on the control head.
- Remove the blue locking clip and insert tubing past the O-ring.
- Re-secure the clip and tug gently to test.
- Connect the other end to the brass nut on the safety float inside the brine tank.
Prime the System with Salt and Water
Priming creates the initial brine solution needed for the first regeneration cycle. Using the wrong salt or skipping water addition causes immediate system failure.
Select High-Purity Salt Pellets
Only use salt with a purity rating of 99.5% or higher. Impure salts create sludge that clogs the injector and damages the system.
- Recommended: Coarse salt pellets or crystal solar salt.
- Prohibited: Rock salt, table salt, or block salt.
- Quantity: Add a minimum of 80 lbs (two 50-lb bags recommended).
Add Water to Create Brine Solution
Water must be added manually to start the brine making process. Without this step, the first regeneration cannot draw salt.
- Pour exactly 5 gallons of clean tap water into the brine tank.
- Replace the lid tightly to keep debris out.
- Allow the salt to begin dissolving before starting the cycle.
Power Up and Program the Digital Controller
Programming the unit customizes regeneration to your specific water usage. This step maximizes efficiency and ensures you never run out of soft water.
Flush Air and Debris in Bypass Mode
Clear air from the lines before sending water through the resin bed. This prevents air locks and ensures clean water flow.
- Set bypass valves to Bypass Mode (knobs perpendicular to pipes).
- Remove the aerator from the nearest cold faucet.
- Slowly turn on the main water supply.
- Run water for 2–3 minutes until clear and air-free.
- Reinstall the aerator and check all joints for leaks.
Fill Resin Tank and Set Regeneration Schedule
Switch to service mode to fill the tank, then program the digital head for automatic operation. The system will track usage and regenerate only when needed.
- Turn bypass knobs to Service Mode (parallel to pipes).
- Open valves ¼ way initially, then fully once air escapes.
- Plug into the 120V outlet and hold Menu for 3 seconds.
- Select Time Meter (tM) mode for efficient 2:00 AM regeneration.
- Calculate gallon capacity using the formula:
(Grain Capacity ÷ Hardness) − (People × 75). - Hold the Regen button for 5 seconds to start a manual cycle.
Final Checks and Maintenance Best Practices
Regular maintenance extends the life of your Aquasure water softener and keeps water quality high. Simple checks prevent major issues down the road.
Confirm Soft Water Flow and Check Leaks
Verify that the system is delivering soft water after the first regeneration cycle. Inspect all connections one last time under full pressure.
- Ensure bypass is in Service Mode.
- Test water at multiple faucets for a silky feel.
- Inspect the cone adapter and bypass valve for any moisture.
Extend Warranty and Prevent Failures
Proactive care keeps your system running smoothly for years. Registering your unit is the most important step for long-term protection.
- Register Online: Visit the support site within 60 days to extend warranty from 1 to 5 years.
- Monthly Checks: Inspect salt levels and refill before the tank is half empty.
- Annual Care: Clean the brine injector and venturi once a year.
- Avoid Mistakes: Never overtighten plastic parts or use incorrect salt types.
Frequently Asked Questions About Aquasure Installation
Can I install an Aquasure water softener outside?
No, you must install the system indoors. Freezing temperatures will crack the fiberglass tank and control head, voiding your warranty immediately.
How much salt should I add during the first fill?
Add a minimum of 80 lbs of high-purity pellets. It is recommended to pour two 50-lb bags to ensure the brine tank has enough salt for multiple cycles.
What happens if I forget to add water to the brine tank?
The system cannot create brine without water. The first regeneration cycle will fail to draw salt, leaving your resin bed uncharged and water hard.
Do I need a special electrical outlet for the controller?
No, the unit uses a standard grounded 120V outlet. Ensure the outlet is within 6 feet of the control head and protected from moisture.
How often does the Aquasure Harmony Series regenerate?
Regeneration frequency depends on your water usage and hardness settings. The digital meter tracks gallons used and typically regenerates at 2:00 AM only when capacity is depleted.
Key Takeaways for Installing Your Aquasure Water Softener
Successful installation of an Aquasure water softener relies on choosing the right model, securing leak-free connections, and programming the unit correctly. Always use high-purity salt, maintain the required air gap on the drain line, and register your product within 60 days to maximize your warranty coverage.
Start by testing your water hardness and gathering the necessary tools before shutting off your main water supply. Follow the assembly steps carefully to avoid cracking plastic threads, and run a manual regeneration cycle to confirm everything works. With proper setup, you will enjoy scale-free pipes and soft water throughout your home.