Low water pressure after installing a water softener is a common but frustrating problem. You turn on the shower and get a trickle, flush the toilet and watch the water sputter. These are clear signs something is wrong with your system.
If your water softener is the culprit, the issue likely stems from internal clogs or degraded components. Most problems are fixable without replacing the entire unit. This guide walks you through diagnosing the root cause and applying targeted fixes to restore strong, reliable water pressure.
Confirm the Softener Is the Cause of Low Pressure
Before tearing into your system, prove the softener is responsible. Many homeowners waste time fixing the wrong component when the issue lies in the main supply.
Perform the Bypass Test to Isolate Flow Issues
The fastest way to isolate the problem is using your softener bypass valve.
- Locate the bypass assembly usually found on the back or side of the unit.
- Turn the arrows to face each other to engage bypass mode. This routes water around the softener entirely.
- Test water pressure at multiple fixtures like the shower, kitchen sink, and laundry room.
If pressure returns to normal, the softener is restricting flow. Move to internal diagnostics. If pressure stays low, the issue is external. Check for leaks, clogged main lines, or municipal supply problems.
Rule Out External Plumbing Problems
Do not overlook simple culprits before assuming softener failure.
- Clean faucet aerators and showerheads since they trap debris first.
- Check for leaks by monitoring your water meter when all water is off.
- Determine if the issue is whole-house or fixture-specific. Isolated low flow suggests local clogs rather than softener failure.
Diagnose Internal Softener Problems Causing Low Flow
Once you confirm the softener is the bottleneck, investigate what is blocking flow inside the unit.
Check for Resin Bed Degradation
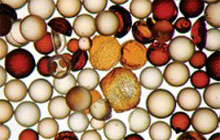
Aging or damaged resin beads are a top cause of gradual pressure loss. Chlorine in municipal water breaks down plastic resin beads over time. They fracture into fine particles that clog the tank distributor tube and media bed.
Watch for these specific signs:
* Pressure drops slowly over months or years.
* Showers shut off when toilets flush.
* Sand-like particles appear in aerators. This is resin fines escaping the tank.
Homes with chlorinated water or units older than five years are at high risk. Resin can fail even if water still feels soft. Softening ability does not mean flow is unrestricted.
Look for Sediment or Iron Buildup
Even with pre-filters, dirt, rust, or iron can accumulate in the resin bed or inlet screen. Sediment clogs reduce flow by physically blocking water paths. Iron fouling causes beads to stick together, forming a dense mass that resists water.
Symptoms include a sudden or progressive pressure drop. You may also see brown or yellow water after regeneration. If your area has well water or rusty pipes, iron and sediment are likely contributors.
Inspect the Inlet Screen and Control Valve
The control valve contains small internal parts that can become choke points. The inlet strainer screen is a tiny filter inside the valve that catches debris. If clogged, it can cut flow by 50% or more.
Some valves have built-in orifices that can get blocked. Shut off water, relieve pressure, and remove the inlet line to access and clean the screen. Never repressurize the system without reassembling the valve. You risk damaging seals or causing leaks.
Fix Clogs and Fouling Issues Restoring Pressure
For clogged or fouled systems, cleaning can restore flow often without replacing parts.
Clean the Inlet Screen for Immediate Relief
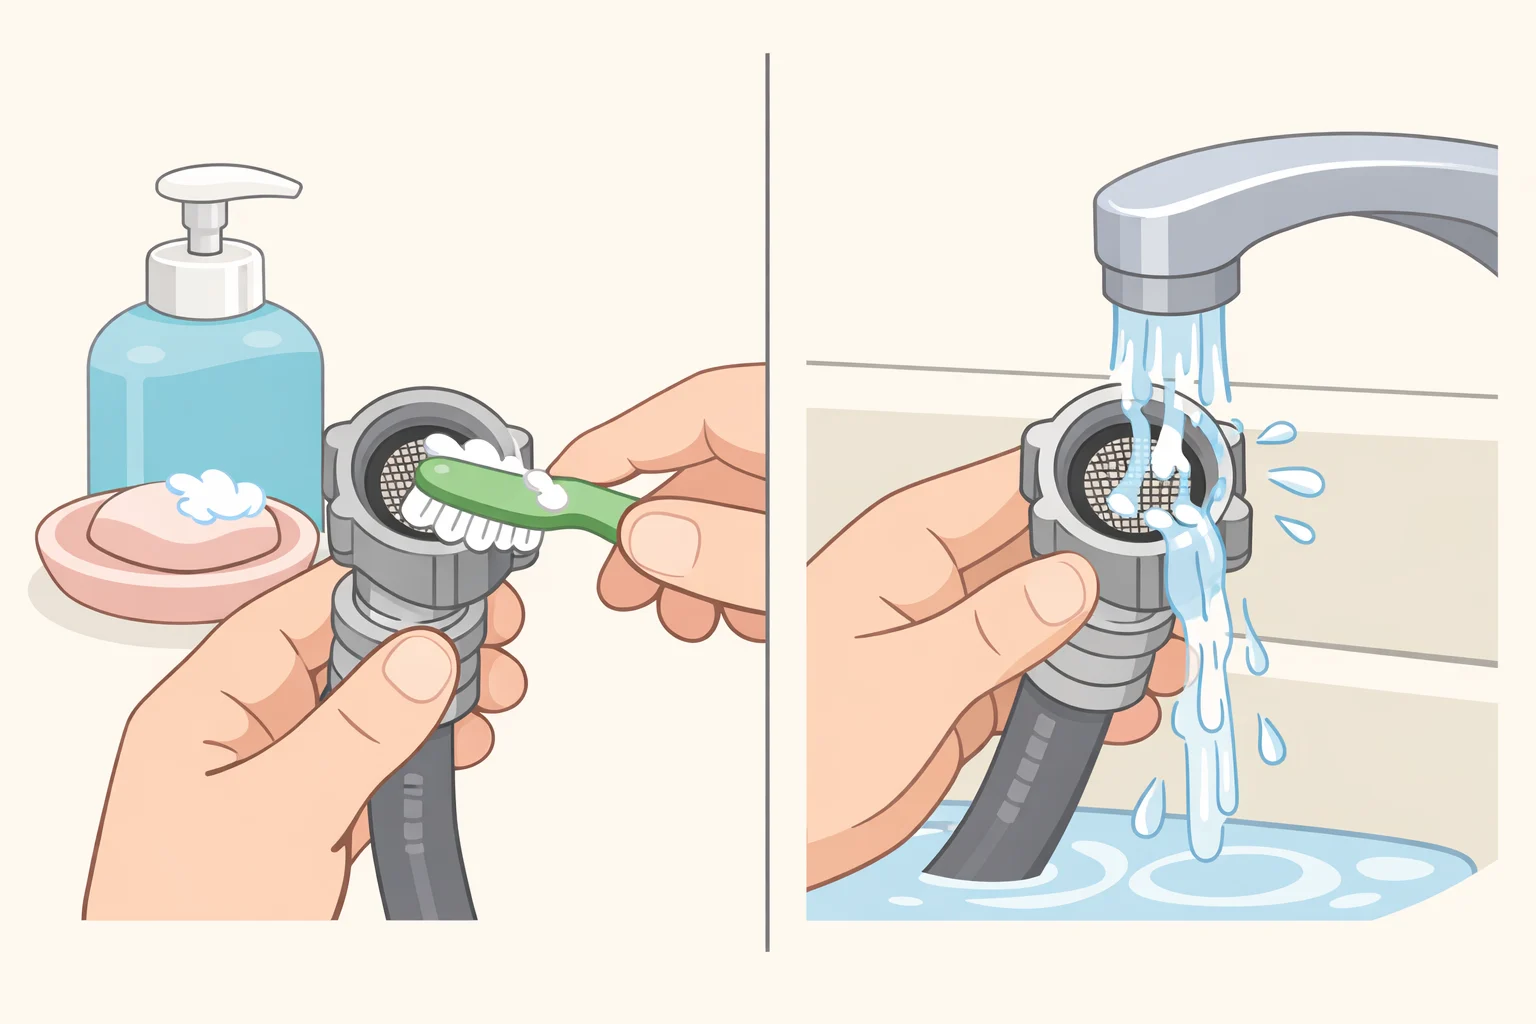
This is the easiest and most overlooked fix for low water pressure from water softener issues.
- Shut off water supply to the softener.
- Open a downstream faucet to relieve pressure.
- Disconnect the inlet line from the control valve.
- Remove and inspect the strainer screen. Clean it with vinegar or a soft brush.
- Reinstall and test pressure in service mode.
This process takes about 15 minutes and costs nothing. This fix resolves sudden pressure drops in many cases.
Flush the Resin Bed with Chemical Cleaner
Standard salt will not remove iron or sediment. You need a targeted cleaner like Rest-Care or Iron-Out. Pour it directly into the brine well or as directed by your softener model.
Initiate a manual regeneration immediately after adding the cleaner. Run two to three back-to-back cycles for severe clogs. This forces aggressive backwashing to dislodge buildup. For iron-heavy water, clean every 6 to 12 months to prevent fouling.
Backwash Iron Filters Separately
If you have a dedicated iron filter, backwash it two to three times consecutively. This clears trapped media and restores flow. Do this monthly if iron levels are high. Note that this applies to iron filters distinct from your softener unit.
Replace Degraded Components to Restore Flow
When cleaning fails, replacement is the next step. This is often more affordable than a full system swap.
Replace the Resin Beads
If resin is broken down, no amount of cleaning will help. Replacement is required. The cost is typically $100 to $200 for resin and labor if you do it yourself.
Do this if pressure has not improved after cleaning. It is also necessary if you find resin fines in fixtures or if the unit is over five years old and exposed to chlorine.
Follow these steps to replace resin:
1. Bypass the softener.
2. Drain the tank by disconnecting the drain line.
3. Remove the control valve head.
4. Extract old resin using a shop vac or siphon.
5. Inspect the distributor tube. Clean or replace if clogged.
6. Pour in fresh resin. Use one to two cubic feet depending on tank size.
7. Reattach the valve, sanitize, and restart.
In documented cases, resin replacement restored full pressure. This eliminated shower shutoffs and weak flow immediately.
Clean or Replace Fixtures After Resin Failure
If resin beads escaped, they have likely clogged aerators and showerheads. Remove and soak fixtures in vinegar to dissolve mineral deposits.
Flush pipes by running all taps for several minutes after resin replacement. Consider installing inline filters downstream if bead escape is recurring. This prevents future clogs in your fixtures.
Upgrade Plumbing and Installation for Better Flow
Sometimes the softener is not broken. It may just be mismatched to your home plumbing.
Upgrade to 3/4 Inch Piping

Many low-pressure issues stem from undersized pipes. Half-inch PEX or copper has high friction loss. Adding a softener increases resistance, especially with crimp fittings that reduce internal diameter.
Replace supply lines to and from the softener with 3/4 inch PEX. Use expansion fittings instead of crimp rings. They maintain full internal diameter. A 40-foot run of half-inch PEX can drop flow by 30 to 50 percent. Upgrading to 3/4 inch often restores pressure completely.
Install Pre-Filtration Systems

Protect your softener from the start. Install a 20-inch Big Blue 5-micron filter upstream to catch sand and rust. Add a carbon pre-filter to remove chlorine. This is essential for municipal water users.
Both filters go before the softener. This extends resin life from five to over ten years. It also prevents clogs before they start.
Ensure Proper Bypass and Outdoor Hookups
Verify your bypass works correctly. You should be able to service the unit without cutting water to the house. Tap outdoor faucets before the softener. This avoids using softened water for irrigation and maintains higher outdoor pressure.
Prevent Future Pressure Problems
Fixing the issue is only half the battle. You must prevent it from returning.
Follow a Maintenance Schedule
Adhere to a strict maintenance routine. Clean the inlet screen annually. Inspect for resin fines at the same time. Use a resin cleaner every 6 to 12 months if iron or chlorine is present. Consider resin replacement every 5 to 7 years, especially with chlorinated water.
Reassess System Sizing
If you added family members or a new bathroom, your old softener may be undersized. Recalculate capacity using people times 75 gallons per day times grains of hardness. Upgrade if needed. A higher GPM rated unit handles demand better.
Monitor for Early Warning Signs
Watch for sand in faucets. This indicates resin breakdown. Look for brown water after regeneration. This signals iron or sediment disturbance. Address a sudden pressure drop quickly. It usually means a clogged screen or valve issue. Quick action avoids full blockages.
Frequently Asked Questions About Low Water Pressure from Water Softener
Why does my water pressure drop only when the softener is active?
This indicates the softener is creating a bottleneck. The resin bed may be clogged with sediment, or the resin beads themselves have degraded. Another possibility is undersized piping connecting the unit. Perform a bypass test to confirm the softener is the restriction point.
Can broken resin beads cause low water pressure?
Yes, broken resin beads are a primary cause of gradual pressure loss. As beads fracture, they create fine particles that clog the distributor tube. This sludge restricts water flow significantly. You may also find sand-like particles in your faucet aerators.
How often should I clean my water softener to prevent low pressure?
You should clean the inlet screen annually. If you have iron or high chlorine, use a resin cleaner every 6 to 12 months. Regular maintenance prevents sediment buildup and iron fouling. This keeps your system running at peak efficiency.
Is it better to replace resin or buy a new softener?
Replacing resin is often more cost-effective. It typically costs $100 to $200 compared to over $1,000 for a new unit. If your tank and valve are in good condition, resin replacement restores pressure effectively. Only replace the whole unit if the tank is damaged.
Will upgrading my pipes fix low pressure from my softener?
Upgrading to 3/4 inch pipes often solves the problem. Many homes have half-inch pipes that create too much friction. The added resistance of the softener worsens this issue. Larger pipes reduce friction and restore adequate flow rates.
Key Takeaways for Fixing Low Water Pressure from Water Softener
Low water pressure from a water softener is rarely a mystery. It is usually a clog, degraded resin, or undersized plumbing. Start with the bypass test to confirm the source. Then clean or replace the right component to fix the issue.
In most cases, replacing resin or upgrading to 3/4 inch piping solves the problem. These fixes cost a fraction of a new system. With proper pre-filtration and maintenance, your softener can deliver soft water and strong pressure for years. Take action today to restore your home water flow.