You turn on your reverse osmosis faucet and get nothing but a weak dribble or silence. If your reverse osmosis not flowing, you’re dealing with one of the most common issues homeowners face with RO systems. The good news? Most causes are fixable with basic tools and a logical approach.
This guide covers the five main reasons your RO system stops flowing: water-logged storage tank, clogged filters, low inlet pressure, fouled membrane, and faulty flow restrictor. You’ll learn exact diagnostic steps, specifications, and repair procedures to restore full flow fast.
Check Storage Tank Air Pressure
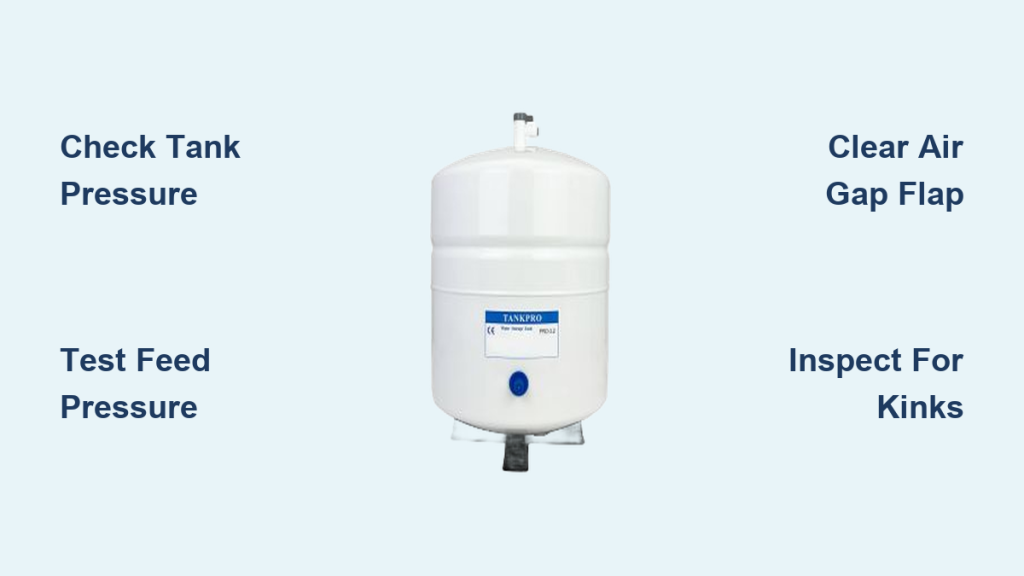
A water-logged storage tank is the number one cause of reverse osmosis not flowing. Without proper air pressure, there’s no force pushing water out of the faucet, even if your system is producing water.
Why Tank Pressure Matters
The storage tank uses a butyl rubber bladder to separate purified water from compressed air. When the bladder fails or loses pressure, water floods the air chamber. Without pressure, water cannot exit the tank through the faucet.
Signs of a Failed Tank
• Faucet starts strong, then stops within seconds
• Tank feels heavy even after draining completely
• System refills slowly or not at all
Test and Repressurize the Tank

Step 1: Shut Off the System
Close the inlet shutoff valve clockwise and the ball valve on top of the tank.
Step 2: Drain the Tank
Disconnect the outlet line and open the ball valve to drain all water. If water trickles out and stops quickly, the air chamber is compromised.
Step 3: Measure Air Pressure
Use a low-range tire gauge on the Schrader valve. Target pressure is 6 to 8 psi when empty. Ideal is 7 psi. Never exceed 8 psi or you risk damaging the bladder.
Step 4: Add Air if Needed
Use a hand pump or small air compressor. Pump slowly and recheck pressure. Water may leak out initially if the bladder is saturated.
Step 5: Reconnect and Refill
Reattach the tubing, open valves, and wait 2 to 4 hours for full refill. Test faucet flow.
Pro Tip: If flow returns but drops again within days, the bladder is ruptured. Replace the entire tank. Repair is not possible.
Prevent Future Tank Issues
• Check air pressure every 6 to 12 months
• Always drain and depressurize before testing
• Replace tanks every 5 to 7 years, even if working
Replace Clogged Pre- and Post-Filters
Clogged filters are the second most common cause of reverse osmosis not flowing. Over time, sediment and carbon filters trap debris, restricting water movement through the system.
How Filters Affect Flow
The sediment filter blocks dirt, rust, and sand. The carbon pre-filter removes chlorine and organics but fouls quickly in hard water. The post-filter polishes water before dispensing. When any filter clogs, water cannot reach the membrane efficiently.
Warning Signs
• Gradual flow reduction over weeks or months
• Discolored or odd-smelling water
• High pressure drop across filters
Replace Filters Every 6 to 12 Months
Even if water tastes fine, clogged filters starve the membrane. Follow this schedule:
• Pre-filters (sediment plus carbon): Every 6 to 12 months
• Post-filter: Every 6 to 12 months, usually with pre-filters
In hard water areas with TDS above 300 ppm, change filters every 6 months.
How to Replace Filters
- Shut off the inlet valve and tank valve.
- Depressurize by opening the faucet.
- Use a filter wrench to remove old cartridges.
- Lubricate O-rings with food-grade silicone grease.
- Install new filters and hand-tighten only.
- Flush system for 5 to 10 minutes to clear carbon fines.
Never skip flushing. Loose carbon can clog lines and damage the membrane.
Avoid These Mistakes
• Reusing old filters for extra weeks
• Using non-OEM filters or wrong micron ratings
• Over-tightening filter housings, which causes cracks
Test Inlet Water Pressure
Low inlet pressure is a silent killer of RO performance. Below 40 psi, the system cannot push water through the membrane effectively.
Minimum Pressure Requirements
• Minimum: 40 psi
• Optimal: 40 to 60 psi
• Below 40 psi means low flow, poor rejection, and high waste
Common Causes of Low Pressure
• Municipal supply fluctuations
• Clogged shutoff valve
• Kinked or narrow tubing
• Shared plumbing with washing machines or irrigation
How to Measure Inlet Pressure
- Attach a water pressure gauge to a cold water line or RO test port.
- Turn on the supply valve and check the reading.
- Record pressure at peak usage times like morning and evening.
Fix Low Inlet Pressure
Option 1: Clean or Replace Feed Line
Inspect the shutoff valve and tubing for clogs. Replace 1/4 inch OD tubing if kinked or discolored.
Option 2: Install a Booster Pump
If pressure is consistently below 40 psi, electric booster pumps raise pressure to 60 to 80 psi. These include pressure switches and check valves. They work well for older homes, upper floors, or low-pressure municipalities.
User Feedback: Eighty-five percent of low-pressure cases resolve with a booster pump.
Inspect the Reverse Osmosis Membrane
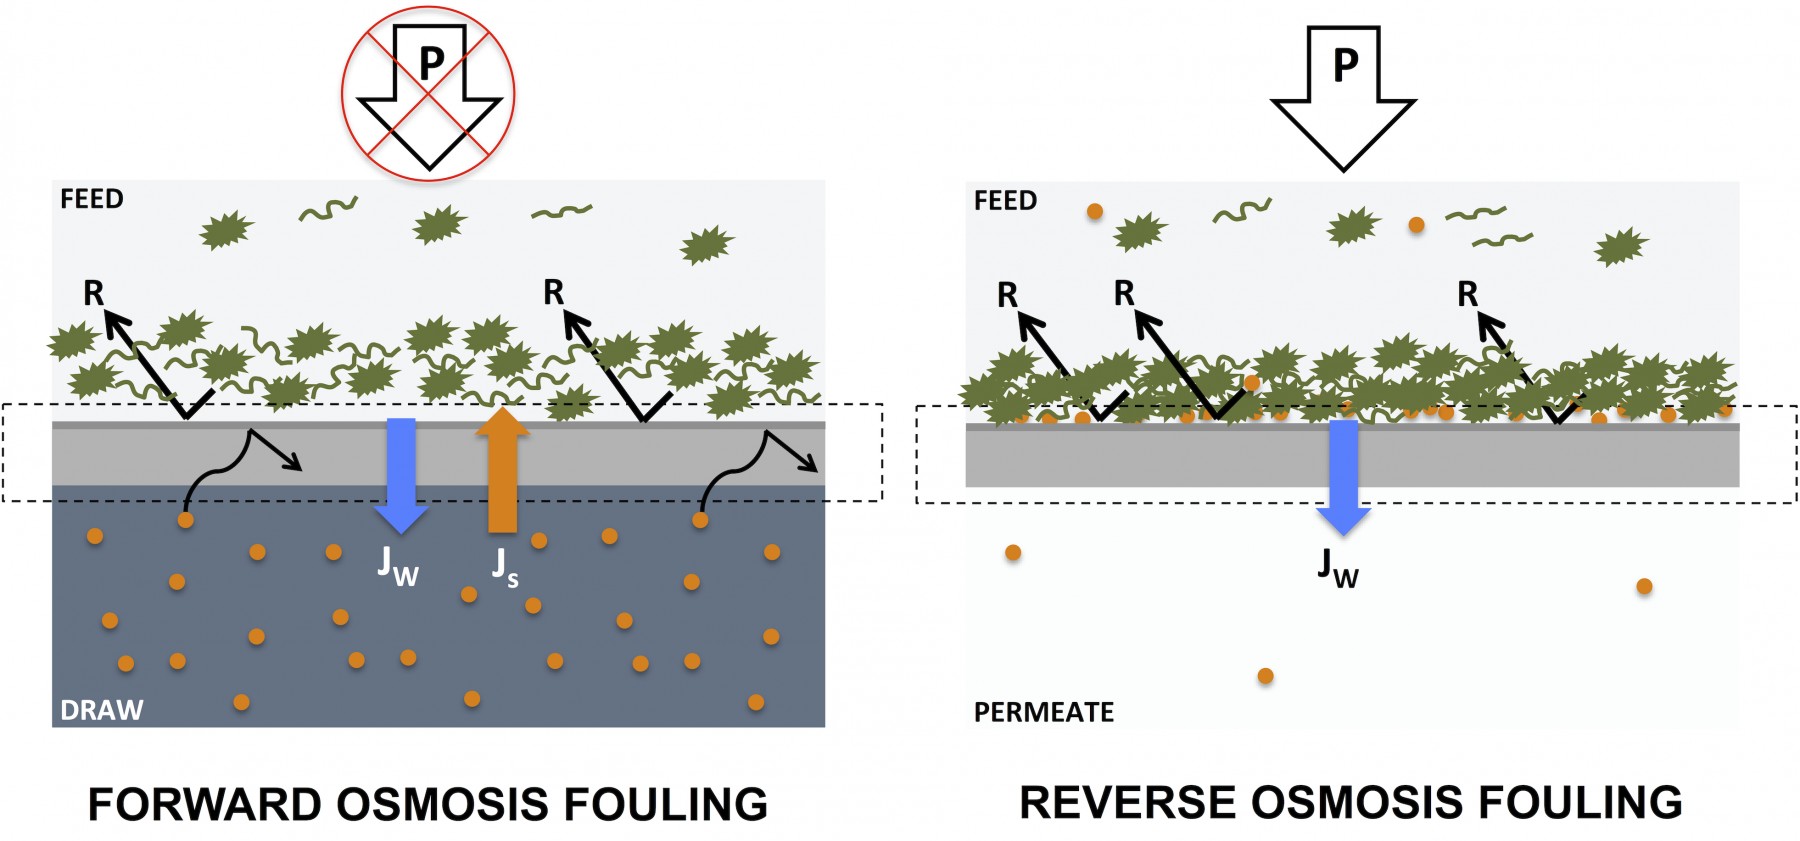
If filters and pressure are good but flow is still low, the membrane may be fouled or degraded.
Symptoms of a Bad Membrane
• Low flow despite clean filters and good pressure
• High TDS in product water (more than 10 percent increase from baseline)
• Excessive wastewater (for example, 4 to 1 ratio instead of 3 to 1)
Common Causes of Membrane Failure
• Scaling from calcium and magnesium buildup in hard water
• Biofouling from bacterial growth in stagnant water
• Chlorine damage from an exhausted carbon pre-filter
• Colloidal fouling from fine particles bypassing pre-filters
Membrane Lifespan
• Normal conditions: 2 to 3 years
• Poor maintenance or hard water: less than 12 months
Clean or Replace
Try Cleaning First (Mild Fouling):
Soak the membrane in citric acid for scaling or a specialized cleaner for organics. Flush the system for 30 minutes and retest flow and TDS.
Replace If:
No improvement after cleaning, TDS exceeds 150 ppm, or membrane is more than 3 years old.
Never expose TFC membranes to chlorine. Always replace the carbon pre-filter first.
Diagnose Flow Restrictor Issues
The flow restrictor controls wastewater rate and maintains pressure on the membrane side. If it fails, system balance collapses.
How It Works
The flow restrictor maintains a 1 to 3 or 1 to 4 permeate-to-waste ratio. It ensures optimal membrane efficiency and prevents premature wear.
Signs of a Bad Restrictor
• No product water but high waste flow
• Low flow despite good pressure and filters
• Gurgling or pulsing sounds in the drain line
Common Problems
• Clogged with mineral deposits blocking the orifice
• Wrong size mismatched to membrane capacity
• Cracked from physical damage or over-tightening
Match Restrictor to Membrane Size
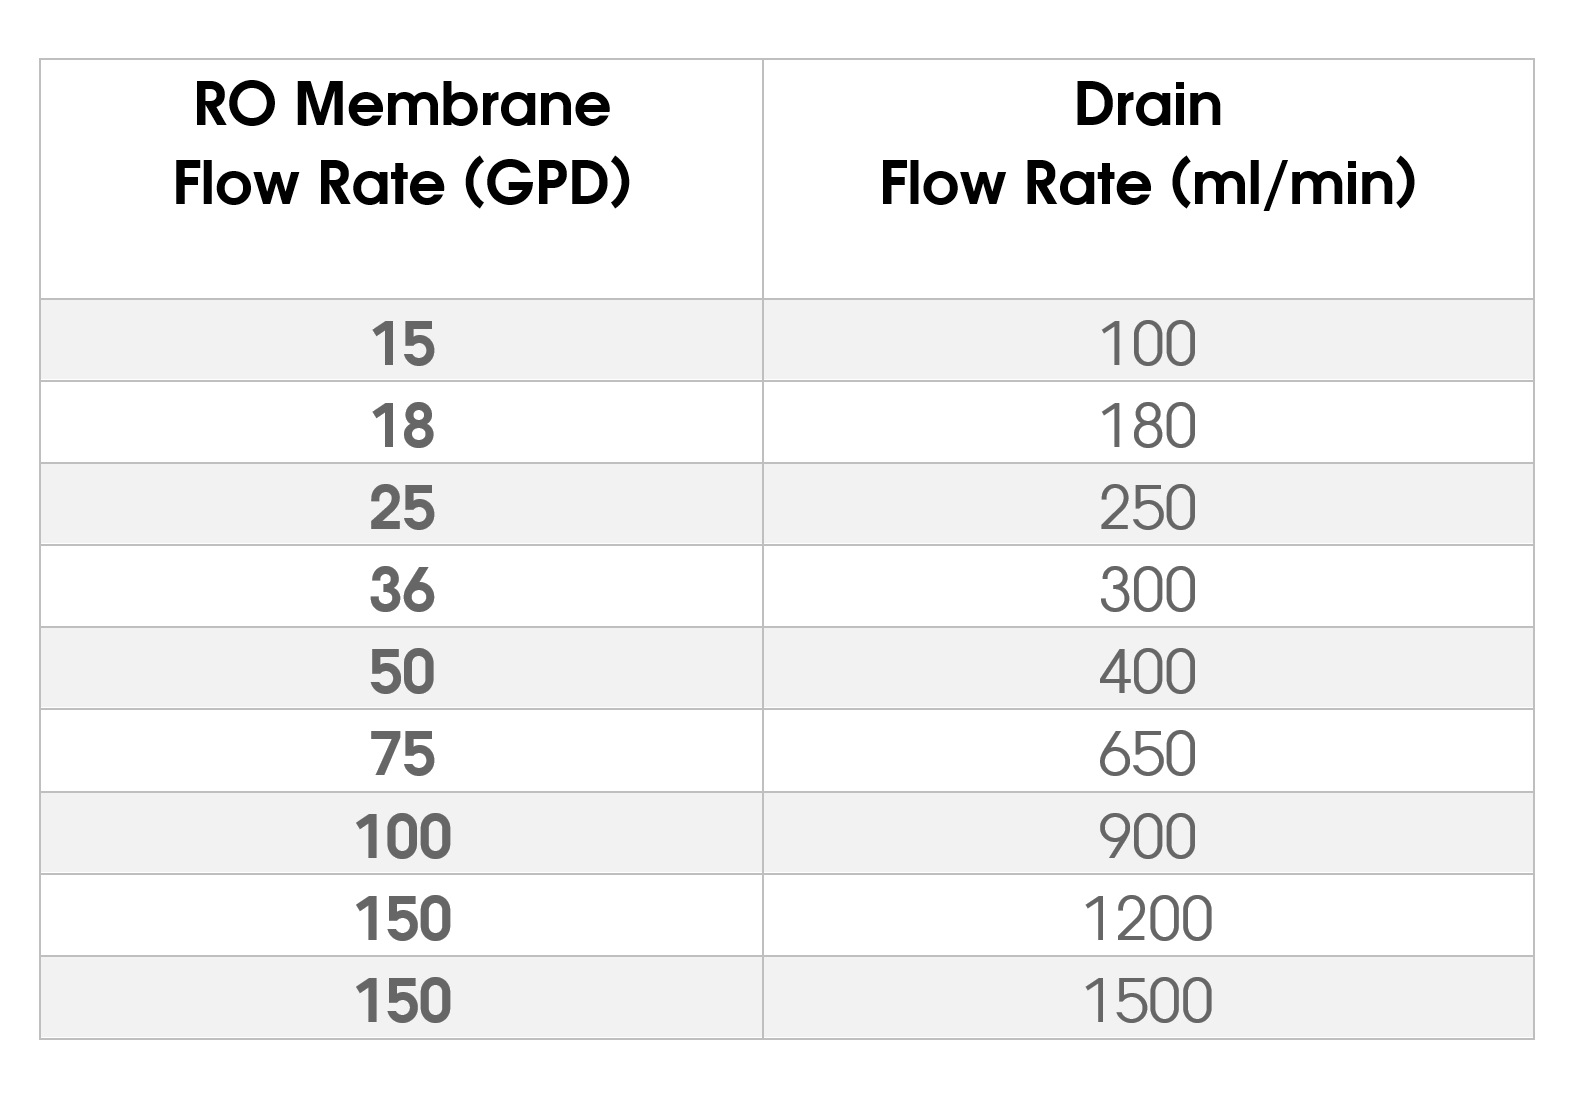
| Membrane (GPD) | Flow Restrictor (ml/min) |
|---|---|
| 50 | 275 to 300 |
| 75 | 375 to 400 |
| 100 | 500 |
Using a 50 GPD restrictor on a 100 GPD system cuts flow by 50 percent.
Clean or Replace
- Remove the restrictor from the housing.
- Soak in white vinegar for 30 minutes.
- Flush with water to clear debris.
- Reinstall or replace with the correct model.
Upgrade Tip: Replace the flow restrictor with a permeate pump to reduce waste and boost flow.
Final Diagnostic Flow: Fix RO Flow Fast
When reverse osmosis not flowing, follow this proven sequence:
1. Quick Tank Check
• Drain the tank and weigh it
• Heavier than 5 lb when empty means repressurize to 7 psi
• Flow returns but fails again means replace the tank
2. Verify Inlet Pressure
• Use a gauge at the feed line
• Below 40 psi means install a booster pump
3. Change Filters
• Replace pre- and post-filters every 6 to 12 months
• Always flush the system after replacement
4. Test Membrane
• Check TDS with a meter
• High TDS plus low flow means replace the membrane
5. Inspect Flow Restrictor
• Clean with vinegar or replace
• Confirm the correct size for your membrane
Prevent Future Flow Problems
Avoid repeat issues with these maintenance habits:
Monthly
• Check faucet flow and TDS
• Listen for unusual sounds like hissing or gurgling
Every 6 Months
• Replace pre- and post-filters
• Test tank air pressure
Every 2 to 3 Years
• Replace the RO membrane
• Inspect tubing and connectors
In Hard Water Areas
• Install a water softener upstream
• Use scale inhibitor cartridges
• Increase filter change frequency
When to Call a Pro or Replace the System
Some issues are not DIY-friendly:
Call a Technician If
• You suspect a leak in the membrane housing
• The booster pump is not engaging
• Electrical components fail in pressurized systems
Replace the Whole System If
• Multiple components failed within a year
• The system is more than 10 years old
• Repairs cost more than 50 percent of a new unit
Modern RO systems with permeate pumps and smart monitoring last longer and waste 50 percent less water.
Frequently Asked Questions About Reverse Osmosis Not Flowing
Why is my RO faucet dripping slowly instead of flowing?
Slow or dripping flow typically indicates a water-logged storage tank, clogged filters, or low inlet pressure. Start by checking the tank air pressure. If that is correct, inspect and replace your filters. If the problem persists, test your inlet water pressure.
How do I know if my RO storage tank is bad?
A bad tank feels heavy even after you drain it. When you try to repressurize the tank, if flow returns but drops again within days, the bladder is ruptured and the tank must be replaced.
Can low water pressure cause no flow from RO?
Yes. Below 40 psi, the RO membrane cannot generate sufficient osmotic pressure for effective separation. This results in drastically reduced or zero permeate flow. Install a booster pump if your inlet pressure is consistently below 40 psi.
How often should I replace RO filters to prevent flow problems?
Replace pre-filters and post-filters every 6 to 12 months. In hard water areas with TDS above 300 ppm, replace them every 6 months. Regular replacement prevents clogging that restricts water flow.
What TDS level indicates a bad RO membrane?
If your TDS increases by more than 10 percent from baseline, the membrane is likely failing. A reading above 150 ppm (depending on your feed water) combined with low flow indicates it is time to replace the membrane.
Should I clean or replace a fouled RO membrane?
Clean the membrane first if fouling is mild. Use citric acid for scaling or a specialized cleaner for organic buildup. If cleaning does not improve flow or TDS, replace the membrane entirely.
Key Takeaways for Fixing Reverse Osmosis Not Flowing
A reverse osmosis not flowing issue is rarely a mystery. Eighty percent of low-flow cases resolve by checking tank pressure and replacing filters. The diagnostic sequence is simple: start with the storage tank, then filters, then inlet pressure, then membrane, and finally the flow restrictor.
Regular maintenance prevents 90 percent of flow problems. Check tank air pressure every 6 to 12 months, replace filters every 6 to 12 months, and replace the membrane every 2 to 3 years. In hard water areas, install a water softener upstream and increase filter change frequency.
Stay proactive with scheduled maintenance, and your RO system will deliver clean, fast-flowing water for years to come.