
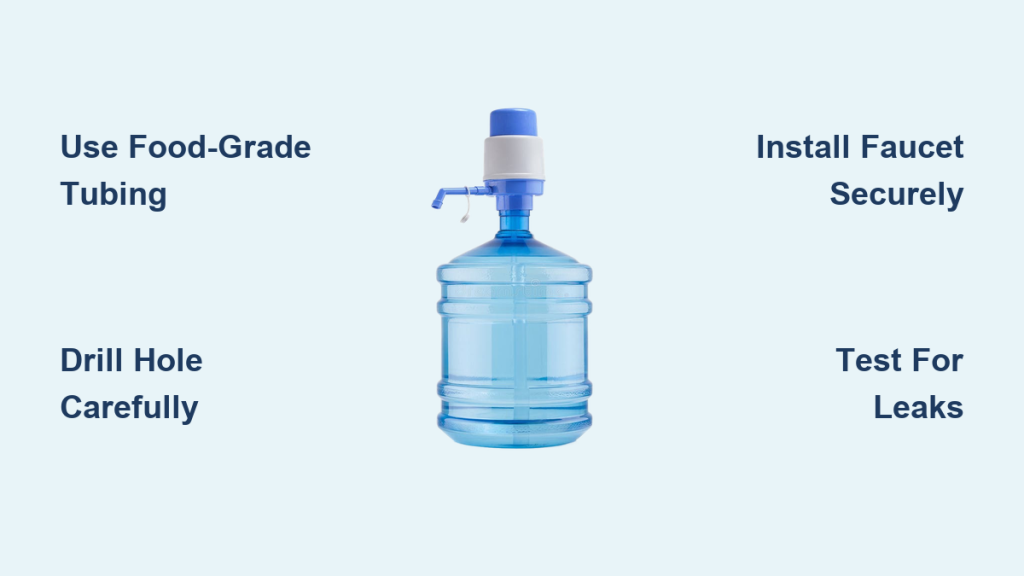
Coming home to an empty cooler or a leaking jug creates immediate frustration when you need clean water. You can solve this by learning how to make a water bottle dispenser using simple tools or basic electronics in under an hour.
This guide details two proven methods for building your own unit from scratch. You will discover how to construct a manual gravity-fed system for daily use and an automated sensor model for touch-free operation.
Build a Gravity-Fed Water Dispenser

This system relies on gravity rather than electricity to deliver clean water reliably. It serves as an ideal solution for homes or offices needing a cost-effective hydration station.
Prepare the 5-Gallon Bottle
Select a clean 5-gallon water bottle with a standard 1-inch neck opening. Inspect the rim carefully for cracks or residue that might prevent a tight seal. Mark the exact center of the neck with a permanent marker for the faucet installation.
Avoid using bottles that show signs of cloudiness or brittleness from sun exposure. These defects indicate plastic degradation that could lead to sudden failure under weight.
Drill the Faucet Hole Securely
Attach a 1-inch hole saw bit to your power drill for this critical step. Hold the bottle steady and drill slowly through your marked center point while keeping the drill perpendicular.
Smooth all rough edges around the new opening using sandpaper immediately after drilling. Sharp plastic fragments can damage the rubber washer and cause leaks later.
Install the Dispenser Faucet
Push the threaded end of the faucet through the hole from the inside of the bottle neck. Slide the rubber washer over the thread and screw the locking nut onto the outside firmly.
Do not over-tighten the nut as excessive force can crack the plastic neck. G wiggle the faucet to ensure it feels stable with no wobbling movement.
Connect Tubing and Mount Base
Cut 3 to 4 feet of food-grade tubing to match your desired dispenser height. Push one end onto the faucet outlet and secure it with a hose clamp to prevent slippage.
Route the tubing down to your dispensing point without creating sharp bends or kinks. Place the bottle upright on a stable stand to ensure consistent water flow.
Test for Leaks and Flow
Fill the bottle with clean water and open the faucet to begin your inspection. Watch the neck joint and tubing connections closely for any signs of dripping water.
Verify that the water flows in a steady stream rather than a weak trickle. Adjust the tubing position if you notice any restrictions or blockages affecting performance.
Assemble the Sensor-Based Dispenser

This automated model converts a standard plastic bottle into a smart touch-free device. It works perfectly for science projects or environments requiring strict hygiene protocols.
Modify the Water Reservoir
Use a disposable plastic bottle between 500ml and 1L as your reservoir. Cut it horizontally at the shoulder where the bottle begins to narrow for easy access.
Create a small rectangular slot near the bottom edge for the pump nozzle. Insert the submersible pump ensuring the power wires exit safely without pinching.
Construct the Cardboard Housing
Draw a square template on cardboard to serve as the main housing structure. Cut equal slots on each side to allow folding into a box shape and glue the edges.
Add a solid back panel by gluing a separate cardboard square over one open side. Ensure the box is tall enough to hold the bottle with room for the pump outlet.
Apply Decorative Templates
Print a water dispenser or coffee machine design on standard A4 or A5 paper. Use sticker paper for best results or laminate the print for added durability.
Carefully cut out the design and smooth it onto the cardboard housing evenly. This step transforms a simple box into a professional-looking prototype for display.
Build the Dispensing Head
Cut a hexagon-shaped piece from cardboard and fold it into a 3D nozzle housing. Attach a smaller square piece with a center hole to act as the outlet guide.
Cover this assembly with a matching template and glue it to the top front of the main housing. Align the opening with the pump nozzle so water flows cleanly into a cup.
Wire the Automatic Circuit

The system uses an IR sensor to trigger the pump only when a cup is present. This logic saves water and improves hygiene by preventing unnecessary contact.
Connect Power Sensor and Motor
Snap the electronics together in this order: Power Element then IR Element then Motor Element. These modular components link magnetically or via 3-pin cables for easy assembly.
Plug the IR sensor pair into the IR Element using the provided 3-pin cable. Connect the submersible pump wires to the Motor Element terminals securely.
Mount the Pump and Sensor
Place the water-filled reservoir into the housing carefully. Feed the pump nozzle through the front slot so it extends slightly beyond the dispenser head.
Position the small IR sensor just above or beside the outlet clearly. It must have a clear line of sight to detect when a glass is placed under the spout.
Calibrate and Activate System
Set the potentiometer dial on the IR Element to the middle position initially. This adjusts detection sensitivity so the sensor triggers when a cup is 1 to 2 inches away.
Turn on the Power Element and place a glass under the nozzle immediately. The pump should activate instantly and stop automatically when you remove the glass.
Choose the Right Materials

Material selection directly impacts safety durability and overall water quality for your project. Never compromise on key components when learning how to make a water bottle dispenser.
Use Food-Grade Tubing Only
Always use tubing explicitly labeled as food-grade for gravity-fed systems. Non-food-grade plastic can leach harmful chemicals like BPA into your drinking water.
Silicone or polyethylene tubing offers the best flexibility and chemical resistance. Replace these tubes every 6 to 12 months to prevent biofilm buildup inside.
Select Safe Plastic Bottles
Use only PET or HDPE bottles designed specifically for water storage purposes. Avoid repurposing containers that previously held chemicals milk or oil due to residual risks.
Inspect bottles regularly for cloudiness odor or cracks before each use. Replace any container showing signs of wear to maintain system integrity.
Ensure Electrical Isolation
Keep all electronic components physically separated from water in automated models. Use sealed enclosures rubber grommets or plastic dividers for protection.
Power the system with a USB power bank instead of wall outlets to reduce shock risk. Never operate the device with wet hands or on damp surfaces.
Prevent Common Failures
Even well-built dispensers can fail due to overlooked details during assembly. Avoid these frequent issues to ensure long-term reliability.
Stop Leaks at the Faucet
Most leaks occur at the bottle neck due to rough drill edges or over-tightened nuts. Always sand the hole smooth and hand-tighten the faucet with a quarter-turn past snug.
Use a fresh rubber washer if the original appears cracked or flattened. Replace with a silicone washer for a longer-lasting seal against leaks.
Fix Low or No Water Flow
Check for kinks in the tubing or partial blockages restricting movement. Straighten the line and flush with clean water to remove debris.
Ensure the bottle is fully upright in gravity systems to maintain pressure. For automated models verify the pump is fully submerged and the nozzle is clear.
Troubleshoot Sensor Errors
Adjust the IR sensor potentiometer if the automatic dispenser fails to trigger. Clean the sensor lens with a dry cloth to remove dust or smudges.
Ensure no ambient light from lamps or sunlight interferes with detection. Reposition the sensor closer to the outlet if the pump runs nonstop.
Maintain Hygiene and Performance
A clean dispenser delivers safe water free from mold bacteria and clogs. Establish a routine to keep your system operating at peak efficiency.
Clean Monthly
Disassemble the system every 30 days for a thorough cleaning session. Soak the tubing faucet and pump in a vinegar-water solution for 30 minutes.
Rinse thoroughly with clean water before reassembling the unit completely. Never use bleach unless specified by the manufacturer as it degrades plastics.
Replace Worn Parts
Change food-grade tubing every 6 to 12 months regardless of appearance. Microorganisms colonize the inner surface over time despite visual cleanliness.
Replace submersible pumps if flow decreases significantly or noise increases. Most low-voltage pumps last 6 to 12 months with daily use.
Store Properly
Drain all water and leave components disassembled when not in use. Store parts in a cool dark place to prevent algae growth and UV damage.
Cap all openings to keep dust and insects out during long-term storage. This simple step extends the life of your DIY project significantly.
Customize Your Dispenser
Both models can be adapted for different uses aesthetics or environments easily. Explore these options to tailor the build to your specific needs.
Scale Up the Gravity System
Use larger bottles such as 7-gallon sizes for higher capacity requirements. Adjust tubing length and base size accordingly to support the extra weight.
Swap the faucet for a push-button lever or foot pedal for hands-free operation. This modification works well in kitchens or workshop settings.
Repurpose the Sensor Model
Use the same circuit to dispense coffee juice or soap safely. Just replace the water with your liquid of choice and use compatible tubing.
Switch templates to create a soda fountain hand sanitizer station or pet waterer. These variations make ideal STEM projects for students.
Upgrade Materials
Replace cardboard with acrylic sheets or 3D-printed parts for permanence. Use metal brackets instead of tape for more secure component mounting.
These upgrades create a durable waterproof housing suitable for heavy traffic areas. The core logic remains the same while improving structural integrity.
Frequently Asked Questions About Water Bottle Dispensers
What type of tubing is safe for drinking water?
You must use tubing explicitly labeled as food-grade to ensure safety. Silicone or polyethylene options prevent chemical leaching and are best for long-term use.
How often should I replace the tubing in my dispenser?
Replace food-grade tubing every 6 to 12 months to prevent biofilm buildup. Even if it looks clean microorganisms can colonize the inner surface over time.
Why is my automatic dispenser pump running continuously?
The sensor sensitivity may be too high or the lens might be obstructed. Adjust the potentiometer dial or clean the sensor lens with a dry cloth to fix this.
Can I use any plastic bottle for the gravity-fed system?
No you should only use PET or HDPE bottles designed for water storage. Avoid containers that held chemicals or milk as residuals can contaminate your water.
How do I stop leaks at the faucet connection?
Sand the drilled hole smooth and avoid over-tightening the locking nut. Using a fresh rubber washer also ensures a watertight seal at the neck.
Is it safe to power the sensor model with a wall outlet?
No you should use a USB power bank to reduce shock risk significantly. Wall outlets introduce high voltage dangers when working near water sources.
Key Takeaways for Building Your Water Bottle Dispenser
Building your own unit saves money and reduces plastic waste while providing reliable access to water. Whether you choose the manual gravity system or the automated sensor model proper material selection ensures safety and durability.
Regular maintenance including monthly cleaning and annual tubing replacement keeps your dispenser hygienic. Start your project today by gathering food-grade materials and following these precise assembly steps.



