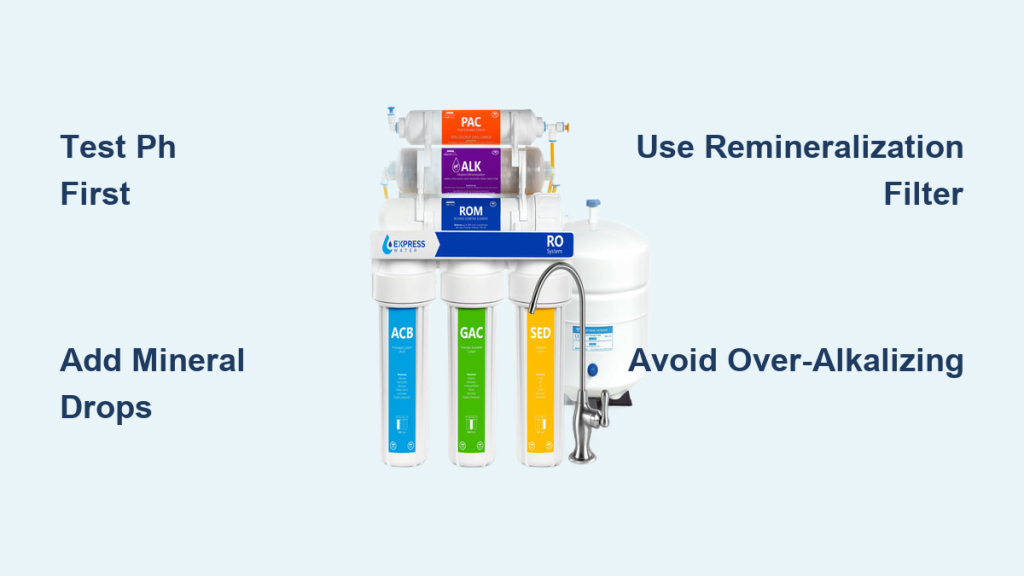
If your reverse osmosis system isn’t producing the clean water it once did, the problem likely isn’t a broken pump or faulty faucet. It’s probably overdue filter replacements. RO filters require regular maintenance to continue removing lead, arsenic, PFAS, nitrates, and other dangerous contaminants at the advertised 99.9% rate. Fresh, functioning filters are the difference between safe drinking water and potential exposure to harmful substances.
This guide provides the exact replacement schedules for each filter type in your RO system, explains the warning signs to watch for, covers testing methods, and shares expert tips to maximize filter life. You’ll know exactly when to change sediment filters, carbon filters, the RO membrane, and specialty filters based on your specific water conditions.
Filter Replacement Schedule by Filter Type
Each component in your reverse osmosis system serves a specific purpose and has its own lifespan. Understanding these differences helps you maintain peak performance while avoiding unnecessary expenses.
Sediment Pre-Filter: Replace Every 6 to 12 Months
The sediment filter is your system’s first line of defense, trapping sand, rust, silt, dirt, and debris before they reach sensitive downstream components. A clean sediment filter maintains strong water flow and protects the more expensive RO membrane from premature wear.
Replace your sediment pre-filter when you notice these indicators:
- Water flow slows noticeably from the faucet
- The filter appears dark or clogged in transparent housing
- System pressure drops if equipped with a pressure gauge
- Visible particles appear in your drinking water
High-risk conditions require more frequent changes. If you have well water, live near construction sites, or notice cloudy tap water, replace the sediment filter every 3 to 6 months. Systems with clear filter housings, like some Nu Aqua models, make visual inspection simple.
Carbon Pre-Filter: Replace Every 6 to 12 Months
The carbon pre-filter removes chlorine, chloramines, volatile organic compounds, pesticides, and improves overall taste and odor. This stage is critical because chlorine can destroy the RO membrane over time, leading to costly repairs.
Watch for these replacement signs:
- You taste or smell chlorine in the water
- Chlorine test strips show more than 0 ppm in the drain line after the carbon filter
- Water develops a chemical or medicinal aftertaste
Carbon filter type matters for replacement timing. Granular activated carbon works well for chlorine removal but is less effective against chloramines. Carbon block filters offer superior contaminant removal and longer life. In municipal areas with heavy disinfection, replace carbon filters at 6 to 9 months. In agricultural zones with pesticide runoff, stick to 6-month intervals.
RO Membrane: Replace Every 2 to 5 Years
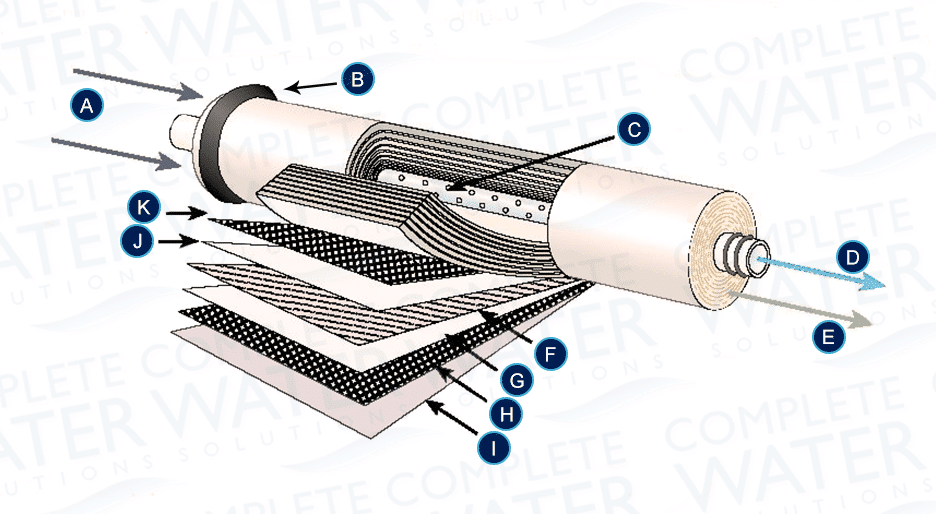
The RO membrane is the heart of your system, removing fluoride, lead, arsenic, nitrate, microplastics, and PFAS at the molecular level. While it lasts longer than pre-filters, the membrane degrades silently until water quality drops noticeably.
Replace your RO membrane when you observe these warning signs:
- TDS meter reads above 50 ppm in purified water
- The storage tank fills much slower than when the membrane was new
- Laboratory tests detect contaminants like lead or arsenic
- Physical inspection reveals scaling or biofouling
Most RO membranes, like those from Sans, are rated for 1200 gallons or 24 months, whichever comes first. Several factors shorten membrane lifespan, including poor pre-filter maintenance, hard water causing scaling, high iron or manganese leading to fouling, and cold feed water below 50 degrees Fahrenheit reducing efficiency.
Post-Carbon Polishing Filter: Replace Every 1 to 2 Years
The polishing filter, often called the T33 filter, provides the final stage of filtration, removing any residual taste, odor, or carbon fines from new filters. This ensures your water tastes clean and free of any “plastic” or “carbon dust” flavors.
Replace the polishing filter when:
- Water tastes flat, plastic-like, or “off”
- You notice a slight TDS rise, though this is less reliable than membrane testing
- Bacterial growth appears after long idle periods
Even if your water tastes fine, replace this filter at least every 2 years because bacteria can grow over time in the filtration media.
Remineralization Filter: Replace Every 6 to 12 Months
Premium RO systems include a remineralization filter that adds back calcium and magnesium to improve taste and pH balance. Demineralized RO water is naturally flat and slightly acidic, so this filter is essential for both taste and health benefits.
Replace the remineralization filter when:
- Water tastes metallic or acidic
- You no longer feel the smooth texture of mineralized water
- Laboratory tests show low mineral content
Systems like Sans and AquaTru include this filter for users who want the health benefits of minerals in their drinking water.
VOC-Specific Filter: Replace Every 12 Months or 600 Gallons
Advanced RO systems include a dedicated filter for pharmaceuticals, solvents, and industrial chemicals. This is critical in areas with known contamination from industrial facilities or agricultural operations.
Replace this filter when:
- System alerts trigger, like Sans SmartPure notifications
- You reach the 600-gallon mark
- Taste or odor changes suggest breakthrough
This filter works alongside the carbon pre-filter and should follow the same replacement schedule.
DI Resin: Replace on Demand
RO/DI systems used for aquariums, laboratories, or ultra-pure water applications include deionization resin to remove remaining ions and achieve 0 ppm TDS. Unlike timed filters, DI resin life depends entirely on ion load and usage.
Replace DI resin when:
- TDS meter reads above 0 ppm
- Resin turns 75% orange-brown, with fully orange indicating exhaustion
During installation, fill the cartridge three-quarters full, tap firmly to settle the resin, then top off. Flush thoroughly to remove resin dust before use.
Factors That Change Your Replacement Schedule
Your specific circumstances determine whether filters last longer or need earlier replacement. Understanding these factors helps you customize a maintenance schedule that works for your situation.
Your Water Source Determines Filter Wear
Well water contains high sediment, iron, hardness, and potentially microbes. These systems require 3 to 6-month pre-filter changes. Well water is not EPA-regulated, so annual testing for arsenic, radon, and nitrates is essential.
Municipal water has lower sediment but higher chlorine and chloramines. Carbon filters degrade faster in this environment, so plan for 6 to 9-month replacement. While generally safer, municipal water can still contain PFAS and lead from aging infrastructure.
Hard water causes scaling on the RO membrane. If your water exceeds 10 grains per gallon hardness, consider installing a water softener upstream to extend membrane life.
How Much You Use Your System Matters
High-use households with 4 or more people or frequent water dispensing deplete filters faster. Replace filters at the lower end of their recommended range.
Low-use homes see filters last longer, but stagnant water risks biofilm growth. Replace based on time rather than gallons if you use your system infrequently. Even if you use little water, replace pre-filters at least once per year.
Contaminant Load Adds Stress to Filters
High levels of lead, copper, and fluoride increase membrane workload. Iron and manganese cause fouling and may require additional pre-treatment. Volatile organic compounds and pesticides overload carbon filters, requiring earlier replacement.
If your water comes from an industrial or agricultural area, be aggressive with maintenance and consider testing more frequently.
Warning Signs Your Filters Need Replacing Now
Your RO system communicates when it’s struggling. Watch for these urgent indicators that replacement cannot wait.
A chlorine taste or smell means your carbon filter is spent and no longer removing disinfection byproducts. Slow flow or long tank fill times indicate a clogged pre-filter or failing membrane. Cloudy ice or visible particles in water signal an overwhelmed sediment filter.
Metallic or flat taste points to a failing polishing or remineralization filter. TDS readings above 50 ppm mean the membrane is failing and no longer removing dissolved solids. Discolored or slimy filters indicate biofilm or bacterial growth that poses immediate health risks.
Delaying replacement when you notice these signs can cause contaminant leaching, bacterial regrowth, and permanent system damage.
How to Test Filter Performance at Home

Regular testing confirms whether your filters are working properly or need attention. These methods help you make data-driven maintenance decisions.
Use a TDS Meter Monthly
A TDS meter measures total dissolved solids in parts per million and is the most accessible tool for monitoring RO performance. Pre-RO water typically reads 100 to 500 plus ppm depending on your source. Post-RO water should read below 50 ppm. Post-DI water must read exactly 0 ppm.
If your post-RO TDS doubles from its baseline, the membrane is degrading and needs replacement. Test monthly and track results over time to identify trends.
Sans SmartPure systems display real-time TDS readings, eliminating the need for manual testing.
Test for Chlorine After the Carbon Filter
Chlorine test strips help you verify carbon filter effectiveness. Dip a strip in the drain line after the carbon filter. If chlorine reads above 0.5 ppm, replace the carbon filter immediately.
This test is particularly important because chlorine breakthrough indicates the carbon filter can no longer protect your RO membrane from oxidative damage.
Monitor System Pressure
A drop in system pressure indicates clogged filters, a failing pump, or blocked tubing. Check pressure during routine maintenance and compare readings to your system’s specifications.
Schedule Professional Lab Testing
DIY tools provide useful information, but only laboratory testing confirms your water is safe. Test annually for lead, arsenic, bacteria, and PFAS. Use EPA-certified laboratories for accurate results. Well water users should test more frequently due to the lack of regulatory oversight.
Step-by-Step Filter Replacement Process
Replacing filters correctly ensures your system continues performing optimally. Follow this sequence for each filter change.
First, turn off the water supply by closing the shut-off valve feeding your RO system. Next, relieve system pressure by opening the RO faucet and letting water run until it stops flowing.
Use a filter wrench to unscrew the housing canister. Drain any remaining water and remove the old cartridge. Inspect the housing for debris or biofilm and clean if necessary.
Install the new filter. Sediment and carbon filters have no orientation requirement. For DI resin cartridges, fill three-quarters full, tap firmly to settle the resin, then top off to full.
Reassemble the housing by hand-tightening the canister. Avoid over-tightening, which can damage O-rings. Turn the water back on and flush the system for 10 to 15 minutes to remove air and fines.
Label each canister before removal to avoid confusion during future replacements.
Sanitize Your Storage Tank After Filter Changes
The storage tank can develop biofilm over time, especially after long idle periods or during filter changes. Annual sanitization prevents bacterial growth and extends system life.
Drain the tank completely. Remove all filters from their housings. Pour one cup of food-grade hydrogen peroxide into the first housing. Open the valve and allow the tank to fill. Drain fully, then repeat the fill and drain cycle once more.
Reinstall all filters and flush the system by filling and dispensing 2 to 3 full tanks before using the water.
Smart Features in Modern RO Systems
Today’s RO systems include intelligent features that simplify maintenance and improve performance.
Filter Life Alerts
Systems like Sans track actual usage and send replacement alerts based on time or gallons consumed. This prevents both under-replacement, which risks water quality, and over-replacement, which wastes money.
Smart alerts increase user compliance and ensure consistent protection.
Real-Time Monitoring
SmartPure technology displays real-time TDS readings and filter life remaining. You always know your system’s status without manual testing.
UV-C Disinfection
UV-C light kills 99.9999% of bacteria and viruses in stored water. This feature prevents microbial regrowth in the storage tank and distribution lines. However, UV-C does not replace filter changes. It works best when filters are fresh and functioning properly.
OEM Versus Third-Party Filters
Choosing the right replacement filters affects performance, safety, and system longevity.
OEM filters are optimized for your specific system and often carry NSF certification. They guarantee proper fit and seal, eliminating leak risks. The tradeoff is higher cost.
Third-party or generic filters may cost less, but performance varies significantly. Few generic filters undergo independent testing or certification. They may degrade faster and could void your warranty.
High-quality compatible filters, like BRS universal kits, offer a middle ground. These 10-inch cartridges fit most standard residential RO systems and often provide better quality than brand-specific options at lower prices.
For safety and performance, use NSF-certified, OEM, or high-quality compatible filters. Avoid cheap knockoffs that make unrealistic claims.
Professional Maintenance Programs
If DIY maintenance isn’t appealing, professional programs handle everything for you.
VIP Maintenance Plans
Companies like Rayne Water offer comprehensive plans that include scheduled filter replacements, annual system inspections, water quality testing, and priority support. These plans are ideal for well water users, large households, and anyone preferring hands-off maintenance.
DIY Automation
Set calendar reminders for each filter type based on your customized schedule. Subscribe to auto-ship filter delivery services to ensure you always have replacements on hand. Keep spare filters stored properly since they do not expire.
Tips to Extend Filter Life
Proper care maximizes the time between replacements while maintaining water quality.
Clean filter housings during each change to remove biofilm and sediment buildup. Inspect the system annually for leaks, damage, or corrosion. Sanitize the storage tank at least once per year.
Monitor actual usage and adjust your replacement schedule based on real performance data. Use pre-treatment like water softeners or iron filters if your feed water is particularly aggressive.
Ensure proper ventilation around the system and avoid exposing it to extreme temperatures. Consider installing a whole-house sediment filter to reduce the load on your RO pre-filters.
Frequently Asked Questions About RO Filter Replacement
Can I reuse a carbon filter by cleaning it?
No. Carbon filters cannot be effectively cleaned and should never be reused. Attempting to clean them can damage the carbon media and create bacterial growth pathways. Always replace carbon filters with new ones.
What happens if I don’t replace my RO filters on time?
Failing to replace filters leads to several serious problems. Contaminants can leach back into your water. Bacterial growth may occur in clogged filters. The RO membrane can become permanently damaged, requiring expensive replacement. Your water quality deteriorates, defeating the purpose of having an RO system.
Does my RO membrane need replacement if the TDS is still low?
Yes, possibly. While a low TDS reading indicates the membrane is still functioning, membrane performance degrades gradually. If your system is approaching the 2-year mark or has processed significant gallons, consider proactive membrane replacement. Waiting for high TDS means you’ve been drinking degraded water.
How do I know if my well water needs more frequent filter changes?
Well water typically requires more frequent changes due to higher sediment and contaminant loads. If your water appears cloudy, has visible particles, or tests show high turbidity, replace sediment filters every 3 to 6 months. Annual comprehensive water testing identifies specific contaminants that may require adjusted schedules.
Can I replace all my filters at the same time?
While convenient, replacing all filters simultaneously is usually unnecessary and wastes money. Sediment and carbon pre-filters need replacement every 6 to 12 months. The RO membrane typically lasts 2 to 3 years. Polishing and remineralization filters fall between these intervals. Staggering replacements ensures continuous protection and better value.
Do RO fridge filters follow the same schedule as under-sink RO filters?
No. Refrigerator RO filters typically require replacement every 6 months, regardless of the main under-sink system. The smaller size and potential stagnation from infrequent use create higher microbial risk. Set separate reminders for fridge filter replacement.
Key Takeaways for Maintaining Your RO Filter Schedule

Replacing reverse osmosis filters on schedule is essential for ensuring clean, safe drinking water. Sediment and carbon pre-filters need replacement every 6 to 12 months, with well water or high-contaminant situations requiring changes at 3 to 6 months. The RO membrane typically lasts 2 to 3 years, but monitor TDS monthly and replace proactively rather than waiting for failure. Polishing and remineralization filters follow 6 to 12-month cycles.
Your specific replacement schedule depends heavily on water source, household usage, and contaminant load. Test your water regularly using TDS meters and chlorine strips to supplement time-based schedules. Watch for warning signs like changes in taste, flow rate, or water clarity.
Invest in quality NSF-certified filters, whether OEM or high-quality compatible alternatives. Consider smart systems with built-in monitoring if you want automated tracking. Professional maintenance programs offer convenience for those preferring hands-off care.
By following this customized maintenance approach, your RO system will continue delivering clean, great-tasting water for years to come.