
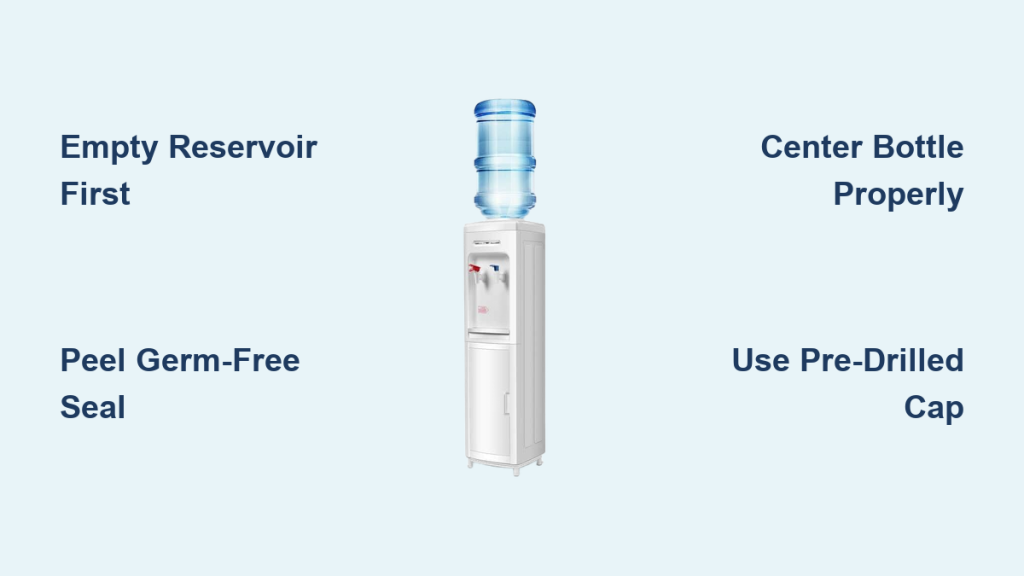
Changing a 5-gallon water bottle on a dispenser seems straightforward, but doing it wrong often causes spills, leaks, or back strain. A full jug weighs about 40 pounds, so proper technique matters whether you use a top-loading cooler or a bottom-loading model like the Primo Water Deluxe. Many people skip key steps like removing the germ-free seal or centering the bottle, which leads to frustrating messes.
This guide walks you through both dispenser types, shares expert tips, and helps you avoid common pitfalls. You’ll learn about useful accessories like water guard adapters and pre-drilled reusable caps that make every bottle swap clean and effortless.
Top-Loading Dispenser: Step-by-Step Setup

Let the Reservoir Drain Before Swapping
Before you remove anything, wait until the current bottle is empty or the reservoir is nearly drained. This prevents splashing when you place the new full bottle on top. When water stops flowing from the spigots, it’s safe to lift the empty jug off.
Pull the bottle straight up without jerking or twisting. A sudden yank can damage the puncture pin inside the cooler. If you’re in a rush and the reservoir still holds water, place a towel under the base to catch drips. Still, waiting for a full drain is the cleanest approach.
Remove the Empty Bottle Safely
Grip the empty jug by the handle and the opposite side. Lift straight up using bent knees and a straight back to protect your spine. Keep your face clear of the opening, since residual water can splash out during removal.
Set the empty bottle aside for return or recycling. Never leave it on the floor near the dispenser, where it becomes a tripping hazard for you or anyone nearby.
Clean the Cooler Top and Bottle Neck
Wipe the top of the cooler’s reservoir with a damp cloth to remove dust or residue. Also clean the neck and cap area of the new 5-gallon bottle, even if it’s factory sealed. Bottles collect dirt during shipping and storage.
This quick step keeps contaminants out of your drinking water and extends the life of your dispenser. A clean surface also helps the water guard adapter seal properly.
Peel Off the Germ-Free Seal Completely
Every new 5-gallon bottle ships with a plastic germ-free seal tucked under the cap. Peel it off completely before placing the bottle on the cooler. Leaving even a small piece of the seal in place blocks water flow and can damage the puncture mechanism.
Check the cap carefully after peeling. Any leftover film can prevent the puncture pin from piercing cleanly, which causes leaks or no flow at all.
Lift the New Bottle with Proper Form
A full 5-gallon jug weighs about 40 pounds, which is too heavy for some people to lift safely. To protect your back:
- Bend your knees, not your waist
- Hug the bottle close to your chest
- Grip the neck with one hand and the base with the other
- Turn your whole body when positioning, never twist at the waist
Pro tip: Place the bottle on a sturdy chair or table next to the cooler first. Then lift it onto the dispenser from that intermediate height. It cuts the strain roughly in half and makes the job much easier.
Install the Bottle Cap-Down
Align the new bottle over the reservoir and lower it cap-first into place. Center it carefully so the puncture pin lines up with the cap opening. Press down gently until you hear a slight pop or see water start flowing into the reservoir.
That sound confirms the pin has pierced the cap successfully. Don’t force the bottle if it doesn’t seat easily. Forcing can bend the pin or crack the plastic neck, leading to leaks.
Attach the Water Guard Adapter
Many top-loading coolers use a water guard adapter, a plastic piece that fits between the bottle and reservoir. It creates a sealed, spill-proof connection that maintains the germ-free environment. Insert the adapter into the bottle neck before placing the jug on the cooler, then push down to puncture the cap.
Most top-loading models come with this part built in or included in the box. Replace the adapter if it becomes cracked or stiff, since a damaged seal causes leaks.
Test for Leaks and Flow
Turn on the dispenser and run a small amount of water from both the hot and cold taps. Then check the connection points:
- Drips around the bottle base
- Bubbling sounds lasting more than 15 seconds
- Slow or no water flow from either tap
If everything looks and sounds normal, you’re set. If you spot issues, head to the troubleshooting section below for quick fixes.
Bottom-Loading Dispenser: Easy Bottle Insertion
Use a Pre-Drilled Reusable Cap
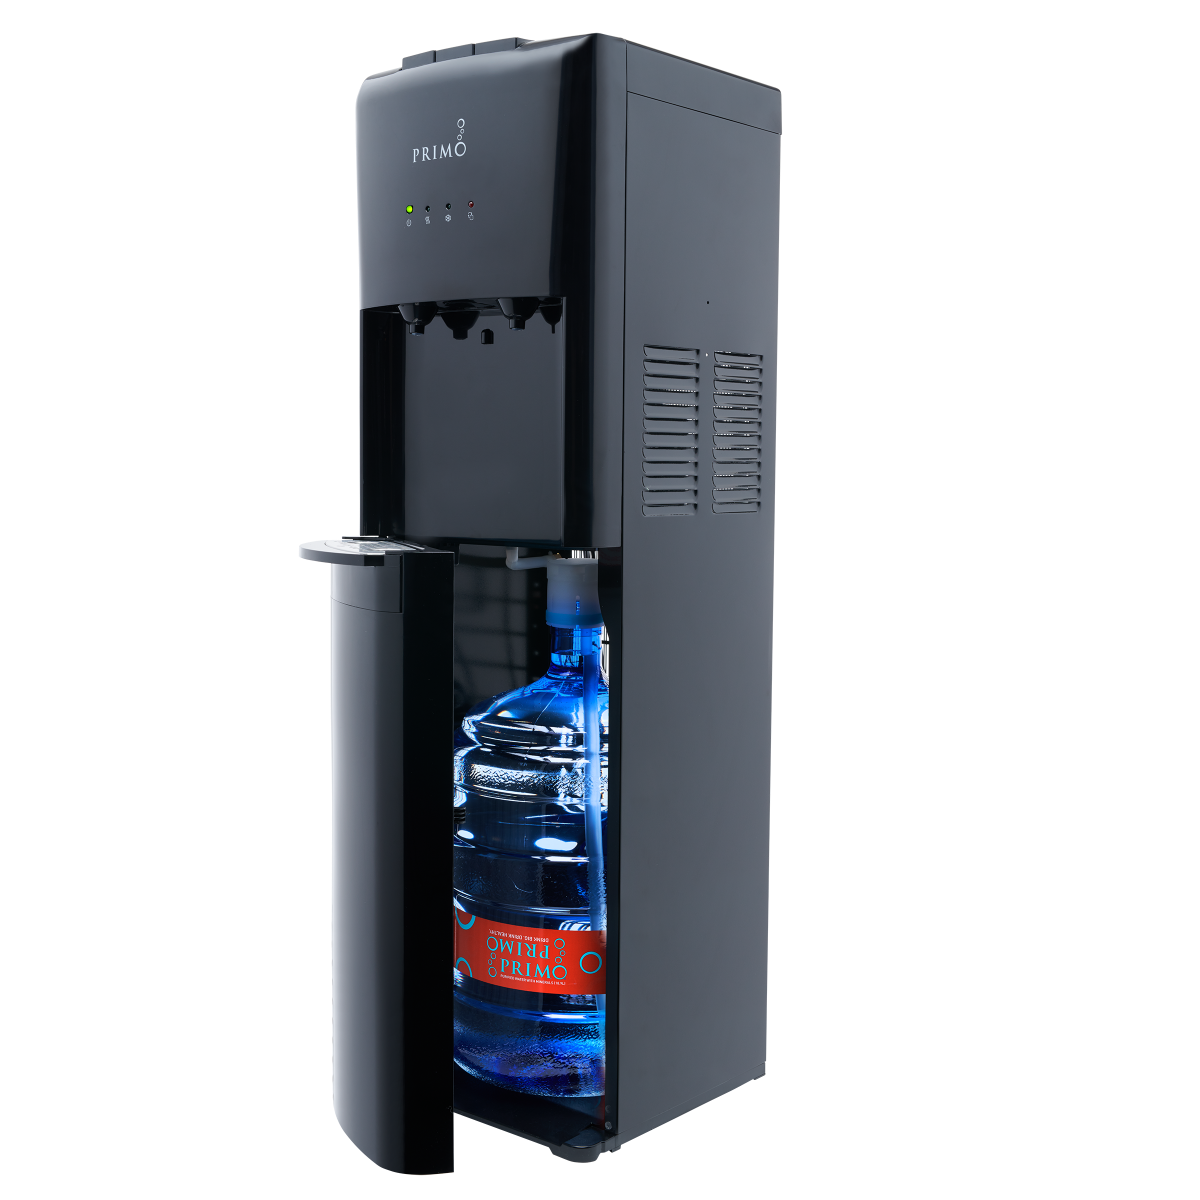
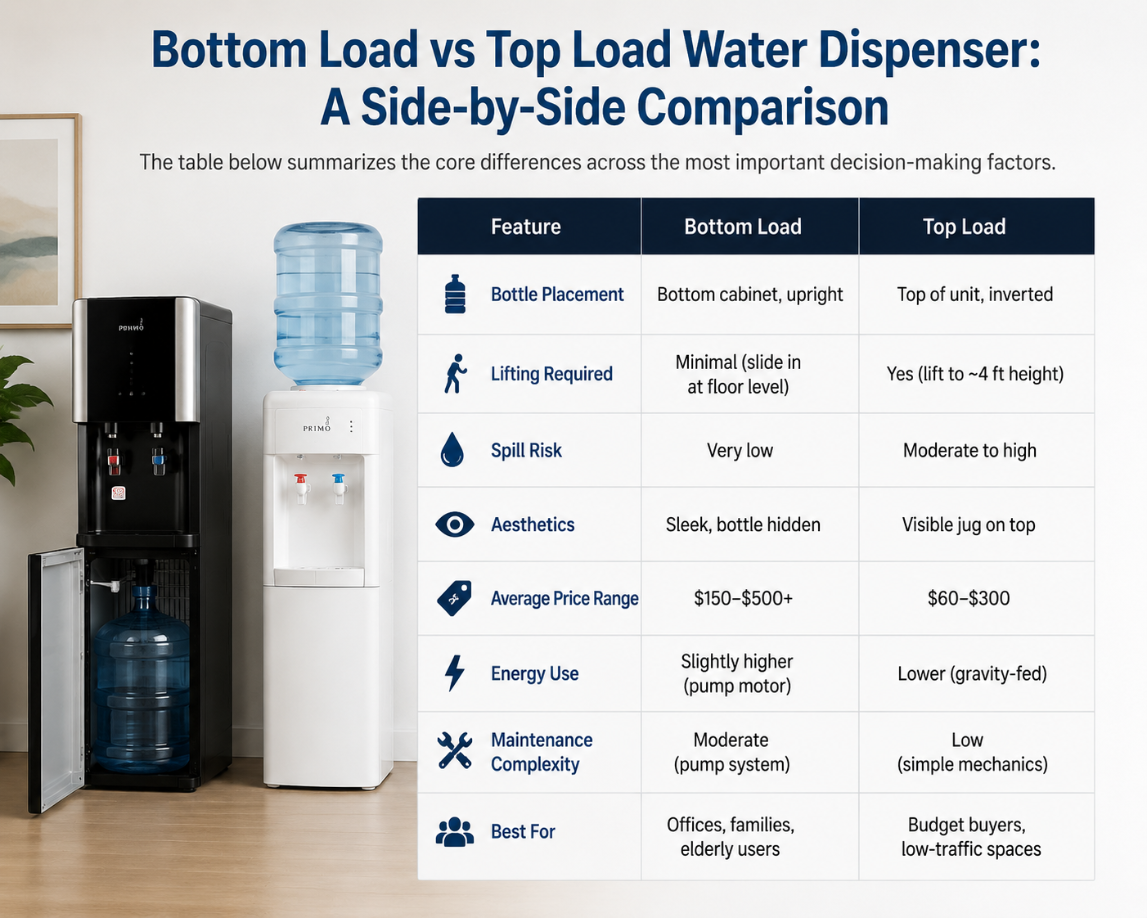
Bottom-loading dispensers like the Primo Water Deluxe require the bottle to be inserted upright into the base. A dagger-shaped nozzle pierces the cap from below, and water is pumped upward into the cooler.
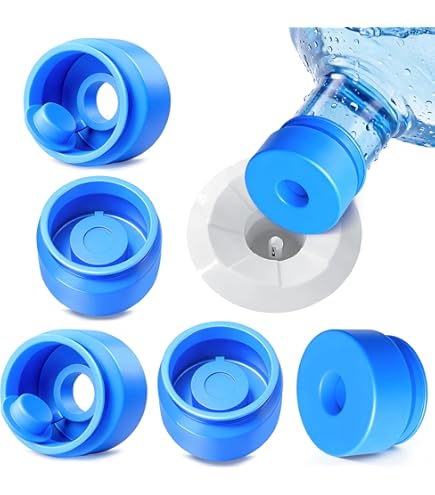
The best method for these models uses a pre-drilled reusable cap, available at Walmart and online. The cap features a built-in plug with a central hole. Follow these steps:
- Remove the original cap from the jug
- Screw on the pre-drilled cap
- Insert the bottle upright into the dispenser’s base
- Push until you feel firm resistance, then stop
Water flows automatically once the nozzle engages. No spills, no mess, no guesswork.
Try the Saran Wrap Trick as a Backup
No pre-drilled cap on hand? This temporary method works in a pinch:
- Remove the original cap from the jug
- Stretch a piece of Saran Wrap over the opening
- Screw the cap back on loosely
- Turn the bottle upside down
- Insert into the dispenser
The nozzle pierces the wrap and creates a basic seal. Warning: Wrap can tear or shift during insertion, which causes leaks. Use this method only when no better option is available.
Avoid the Cut-Hole Cap Method
Some people cut a small hole in a regular cap and cover it with plastic wrap. This old-school fix has serious drawbacks:
- Hard to align the hole with the nozzle
- Wrap tears easily under pressure
- Can cause overflow or airlock in the system
Skip this method if you have any other option. It wastes water and creates mess more often than not.
Align and Push Until You Feel the Stop
When inserting the bottle into a bottom loader:
- Keep the jug perfectly straight, no tilting
- Push all the way in until you feel a firm stop
- You should not feel water sloshing inside the jug once seated
If water leaks from the base, the bottle isn’t fully seated. Remove it and reinsert with steady pressure until it locks into place.
Pro Tips for All Dispenser Types
Center the Bottle for a Perfect Seal
Misalignment is the leading cause of leaks on both top and bottom-loading dispensers. Always center the bottle directly over the puncture point before pressing down.
On bottom loaders, even a slight tilt prevents the nozzle from sealing properly. Take an extra second to adjust the position before applying pressure.
Lift Smart, Not Hard
Forty pounds is heavy for many people. Reduce strain with these tricks:
- Use a water bottle lifter tool, typically $15 to $20 online
- Store bottles on a rolling cart near the dispenser
- Switch to 3-gallon bottles if lifting 40 pounds is too difficult
Your back will thank you, especially if you change bottles frequently.
Never Twist When Installing
Twisting the bottle while placing it can:
- Bend the puncture pin
- Crack the plastic neck
- Cause leaks around the seal
Always turn your whole body instead of twisting at the waist. This protects both the bottle and the dispenser.
Check Bottle Compatibility First
Not all 5-gallon bottles fit every dispenser. Before buying, confirm:
- Neck size, most are standard 63mm
- Bottle height clearance, especially under low cabinets
- Cap type required for bottom loaders
Using the wrong bottle leads to frustration, leaks, and wasted water.
Troubleshoot Common Problems
Bubbles That Won’t Stop
It’s normal to see bubbling for 10 to 15 seconds as the reservoir fills with new water. After that, bubbles should stop completely.
If bubbling continues, check for a crack or pinhole in the bottle. Remove and inspect the jug carefully. Contact your water supplier for a replacement if you spot damage. Persistent bubbling means air is entering the system through a compromised bottle.
Leaks at the Base
For top-loaders:
– Ensure the water guard adapter is fully seated
– Check that the bottle is centered and upright
– Wipe excess water from the reservoir rim
For bottom-loaders:
– Make sure the bottle is pushed all the way in
– Verify the nozzle isn’t bent or damaged
– Try a different bottle or cap to isolate the problem
A small drip during initial flow may be normal. Steady leaking means something needs adjustment.
Spills During the Swap
Spills usually happen when:
- The old bottle isn’t empty
- The new bottle is inserted too quickly
- The cap seal fails or shifts
Prevention tips:
– Change bottles when the cooler is nearly empty
– Use a spill-proof adapter on top loaders
– Place a towel underneath during swaps
– Always use a pre-drilled cap on bottom loaders
A little preparation prevents most mess.
Best Accessories for Easier Loading
Water Guard Adapter
This small plastic piece snaps into the bottle neck and:
- Prevents spills during bottle changes
- Maintains the germ-free seal
- Extends the life of your cooler
Most top-loading coolers include one. Replace it if it becomes cracked, stiff, or discolored.
Pre-Drilled Reusable Cap
A true game-changer for bottom-loading dispensers. Benefits include:
- No cutting or modifications required
- Reusable for hundreds of bottle changes
- Leak-proof and easy to install
Available at Walmart, Amazon, and most hardware stores. Costs under $10 and pays for itself quickly in saved time and frustration.
Bottle Lifting Aid Tool
A handheld gripper that hooks around the neck and base of the jug. It lets you lift heavy bottles with much less strain on your back and arms.
Ideal for seniors, office workers, or anyone with back issues who changes bottles regularly.
Replacement Germ-Free Seals
If you ever reuse bottles (not generally recommended), buy replacement seals to keep water clean. However, always use factory-sealed bottles when possible. They offer the best protection against contamination.
Compare Loading Methods at a Glance
| Method | Dispenser Type | Reliability | Ease | Best For |
|---|---|---|---|---|
| Water Guard Adapter | Top-Loading | High | Easy | Most users |
| Pre-Drilled Cap | Bottom-Loading | Highest | Easiest | Frequent changes |
| Saran Wrap Trick | Bottom-Loading | Moderate | Fussy | Emergencies |
| Cut-Hole Cap | Bottom-Loading | Low | Hard | Last resort |
Choose the method that matches your dispenser and lifestyle. For long-term use, invest in a pre-drilled cap if you own a bottom loader. It pays off in time, cleanliness, and peace of mind.
Frequently Asked Questions About Putting 5 Gallon Water on a Dispenser
How heavy is a full 5-gallon water bottle?
A full 5-gallon water bottle weighs approximately 40 pounds. This is heavy enough to cause back strain if lifted incorrectly. Always bend your knees, hug the bottle close to your body, and consider using a lifting aid or switching to 3-gallon bottles if 40 pounds is too much.
Do you remove the plastic seal on a 5-gallon water bottle?
Yes, you must peel off the germ-free seal completely before placing the bottle on the dispenser. Leaving any part of the seal in place blocks water flow and can damage the puncture pin inside the cooler. Check the cap carefully after peeling to ensure no film remains.
Why is my water dispenser bubbling after I change the bottle?
Bubbling for 10 to 15 seconds is normal as the reservoir fills with new water. If bubbling continues beyond that timeframe, the bottle likely has a crack or pinhole letting air into the system. Remove the bottle, inspect it, and contact your supplier for a replacement.
Can you put a 5-gallon bottle on a Primo water dispenser?
Yes, but bottom-loading dispensers like the Primo Water Deluxe require the bottle to be inserted upright with a pre-drilled cap or a similar piercing mechanism. The dispenser’s dagger-shaped nozzle pushes up into the cap to allow water flow. Standard caps won’t work without modification.
What is a water guard adapter?
A water guard adapter is a plastic piece that fits between the bottle and the reservoir on top-loading coolers. It creates a sealed, spill-proof connection and maintains the germ-free environment. Most top-loading coolers include one, and it should be replaced if cracked or stiff.
How do you lift a heavy water bottle without hurting your back?
Use proper lifting form: bend your knees, keep your back straight, and hug the bottle close to your chest. Grip the neck with one hand and the base with the other. Turn your whole body instead of twisting at the waist. For extra help, place the bottle on a chair or table first, or use a water bottle lifter tool.
Final Takeaways for Loading 5-Gallon Water on Any Dispenser
Putting a 5-gallon water bottle on a dispenser is quick and mess-free when you follow the right steps. For top-loading coolers, the water guard adapter method is reliable and included with most units. For bottom-loading dispensers like the Primo, a pre-drilled reusable cap is the single best upgrade you can buy.
Remember the three essentials: empty the old reservoir first, peel the germ-free seal completely, and lift with your legs. Center every bottle carefully and never twist during installation. These habits prevent spills, protect your back, and keep your dispenser running smoothly for years.
Your next step: Check your current bottle and dispenser setup right now. Make sure you have a water guard adapter or pre-drilled cap ready, and clear a safe path for your next bottle change. A little preparation turns a 40-pound chore into a 2-minute task.



