
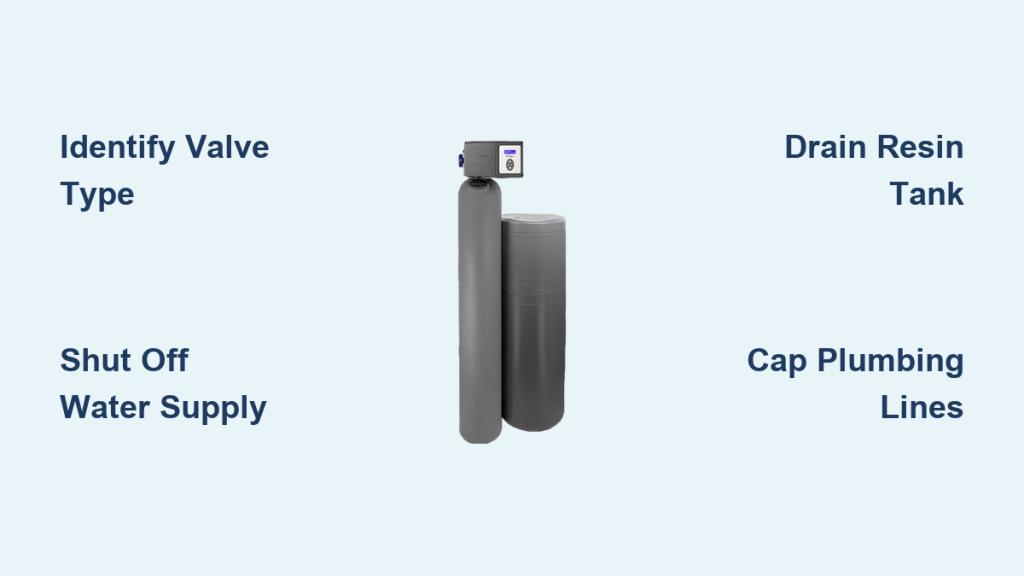
Is your Culligan water softener leaking, due for maintenance, or simply no longer needed? Knowing how to disconnect Culligan water softener units properly is essential to prevent water damage and maintain plumbing pressure. A single mistake during this process can lead to flooded floors or stripped valve threads that require expensive repairs.
This guide walks you through identifying your specific valve type and executing the correct disconnection steps safely. You will learn how to bypass the system temporarily for repairs or permanently remove an old unit without harming your home’s water supply.
Identify Your Culligan Bypass Valve Type
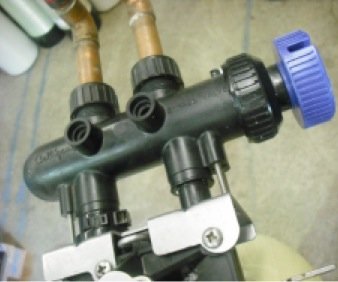
Determining your specific valve configuration is the most critical first step before attempting any disconnection. Culligan uses several distinct mechanisms, and using the wrong method can damage the unit.
Rotary Knob Bypass Systems
Most modern Culligan models feature a single large knob, often blue or black, located on the rear of the control head. To engage bypass mode, turn this knob clockwise until it sits flush with the housing. Return to service by turning it counterclockwise until you feel resistance, but never force it past that point. Over-tightening can strip internal threads and cause permanent leaks.
Push-Pull Slide Valve Mechanisms
Older units or Call Flow models often use a sliding button system with red and blue indicators. Push the red button inward until it is flush with the copper housing to activate bypass. To restore soft water, pull the red button out or push the blue button in. If the button feels stuck, open a faucet to relieve line pressure before gently tapping the valve with a rubber mallet.
Three-Valve Bypass Configurations
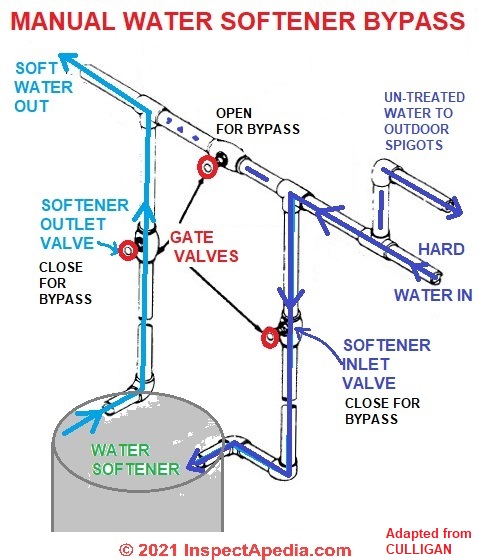
Some installations utilize three separate ball valves on the plumbing lines rather than a single integrated head. Turn the left (inlet) and right (outlet) valves clockwise to close them. Then, turn the center valve counterclockwise to open the bypass line. Reversing this sequence can trap high pressure inside the softener tank or cut off water to your entire home.
Double Black Knob or Brass Handle Units
Legacy systems may have two black plastic knobs on the back of the unit or a single brass handle. Turn both black knobs 90 degrees to a sideways position to bypass. For brass handles, rotate the lever 90 degrees to a horizontal position. Align them parallel with the pipes to return to normal service mode.
Smart System Controls via App
Newer “Smart” models allow you to disconnect Culligan water softener functions digitally without touching physical valves. Open the Culligan Connect app, select your system, and tap “Bypass.” You can even set a timer for temporary needs like gardening, after which the system automatically returns to service.
Steps to Temporarily Bypass Your Softener

Engaging bypass mode allows water to flow to your home while skipping the resin tank, which is ideal for maintenance or emergency leaks.
Execute the Bypass Procedure
- Shut Down Appliances: Turn off dishwashers and washing machines to reduce water demand.
- Activate Valve: Follow the specific steps for your valve type outlined above.
- Verify Flow: Run a cold water tap to ensure pressure is normal.
- Check Water Quality: The water should feel less slippery, indicating hard water is now flowing.
When to Use Bypass Mode
Use this mode when cleaning the brine tank, replacing filters, or fixing control head leaks. It is also useful when watering lawns to save salt or when the system malfunctions during a vacation. Always remember that bypass mode sends hard water to your appliances, so do not leave it engaged longer than necessary.
Common Mistakes to Avoid
Many users forget to return the system to service mode, leading to scale buildup in pipes and water heaters. Others over-tighten rotary knobs, ruining the valve threads. If a slide valve is stuck, avoid using metal tools that can crack the housing. Instead, relieve pressure and use gentle force.
How to Permanently Disconnect and Remove the System
Removing a unit entirely requires draining tanks, cutting plumbing lines, and proper disposal of materials like salt and resin beads.
Shut Off Water and Relieve Pressure
Locate the main water supply valve for your house and turn it off completely. Open a low faucet, such as a basement sink or outdoor spigot, to drain residual pressure from the lines. Confirm the water is off by checking that no flow comes from any tap before proceeding.
Drain the Resin and Brine Tanks
If your unit has a drain valve, open it into a bucket or floor drain. Without one, carefully disconnect the bottom pipe to let water, sludge, and resin beads flow out. Remove all solid salt from the brine tank by hand and seal it in trash bags. Never pour salt or brine solution down your drains or into septic systems.
Disconnect Plumbing and Cap Lines
Inspect the inlet and outlet valves for corrosion. If they are seized, apply penetrating oil and wait several hours before attempting to turn them. If valves fail, use a tubing cutter to make clean cuts on the pipes. Cap both ends immediately with brass threaded plugs or union caps to prevent future leaks. Label the pipes clearly for future reference.
Remove and Dispose of Components
Unscrew mounting brackets and lift out the heavy resin and brine tanks. Separate metal parts like control heads for scrap metal recycling. Check with local recyclers regarding plastic tanks. Dispose of resin beads and salt in sealed household trash bags, as these materials are not recyclable through standard curbside programs.
Troubleshooting Stuck or Leaking Valves
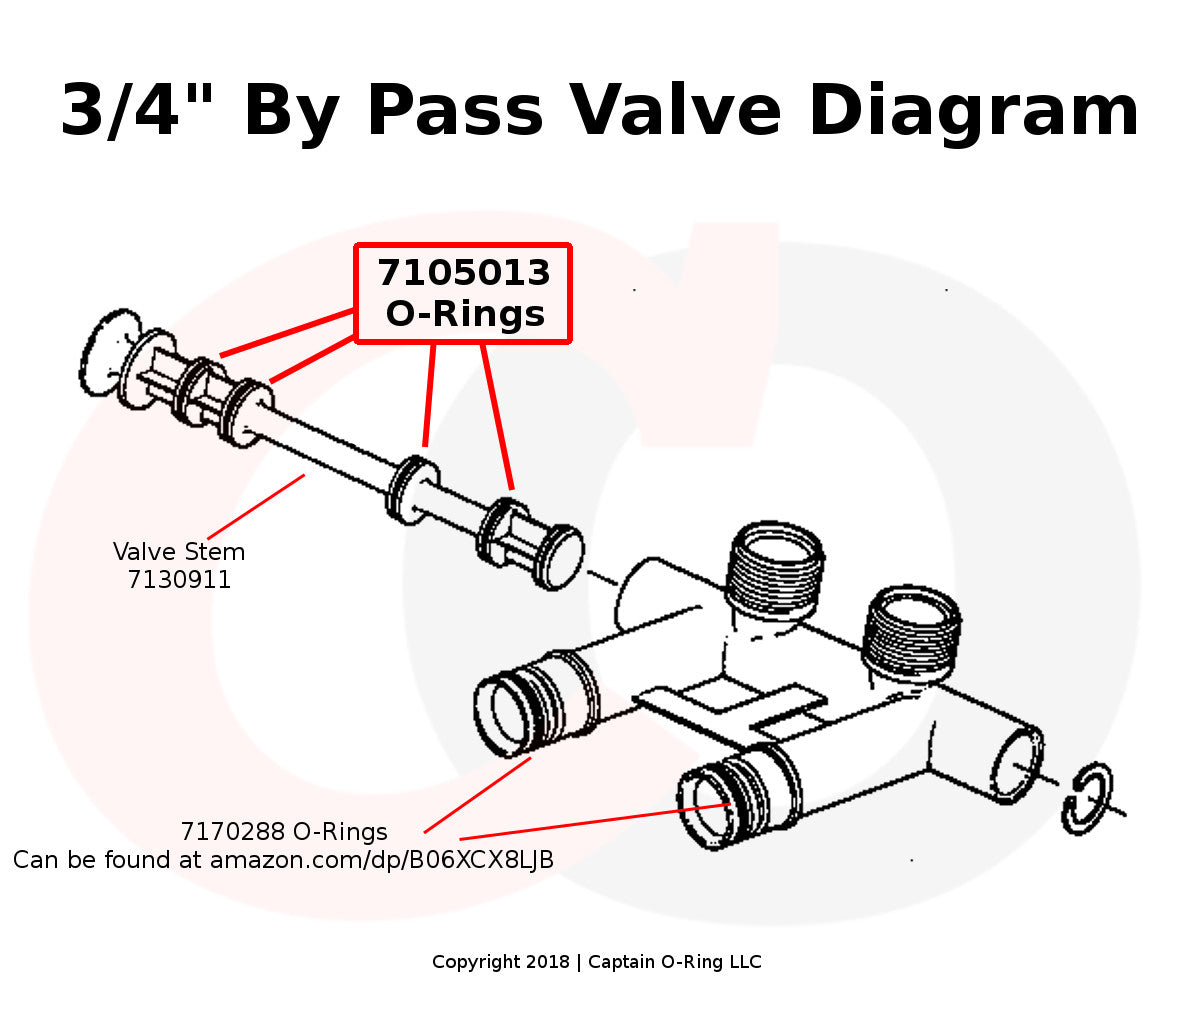
Valves on older systems often become difficult to move due to sediment buildup or corrosion.
Fixing a Stuck Valve
If a valve will not move, first open a faucet to relieve water pressure on the mechanism. Apply penetrating oil to the threads or around the button and wait 12 to 24 hours. For push-pull valves, try turning the red knob clockwise one full turn to break up sediment on the O-rings. Use a rubber mallet to tap the valve body gently if needed.
Addressing Valve Leaks
A leaking bypass valve indicates worn O-rings or a cracked housing. If you see water leaking while in bypass or service mode, shut off the main water supply immediately. Do not attempt to force a leaking valve, as this worsens the damage. You will likely need to replace the entire valve assembly or call a licensed plumber.
Verifying Bypass Functionality
If your water still feels soft after engaging bypass, the valve may not be fully seated or could have an internal crossover. Run the water for two minutes and test it with a hardness strip. If the water remains soft, the bypass is not working, and you must replace the valve to isolate the system effectively.
Verify Operation and Restore Normal Service
After completing your maintenance or repair, you must confirm the system is back online and functioning correctly.
Confirm System Status
Check that all knobs, buttons, or handles are in the correct “Service” position. For smart systems, verify the app displays “Service Mode.” Run a cold tap for three to five minutes to flush hard water out of the pipes before using hot water appliances. This prevents scale from entering your water heater.
Prevent Future Issues
Exercise your bypass valve every three to six months to keep it from seizing. Inspect the area around the control head monthly for signs of moisture or leaks. Consider labeling your valve clearly with “Bypass” and “Service” stickers to help anyone operating the system in the future.
Frequently Asked Questions About Disconnecting Culligan Softeners
How do I know if my Culligan softener is in bypass mode?
Check the position of your valve knob or button against the manufacturer’s indicators. In bypass mode, water will feel less slippery and soap will not lather as easily as it does with soft water. Smart users can verify status directly in the Culligan Connect app.
Can I drink water when the softener is in bypass mode?
Yes, the water is safe to drink, but it will be hard water containing calcium and magnesium. You may notice a different taste or increased spotting on dishes, but there are no health risks associated with drinking untreated hard water.
What should I do if my bypass valve is stuck and won’t turn?
Relieve water pressure by opening a faucet, then apply penetrating oil to the valve mechanism. Wait several hours before trying again. If it remains stuck, gently tap it with a rubber mallet. Never use excessive force or metal tools, as this can break the valve.
Do I need to drain the tank before disconnecting the softener?
Yes, you must drain both the resin and brine tanks to prevent water damage and reduce weight. Open the drain valve if available, or carefully disconnect the bottom piping to empty the contents into a bucket or floor drain.
How often should I exercise the bypass valve?
You should cycle your bypass valve every three to six months. This prevents the internal components from seizing due to lack of use and ensures the mechanism works smoothly during an emergency leak or maintenance event.
Key Takeaways for Disconnecting Culligan Water Softeners
Successfully learning how to disconnect Culligan water softener systems protects your home from water damage and ensures proper maintenance. Always identify your specific valve type first, whether it is a rotary knob, push-pull slide, or three-valve setup, to avoid mechanical failure. Never force a stuck valve without relieving pressure first, and always verify your water flow and quality after making changes.
Take action today by locating your bypass valve and checking its condition. If you plan to remove an old unit, follow the draining and capping steps carefully to maintain your plumbing integrity. With these steps, you can manage your water treatment system with confidence and safety.



