
If your reverse osmosis faucet isn’t flowing smoothly or your purified water tastes off, the culprit might not be the filter. It could be a dirty faucet. Even with top-tier filtration, bacteria-laden biofilm and mineral buildup can accumulate in the spout, recontaminating clean water before it reaches your glass. This guide walks you through safe, effective cleaning steps using common household solutions and simple tools.
Disassemble the Faucet Spout
Start by accessing the internal parts where buildup hides. Most RO faucets have a removable aerator or spout tip that unscrews by hand or with light pliers.
Turn off the RO system and close the tank valve. Grip the faucet body with one hand and twist the tip counterclockwise. If stuck, wrap a microfiber cloth around the tip and use pliers. Avoid scratching the finish. Place all small parts on a clean towel to prevent loss.
Some faucets have non-removable aerators. In that case, skip to internal brushing and vinegar soaking.
Remove Mineral Buildup With Vinegar
Hard water leaves behind limescale, which is white or chalky deposits that restrict flow and trap bacteria.
Soak the aerator or spout tip in white vinegar for 30 to 60 minutes. For heavy scaling, extend soaking up to 2 hours. Avoid vinegar on copper or brass finishes unless the manufacturer approves it.
Do not use vinegar on stainless steel long term. Prolonged exposure can damage the surface.
Scrub Away Biofilm and Debris
Biofilm appears as slimy residue, often clear or pinkish, inside the spout opening. It forms when bacteria colonize stagnant water.
Use a soft bristle toothbrush to scrub the inner walls of the spout. Focus on the first half inch inside the tip. This area traps the most contaminants. Gently brush the aerator’s mesh screen to clear clogs.
Biofilm is slippery and hard to see. If water tastes musty, assume biofilm is present even if invisible.
Flush and Reassemble Properly
After cleaning, flush the system to remove loosened debris.
Rinse all parts under running tap water. Reattach the aerator securely and hand-tighten only. Open the tank valve and let water flow through the faucet for 1 to 2 minutes.
Check for leaks and reduced flow. If water still sputters, the aerator may need a second cleaning.
Deep Clean With Full System Sanitization
Cleaning the faucet alone isn’t enough if the rest of the system harbors bacteria. Annual sanitization is critical, especially if the system hasn’t been cleaned in over a year, water tastes or smells odd, you’ve had plumbing work or a power outage, or it’s time to replace filters or the membrane.
Choose the Right Sanitizer
Not all disinfectants are safe for RO systems. Use only one of these options.
Vital Oxide is chlorine dioxide based, safe for the membrane, and requires no rinsing. Unscented household bleach is safe when used sparingly but requires rinsing with 2 to 3 tanks. Hydrogen peroxide at 3% is safe for the membrane and requires rinsing. Sani System Sanitizer is safe for the membrane and requires no rinsing.
Best choice is Vital Oxide. It is NSF certified, non-corrosive, kills 99.999% of bacteria, and requires no flushing.
Install a Drain Line Shut-Off Valve
To trap sanitizer inside the system, install a push-fit shut-off valve on the drain line.
Cut the drain tubing with a razor blade and make a clean 90 degree cut. Insert the valve and snap it into place. Close the valve during sanitization to prevent chemical loss.
This simple $12 upgrade makes sanitizing 10 times more effective. No more diluted bleach flushing out too fast.
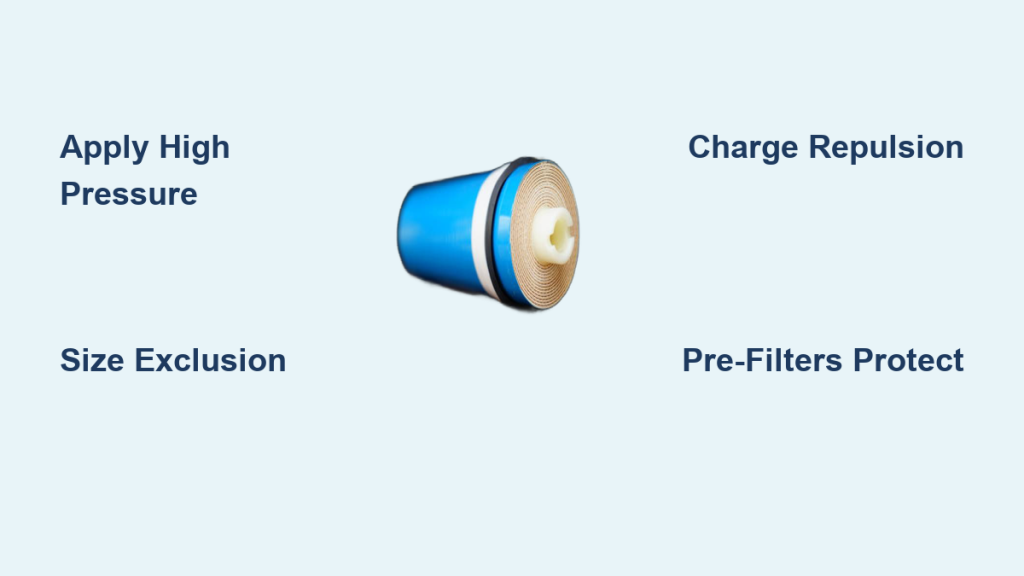
Remove Filters and Membrane
Sanitizers can degrade filters and membranes if left in place.
Turn off water supply and drain the system by opening the faucet. Remove pre-filters and the RO membrane. Leave the post-filter in place. It is designed to handle brief sanitizer exposure.
Never reuse old filters or membranes. Replace them annually with new ones.
Circulate Sanitizer Through the System
Now introduce the disinfectant using one of two methods.
For the bleach method, mix 2 to 3 tablespoons of unscented bleach per quart of water. Pour into the first filter housing and reattach. Turn on water supply and let the system pressurize. Close the drain valve once water flows. This traps bleach inside. Let sit for 10 to 30 minutes.
For Vital Oxide, pour full-strength Vital Oxide into the pre-filter housing. Turn on water and let it circulate for 15 minutes. Turn off supply and let sit for 10 minutes.
Never mix cleaners. Toxic fumes can result, especially from bleach and vinegar.
Flush and Reassemble After Sanitizing
After soaking, flush thoroughly.
Open the faucet and drain the entire system. Remove all housings and empty residual sanitizer. Reinstall new filters and membrane. Let the tank refill completely.
If using bleach, discard the first 2 to 3 full tanks of water to ensure all traces are gone. Smell and taste test until no chemical odor remains.
If using Vital Oxide, no flushing is required. Water is safe to drink after one refill.
Vital Oxide cuts sanitizing time in half and eliminates long flush cycles.
Prevent Future Buildup With Routine Maintenance
Prevention beats cleanup. A few simple habits keep your RO faucet flowing cleanly.
Clean Faucet Monthly
Unscrew and rinse the aerator every 30 days. Wipe the exterior with a damp microfiber cloth. Inspect for slime, discoloration, or flow issues.
Set a phone reminder labeled Clean RO Faucet on the same day each month.
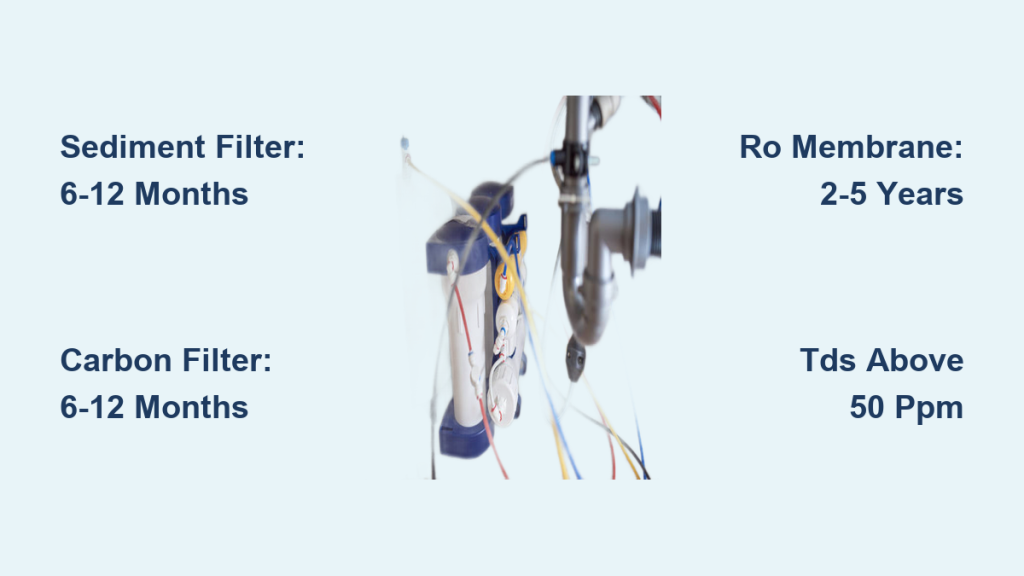
Replace Filters on Schedule
Clogged or expired filters reduce pressure and allow contaminants to pass.
Sediment filter should be replaced every 6 to 12 months. Carbon block filter should be replaced every 6 to 12 months. Post-carbon filter should be replaced every 6 to 12 months. RO membrane should be replaced every 2 to 4 years.
Replace all filters and membrane during annual sanitization.
Check Tank Pressure Annually
A weak storage tank means slow output and frequent refills.
Drain the tank completely. Use a bicycle tire pump with gauge to check pressure. Ideal range is 5 to 7 PSI when empty. Add air if below 5 PSI.
After adjusting tank pressure, many users report their RO faucet went from trickling to full flow.
Troubleshoot Common Post-Cleaning Issues
Even after cleaning, problems can arise. Here is how to fix them fast.
Low Water Flow After Cleaning
Causes include air trapped in lines, new membrane conditioning which is normal for the first hour, or a clogged aerator.
Let the system run for 60 to 90 minutes to purge air. Remove and clean the aerator again. Ensure all filter housings are fully seated.
Chemical Taste or Smell
Incomplete flushing after bleach sanitization causes this issue.
Run and discard one additional full tank. Repeat until water tastes neutral. For persistent odor, flush with a vinegar-water mix at 1 to 3 ratio, then rinse with clean water.
Leaking at Filter Housing
O-ring misalignment or damage causes leaks. Housing that is overtightened or cracked is also problematic.
Turn off water and unscrew the housing. Inspect the O-ring and replace if cracked or flattened. Apply food-grade silicone lubricant for a better seal. Hand-tighten only. Never use a wrench.
Faucet Still Clogged
Debris stuck in aerator or internal passage causes this.
Soak the aerator in vinegar overnight. Use a pin or needle to clear mesh holes. Replace the aerator if damaged.
Verify Cleanliness With Simple Tests
After cleaning, confirm your water is safe and pure.
Taste and Smell Test
Water should be neutral, odorless, and crisp. Any musty, chemical, or metallic taste means further cleaning is needed.
Visual Inspection
Water should pour clear and smooth, not bubbly or cloudy. Shine a flashlight into the spout. No slime or particles should be visible.
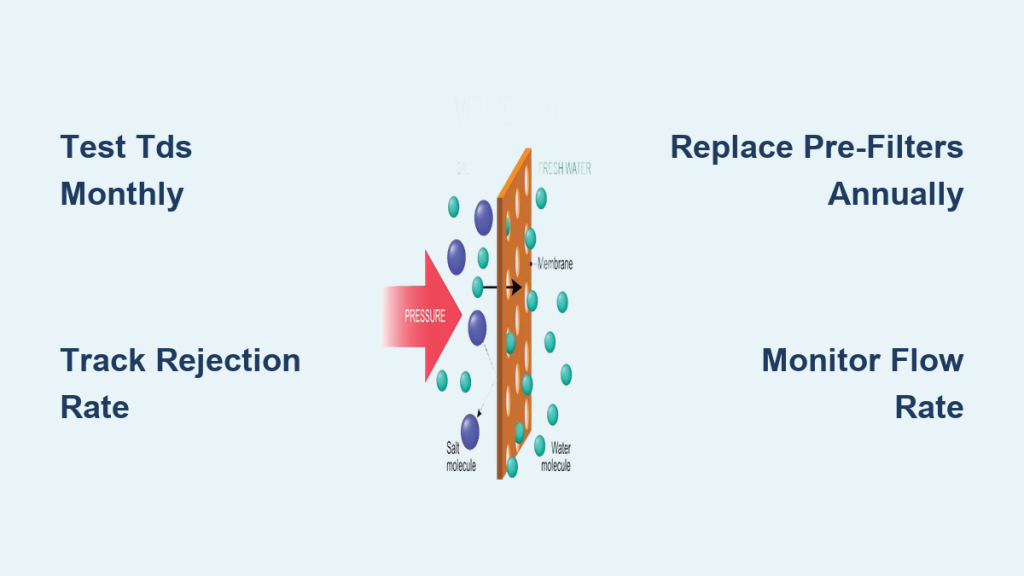
Use a TDS Meter
A Total Dissolved Solids meter verifies filtration performance.
Pre-filter water reads roughly 100 to 300 ppm. Post-RO water should read under 50 ppm which is ideal. If TDS is rising, the membrane may need replacement.
Test before and after cleaning. Compare numbers to track system health.
Keep a Maintenance Log
Track key actions to extend system life and support warranties.
Record filter changes every 6 to 12 months. Record membrane replacement every 2 to 4 years. Record full sanitization annually. Record tank pressure check annually.
Label housings with change dates using waterproof tape. Set calendar alerts 1 week before due dates.
Final Thoughts on Maintaining Your Reverse Osmosis Faucet
Your reverse osmosis faucet is the final gatekeeper of water quality. Even the best membrane cannot protect you if the spout is breeding bacteria. By cleaning the faucet every month and sanitizing the whole system once a year, you ensure every glass of water is as pure as intended. Use vinegar for scale, Vital Oxide for deep sanitizing, and a simple toothbrush for daily upkeep. With these steps, your RO system will deliver safe, great-tasting water for years without surprise clogs, odors, or health risks.
Frequently Asked Questions About Cleaning Reverse Osmosis Faucets
How often should I clean my reverse osmosis faucet?
Clean the faucet aerator and spout every 1 to 3 months. Inspect monthly for visible slime, discoloration, or flow reduction. Full system sanitization should happen once per year.
Can I use vinegar to clean my RO faucet?
Yes, white vinegar effectively removes mineral scale and limescale. Soak the aerator for 30 to 60 minutes. Avoid vinegar on copper or brass finishes unless approved by the manufacturer.
Why does my RO water taste musty after cleaning?
Musty taste indicates biofilm is present in the faucet or system. Scrub the spout interior thoroughly with a toothbrush. If the problem persists, perform full system sanitization with Vital Oxide or bleach.
Do I need to flush the system after sanitizing?
If using bleach, flush 2 to 3 full tanks before drinking. If using Vital Oxide, no flushing is required. Water is safe to consume after one tank refill.
What is the best sanitizer for RO systems?
Vital Oxide is the best choice. It is NSF certified, kills 99.999% of bacteria, is non-corrosive, and requires no rinsing. Unscented bleach works but requires thorough flushing.
How do I know if my RO membrane needs replacement?
Replace the membrane every 2 to 4 years or when TDS levels rise above 50 ppm. Slow flow, bad taste, or frequent refilling also indicate membrane replacement is needed.