

A cloudy taste or strange odor from your Vitapur water dispenser signals hidden bacteria and mineral buildup inside the unit. Ignoring these signs allows biofilm and E. coli to thrive in the reservoir and spigots.
This guide details exactly how to clean a Vitapur water dispenser using vinegar, boiling water, or a commercial kit. You will learn safe disassembly steps, precise rinsing ratios, and how to restore fresh water flow in under an hour.
Prepare Your Vitapur Dispenser for Safe Cleaning
Safety is your first priority before applying any cleaning solution to your unit. You must eliminate electrical hazards and prevent burns from hot internal components.
Turn Off the Hot Water Switch
Even when unplugged, the internal hot tank retains significant heat. Switch off the hot water setting immediately to protect heating elements from cold shock. This step prevents accidental burns while you work on the unit.
Drain the Reservoir Completely
Place a large bucket under the cold water spigot and open the valve fully. Always use the cold spigot first to keep debris out of the hot tank. Locate the small drain cap on the back of the unit and unscrew it slowly to release remaining water.
Disassemble Key Components for Deep Cleaning
Removing specific parts allows you to reach areas where mold and sludge accumulate. These components often harbor the most bacteria if left untouched.
Unlock and Remove the Safeguard
Twist the top safeguard assembly counterclockwise to unlock it from the unit. Lift the piece off and check for a second inner piece that may need gentle upward pressure. Wash both parts with soapy water to remove puncture debris.
Extract the Baffle and Air Filter
Locate the baffle inside the reservoir and lift it out carefully. Find the air filter on the top assembly or under the bottom ring and pull it free. Both parts direct water flow and require individual scrubbing to remove buildup.
Select the Best Cleaning Method for Your Needs
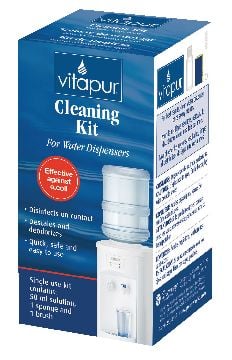
You can choose between natural vinegar descaling, heat sanitation, or a specialized commercial kit. Each method offers distinct benefits depending on your preference for chemicals versus heat.
Use White Vinegar to Remove Mineral Scale

This natural method effectively dissolves limescale and deodorizes the interior without harsh chemicals.
* Mix 2 cups of white vinegar with 6 cups of hot water.
* Pour the solution into the empty reservoir and let it soak for exactly 20 minutes.
* Dispense the mixture through the cold spigot and rinse with 8 cups of clean hot water.
Sanitize with Boiling Water Heat
Heat disinfection kills bacteria instantly but requires careful handling to avoid damaging plastic parts.
* Heat water to approximately 220°F, which is just below a rolling boil.
* Wear thick dishwashing gloves and pour the hot water directly into the reservoir.
* Scrub the interior immediately with a long-handled brush before draining and rinsing thoroughly.
Apply Commercial Vitapur Cleaning Kit

The VCK50 or 10,000 Series kit uses organic acids to eliminate E. coli and biofilm safely.
* Dip the included sponge in the organic acid solution and scrub the entire reservoir interior.
* Insert the tube brush into the spout to clean deep inside the nozzle mechanism.
* Pour the remaining solution into the tank, rinse with 4 cups of water, and flush the system completely.
Wash Removable Parts Separately
Internal components like filters and baffles need dedicated attention outside the main flushing cycle. Proper cleaning here prevents re-contamination of your fresh water.
Clean and Dry the Air Filter
Wash the air filter in the dishwasher or by hand using hot water and mild soap. Rinse it well and allow it to air dry completely before putting it back. Moisture left on the filter encourages mold growth.
Scrub the Baffle Thoroughly
The baffle directs water to the hot tank and often collects significant gunk. Wash it in the dishwasher or scrub it with soapy water until smooth. Ensure it is fully dry before reinstallation to maintain water quality.
Wipe Down the Safeguard and Exterior
Use a disinfecting wipe or damp cloth with mild cleaner on the safeguard cap. Focus on the rim and areas around the spigots where hands frequently touch. Dry these surfaces immediately to prevent water spots.
Reassemble and Test Your Vitapur Dispenser
Correct reassembly ensures your unit functions properly without leaks or flow issues. Follow these steps to restore your dispenser to peak performance.
Reinstall Filter and Baffle Correctly
Slide the completely dry air filter back into its slot on the top or ring. Secure the baffle in its correct position inside the reservoir. A misaligned baffle can disrupt water flow to the hot tank.
Lock the Safeguard Into Place
Align the safeguard arrow so it points toward the front of the dispenser. Lower the assembly and twist clockwise until you hear a distinct click. Ensure it feels snug but do not overtighten the plastic threads.
Power Up and Cycle Water
Plug the unit back in and place a fresh water bottle on top. Turn the hot water switch back on and let the system heat up for 5 to 10 minutes. Run both spigots to verify smooth flow and fresh taste.
Troubleshoot Common Cleaning Issues
Minor problems may occur after cleaning if steps were missed or residue remains. Use these solutions to fix common issues quickly.
Eliminate Residual Vinegar Taste
If the water tastes sour, perform one more rinse cycle with 8 cups of hot water. Dispense fully and repeat if the odor persists after the first flush.
Stop Leaks After Reassembly
Check that the back drain cap and top safeguard are screwed on tightly. Verify the baffle is seated correctly as loose components cause drips.
Restore Water Flow
Ensure the air filter is not clogged and the water bottle is punctured properly. Clean the nozzle again with a tube brush if blockage continues.
Maintain Long-Term Dispenser Performance
Consistent maintenance prevents future buildup and keeps your water tasting great. Adopt these habits to extend the life of your unit.
Adhere to a Cleaning Schedule
Clean your unit every 3 to 6 months for standard home use. Increase frequency to monthly for high-use environments like offices or gyms.
Reuse Drained Water Responsibly
Collect the water you drain during cleaning to water plants or clean floors. This practice saves up to 2 gallons of water per cleaning cycle.
Replace Worn Cleaning Tools
Inspect your tube brush and sponges regularly for wear or bent bristles. Replace these tools immediately if they show signs of degradation to ensure effective cleaning.
Frequently Asked Questions About Cleaning Vitapur Dispensers
How often should I clean my Vitapur water dispenser?
You should clean your unit every 3 to 6 months for standard use. High-traffic environments or units older than two years benefit from monthly cleaning to prevent bacterial growth.
Can I use bleach to clean my Vitapur dispenser?
No, you should not use bleach. The recommended methods are white vinegar, boiling water, or an organic acid commercial kit to avoid damaging internal components.
Why does my water taste like vinegar after cleaning?
This indicates incomplete rinsing. Run an additional rinse cycle with 8 cups of hot water through the cold spigot to flush out any remaining vinegar residue.
Is the Vitapur commercial cleaning kit safe for pets?
Yes, the VCK50 kit uses biodegradable organic acids that are food-grade safe. However, you should still flush the system thoroughly before drinking.
What causes slime to form inside the water reservoir?
Slime is biofilm caused by bacteria like E. coli growing in stagnant water. Regular cleaning every 3 to 6 months prevents this buildup effectively.
Key Takeaways for Cleaning Your Vitapur Water Dispenser
Regularly cleaning your Vitapur water dispenser removes harmful bacteria and mineral deposits that affect taste and safety. Whether you choose vinegar, heat, or a commercial kit, following the correct disassembly and rinsing steps ensures a sanitary result.
Make it a habit to clean your unit every 3 to 6 months to maintain optimal performance. Start your next cleaning session today to enjoy fresh, healthy water again.



