
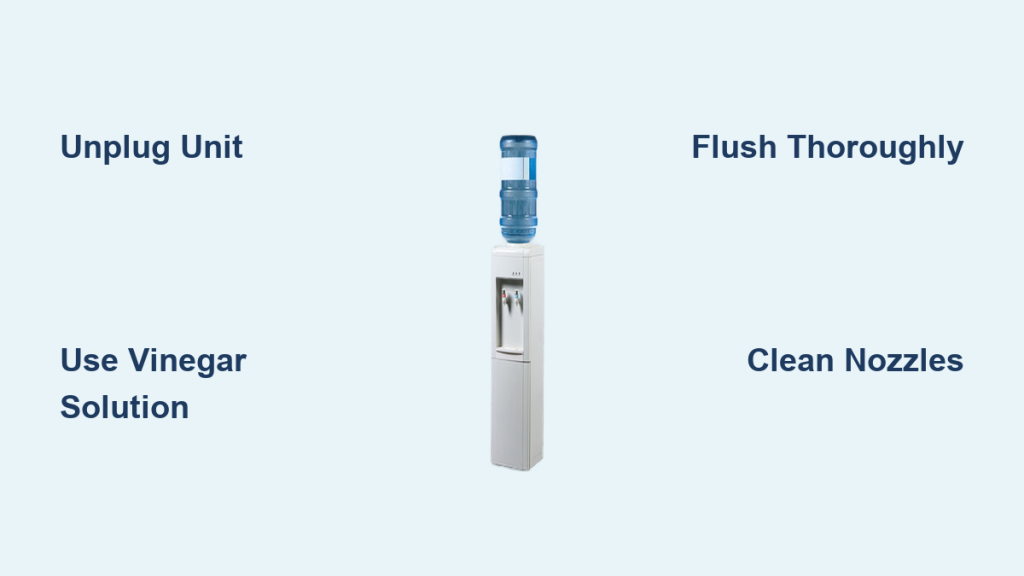
A dirty water dispenser cooler can harbor bacteria, mold, and mineral deposits that make your water taste bad and pose health risks. If you notice a strange odor, see white particles in your cup, or simply cannot remember the last time you cleaned the unit, it is time for immediate action.
This guide explains exactly how to clean a water dispenser cooler using safe, effective methods for any model. You will learn the proper cleaning schedule, required supplies, and step-by-step instructions to sanitize your unit and restore fresh-tasting water.
Determine Your Cleaning Schedule Based on Usage

Cleaning frequency depends entirely on how many people use the unit and where it is located. Ignoring this schedule allows biofilm to form inside the reservoir, leading to potential health issues for your household or office staff.
Standard Recommendations for Home and Office
Most experts recommend a deep clean every 3 months for standard home use. If your unit serves a family of one to four people, this quarterly schedule prevents significant buildup while maintaining water quality. High-traffic environments like offices or gyms require more frequent attention, typically every 1 to 2 months, due to constant bottle changes and increased exposure to airborne contaminants.
Warning Signs You Must Clean Immediately
Do not wait for your scheduled date if you observe specific red flags indicating contamination. Act immediately if you notice:
* Water tastes metallic, musty, or plasticky
* A faint odor appears when dispensing water
* White, sand-like particles float in your cup
* Visible mold or discoloration in the drip tray
* It has been over 6 months since the last deep clean
Adjusting for High-Traffic Environments
Units serving five or more people accumulate contaminants much faster than home models. Shared spaces introduce more dust, hands, and bottle exchanges, which accelerates bacterial growth. If your cooler sits in a break room or lobby, err on the side of caution and clean it every 4 to 6 weeks to ensure safety.
Gather Essential Supplies and Choose a Cleaning Solution
You need specific tools to reach every part of the dispenser without damaging internal components. Using the wrong materials can scratch plastic reservoirs or leave harmful residues behind.
Required Tools and Equipment
Assemble these items before starting to ensure a smooth process:
* 5-gallon empty water bottle (for top-loaders)
* Large bucket or pitcher for draining
* Soft cloths, sponges, and lint-free drying towels
* Soft-bristled bottle brush
* Cotton swabs (Q-tips) for crevices
* Screwdriver (for access panels)
* Rubber stopper (optional, for hot tank protection)
Selecting the Right Cleaning Agent
You have three primary options for sanitizing your unit, each with distinct advantages. Vinegar is the best choice for most users because it is non-toxic and excellent at dissolving mineral deposits. Mix 2 cups of distilled white vinegar with hot tap water in a 5-gallon bottle for a standard clean.
Bleach is a powerful disinfectant suitable for units neglected for over 6 months. Use 1 to 2 tablespoons of household bleach per gallon of water, but be aware it requires thorough rinsing to avoid chemical ingestion. Commercial kits offer pre-measured packets that reduce user error, making them ideal for first-timers.
Safety Wights and What to Avoid
Never mix vinegar and bleach as this combination creates toxic chlorine gas. Avoid using abrasive scrubbers that can scratch plastic interiors or undiluted chemicals that may damage seals. Do not use dish soap inside the reservoir because it leaves a film that affects water taste.
Power Down and Drain the Unit Completely
Safety is your top priority when working with electrical appliances and water. Follow these steps to prepare your dispenser for deep cleaning.
Turn Off and Unplug the Dispenser
Switch off all energy-saving modes and unplug the unit from the wall. Electrical safety is non-negotiable, and you must never work on internal parts while the cooler is live. This prevents accidental activation of heating elements during the cleaning process.
Remove the Water Bottle and Drain Taps
For top-loading models, carefully lift the 5-gallon bottle straight up and set it on a clean surface. Wipe the neck and exterior of the bottle with soapy water to prevent reintroducing contaminants later. Open both hot and cold taps and dispense water into a bucket until the flow stops completely.
Access Rear Drain Valves
Some models feature a rear drain valve to remove residual water trapped in the system. If your unit has one, open it now to ensure the reservoir is empty. You might see white, crystal-like particles draining out, which are harmless mineral deposits confirming the need for descaling. Remove the baffle (the white or blue funnel) and the drip tray to expose the interior.
Sanitize the Internal Reservoir Effectively
This phase kills bacteria and loosens mineral scale buildup inside the tank. Proper circulation ensures the cleaning solution reaches every surface.
Prepare and Load the Cleaning Solution
Fill your empty 5-gallon bottle with the chosen solution. For vinegar, mix 2 cups of distilled white vinegar with hot tap water. For bleach, use 1 tablespoon per 3 liters of hot water. Attach the bottle securely to the dispenser inlet, ensuring a tight seal to prevent leaks during the process.
Circulate Solution and Soak
Plug the unit in and turn the switches on to let the solution fill the reservoirs. You will hear bubbling as the system fills. Once full, turn the unit off and unplug it again. Let the solution sit for 10 to 15 minutes. This dwell time is critical for killing microorganisms and breaking down scale.
Drain the Sanitizing Solution
Plug the unit back in and turn the switches on. Dispense the entire contents of the solution through both hot and cold taps into your bucket. Press both handles simultaneously to speed up drainage. Check the rear drain valve again to ensure no solution remains inside the tank.
Scrub Interior Surfaces and Detail Clean Crevices
Circulation alone cannot remove all biofilm. You must manually scrub accessible areas to ensure a truly clean dispenser.
Wipe Down the Reservoir Interior
Dip a soft cloth or sponge in warm soapy water or your vinegar solution. Wipe the entire inside of the reservoir, paying special attention to corners and the area under the spout. Use a soft-bristled bottle brush to reach deep spots that your hand cannot access.
Clean Nozzles and Small Crevices
Minerals and bacteria often hide around the dispensing nozzles. Use four cotton swabs to scrub each quadrant of the dispensing area thoroughly. Replace the swabs as they become dirty to avoid spreading grime. This step prevents clogs and eliminates sources of bad taste.
Wash Removable Parts and Exterior
Soak the drip tray, baffle, and lid in warm soapy water. Use Dawn Platinum Power Wash or a Mr. Clean Magic Eraser to remove stubborn stains. Rinse these parts thoroughly under running water. Finally, wipe the exterior front panel, handles, and condensation zones with a damp cloth and dry completely.
Rinse Thoroughly to Remove All Residue
Incomplete rinsing is the most common mistake users make. Residual cleaning agents can cause illness or leave an unpleasant taste in your water.
Flush the System with Clean Water
Refill the 5-gallon bottle with 2 gallons of hot tap water containing no additives. Reattach it to the unit and let the reservoir fill. Dispense all this water through both taps into your bucket to flush out loosened debris and cleaning solution.
Repeat Until Odor-Free
Repeat the fill-and-drain cycle at least two more times. Continue rinsing until:
* Water runs completely clear
* No vinegar or bleach smell remains
* A taste test confirms neutrality
This step is especially critical if you used bleach. Incomplete rinsing poses a serious risk of chemical ingestion.
Maintain the Back Drain Valve for Deep Cleaning
Units with accessible rear drain valves, such as Primo models, require special attention to remove trapped mineral deposits.
Access and Clean the Valve
Turn off and unplug the unit. Remove the back access panel using a screwdriver to locate the red silicone plug. Place a bucket underneath and gently pull out the plug to release trapped water and white mineral particles. Let it drain fully to clear long-term buildup that reduces efficiency.
Reinstall Components Carefully
Push the red plug back in and screw the cap on by hand. Do not overtighten the cap, as excessive force can crack the valve or damage the seals. Use only hand pressure to secure it safely.
Reassemble and Verify Proper Operation
Your final steps involve putting the unit back together and ensuring it functions correctly before regular use.
Reinstall Parts and Add Fresh Water
Snap the drip tray back into place until it clicks. A rising red buoy indicates when the tray is full. Reinsert the baffle and lid securely. Place a new or thoroughly cleaned 5-gallon bottle on top, or reconnect the water line for bottom-loading models.
Power On and Perform Final Checks
Plug in the unit and turn on the energy-saving switches. Let it run for 5 to 10 minutes to refill the reservoirs. Dispense a few cups from both hot and cold taps to check for smooth flow, leaks, or unusual tastes. If everything passes, your cooler is ready for safe use.
Follow Brand-Specific Cleaning Guidelines

Different manufacturers have specific requirements to avoid damaging your unit.
Primo, Elkay, and Oasis Instructions
Primo Water Dispensers work best with distilled white vinegar only. Use the rear drain valve for deep cleaning and disconnect water lines gently on bottom-load models. Elkay Stainless Steel Units require mild detergent and a lint-free cloth to maintain their shine. Use a 1:1 vinegar-water mix on spouts but avoid abrasive cleaners.
Oasis Coolers vary by type. Type A units with removable plastic reservoirs can be washed with soapy water and sanitized with a bleach solution. Type B stainless steel models should never be submerged; instead, wipe the interior with a sanitizing solution and avoid getting liquid into the hot tank.
Prevent Future Buildup With Regular Maintenance
Consistent upkeep reduces the effort required for deep cleaning and ensures long-term hygiene.
Weekly Wiping and Bottle Management
Wipe exterior handles, spouts, and the drip tray weekly with a damp cloth to reduce daily grime. Replace water bottles promptly when empty, as stagnant air introduces moisture and microbes. Do not let empty bottles sit on the unit for extended periods.
Environmental Controls and Water Quality
Keep your dispenser out of direct sunlight, as UV rays promote algae and bacterial growth in bottles. Use a plastic bottle hood for extra protection. If you use a refillable system, always choose purified or filtered water, since tap water with high mineral content accelerates scaling inside the reservoir.
Frequently Asked Questions About Cleaning Water Dispensers
How often should I clean my water dispenser cooler?
You should deep clean your unit every 3 months for home use. Offices or high-traffic areas require cleaning every 1 to 2 months to prevent bacterial growth and mineral buildup.
Can I use bleach to clean my water dispenser?
Yes, you can use bleach for heavy contamination, but it requires rigorous rinsing. Mix 1 to 2 tablespoons of bleach per gallon of water and rinse at least three times until no smell remains.
What are the white particles in my water dispenser?
These white, crystal-like particles are mineral deposits from hard water. They are not harmful but indicate your unit needs descaling with a vinegar solution.
Is vinegar or bleach better for cleaning dispensers?
Vinegar is generally safer and better for regular maintenance because it removes minerals without toxic residues. Bleach is stronger for disinfection but poses higher risks if not rinsed thoroughly.
Why does my water taste bad after cleaning?
Bad taste usually results from insufficient rinsing of cleaning agents. Ensure you flush the system with clean water at least twice until no vinegar or bleach odor remains.
Key Takeaways for Cleaning Your Water Dispenser Cooler
Maintaining a clean water dispenser cooler protects your health and ensures great-tasting water year-round. Stick to a 3-month cleaning schedule, use vinegar for safe descaling, and never skip the final rinsing steps. By following these simple procedures, you can prevent bacterial growth and extend the life of your appliance.
Start your next cleaning session today by gathering your supplies and unplugging your unit. Your family and coworkers will appreciate the fresh, safe water you provide.



