
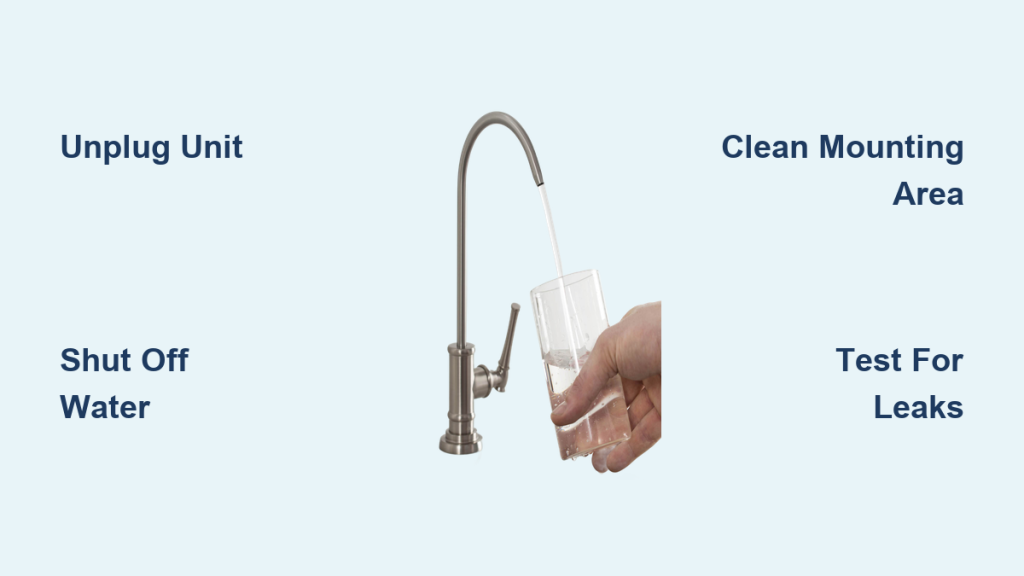
A dripping spigot on your water cooler wastes water and risks damaging your floor or cabinet. Learning how to change a water dispenser faucet solves this leak permanently without needing a professional plumber.
This guide details the safe removal of your old unit and the installation of a new one for both bottle-fed coolers and under-sink systems. You will discover the correct washer order, proper tubing cuts, and testing steps required to ensure a dry, functional result.
Disconnect Power and Water Supply Safely
Safety is your absolute priority before touching any plumbing or electrical components. Isolating the system prevents electric shock and stops water from spraying everywhere.
Unplug the Water Cooler Unit
Locate the power cord at the back of your standalone cooler and pull it from the wall outlet. If your model has a hot water function, find the dedicated switch on the rear panel and turn it off first. This step prevents the heating element from activating while the tank is empty, which could burn it out.
Shut Off Under-Sink Water Valves
Reach under your sink to find the small shutoff valve controlling the filtered water line. Turn this lever clockwise until it stops completely. Open the existing faucet briefly to release pressure and drain any water remaining in the tube into a cup.
Drain Internal Tanks Completely
Remove the large water bottle from the top of bottle-fed coolers to stop fresh water flow. Press both the hot and cold levers to empty the internal reservoirs into a bucket. Ensure no water remains inside before disconnecting hoses to avoid accidental spills.
Prepare Your Workspace and Tools
A clean area and the right equipment make the repair faster and reduce the chance of errors. Gathering everything beforehand ensures you do not leave connections open longer than necessary.
Clear Access to the Unit
Move your standalone cooler away from the wall to access the back panel easily. For under-sink faucets, remove cleaning supplies or storage items from the cabinet below the sink. You need clear visibility of the plumbing connections and mounting hardware.
Clean Mounting Surfaces Thoroughly
Wipe the area around the faucet hole on your sink deck or cooler tank with a damp cloth. Remove any mineral deposits, old sealant, or dirt that could prevent a tight seal. A clean surface ensures your new gaskets sit flush against the material.
Gather Required Tools and Parts
Collect an adjustable wrench, a sharp utility knife or tubing cutter, and a small container for water. Ensure you have the correct replacement faucet, rubber gaskets, mounting washers, and a lock nut ready for installation.
Replace Faucet on Standalone Water Cooler

This process focuses on swapping the spigot on bottle-fed units with internal hot and cold tanks. Precision here prevents water from leaking onto electrical components.
Identify the Correct Tank Side
Remove the back panel to see the two internal tanks inside the unit. The stainless steel tank on the right holds hot water, while the cooling tank on the left holds cold water. Focus your work only on the side corresponding to the broken faucet.
Disconnect the Water Hose
Locate the flexible hose connected to the base of the old faucet inside the unit. Gently pull the hose off the nozzle, taking care not to tear the rubber gasket inside the connector. Inspect this gasket for cracks and replace it if it looks worn or brittle.
Remove the Old Faucet Assembly
Find the lock nut securing the faucet stem to the tank wall from the inside. Use your wrench to loosen and remove this nut completely. Pull the old faucet body outward through the mounting hole and note the order of any washers you remove.
Install and Secure the New Faucet
Insert the new faucet into the mounting hole, ensuring it sits straight and aligned. Slide the lock nut onto the stem from inside the tank and tighten it by hand first. Use your wrench to secure it firmly, but stop before applying excessive force that could crack the plastic.
Reconnect Hose and Seal Joint
Place the rubber gasket securely onto the nozzle of your new faucet. Push the water hose onto the nozzle until it seats fully with no visible gaps. Tighten the connection slightly with your fingers or a wrench to ensure a watertight fit.
Install Under-Sink Filtered Water Faucet
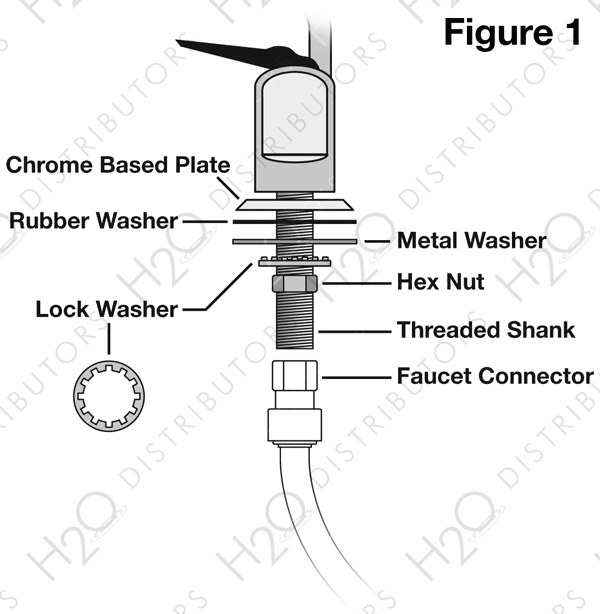
Replacing a faucet for reverse osmosis or filtration systems requires careful attention to washer placement. Proper sequencing here is the key to preventing leaks under your sink.
Remove Old Faucet Hardware
Disconnect the water supply line from the bottom of the old faucet, catching any drips in your container. Unscrew the mounting nut located under the sink that holds the faucet to the countertop. Lift the old unit away and discard it.
Configure Washer Stack Correctly
Arrange your washers in the proper order to create a reliable seal. Place the small rubber washer on the countertop surface first, followed by the faucet base, and then the large washer underneath. If space is tight under the sink, use only the small washer if the fit remains snug.
Secure Faucet with Lock Nut
Thread the plastic washer, lock washer, and mounting nut onto the faucet shank from below. Tighten the assembly until it feels secure, ensuring the faucet does not wobble. Avoid aggressive tightening, as this can deform the seals and cause leaks.
Handle Tubing Size Mismatches

Check if your new faucet has 3/8-inch fittings that are larger than your existing tubing. If they do not match, install a compression reducer to bridge the gap effectively. This small adapter ensures a compatible connection between the line and the faucet.
Cut Tubing Straight and Clean
Use a tubing cutter or sharp blade to make a perfectly straight cut on your supply line. Angled or jagged edges will prevent the fitting from sealing properly, leading to immediate leaks. Insert the reducer into the tubing and attach it to the faucet inlet.
Test Connections and Prevent Future Leaks
Verification is the final step to confirm your repair was successful. Proper testing ensures you do not face water damage later.
Restore Water and Power Sources
Slowly turn the water supply valve back on for under-sink systems or reinstall the water bottle for coolers. Plug the cooler back into the wall and flip the hot water switch to the on position. Watch for the red indicator light to confirm the heater is active.
Flush System and Prime Tanks
Press both levers on your cooler to flush air out of the lines. Drain two to three cups of water from the hot spigot to ensure the heating element is submerged. Run filtered water for thirty seconds to clear any debris from new tubing.
Inspect Every Connection for Drips
Check the faucet base, hose joints, and reducer fittings for any signs of moisture. If you see a drip, gently tighten the specific connection in small increments. Wait ten minutes and check again, as slow leaks may take time to appear.
Avoid Over-Tightening Components
Remember that a snug fit is sufficient for most plastic plumbing parts. Over-tightening is a common mistake that cracks housings and distorts seals. Use hand strength first and only apply minimal tool assistance if necessary.
Frequently Asked Questions About Changing Water Dispenser Faucets
How long does it take to change a water dispenser faucet?
Most people complete this repair in less than 15 minutes with basic tools. The process involves simple disconnection and reassembly steps that require no advanced plumbing skills.
Why is my new faucet still leaking after installation?
Leaks usually result from dirty mounting surfaces, missing gaskets, or over-tightened nuts. Ensure you cleaned the area thoroughly and followed the correct washer order before tightening.
Do I need a special tool to cut the water tubing?
You can use a dedicated tubing cutter or a sharp utility knife for this task. The most important factor is making a perfectly straight cut to ensure the fitting seals correctly.
What if the new faucet fittings do not match my old tubing?
Use a compression reducer to connect 3/8-inch fittings to smaller existing lines. This adapter bridges the size gap and allows for a secure, leak-free connection.
Can I reuse the old rubber gasket from my previous faucet?
It is best to use the new gasket provided with your replacement kit. Old gaskets often degrade or lose their shape, which can lead to future leaks and water damage.
Key Takeaways for Changing Your Water Dispenser Faucet
Successfully changing your water dispenser faucet requires careful preparation, correct part placement, and gentle handling of components. By disconnecting power, cleaning surfaces, and avoiding over-tightening, you can fix leaks quickly and safely.
Always test your work by running water and checking for drips before considering the job done. With these steps, you can restore your water system to full function and save money on service calls.



