

You press the button, but nothing comes out. No cold water, no hot water, just silence or a blinking light. If your Honeywell water dispenser is not working, this guide helps you diagnose and fix the issue quickly without calling a pro.
Most problems stem from simple causes like mineral buildup, loose hoses, or air locks that you can resolve in minutes. We will walk through specific steps to clear spouts, prime pumps, reset sensors, and thaw frozen reservoirs based on official troubleshooting data.
Clear Mineral Buildup from Spouts
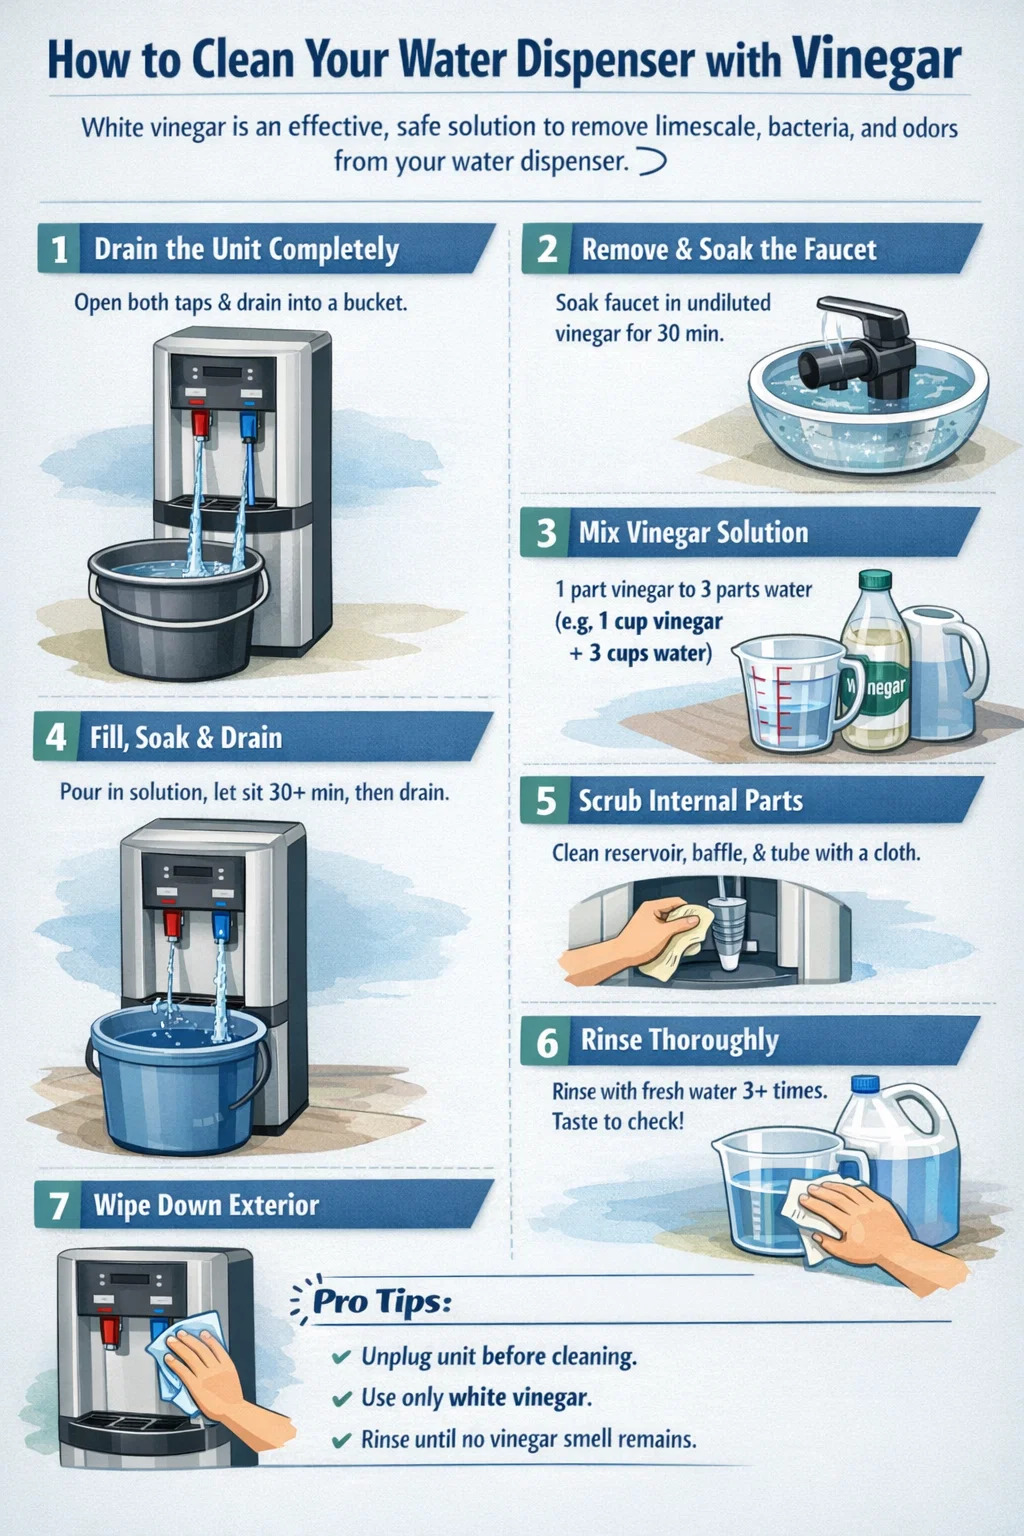
Mineral deposits and debris are the most common culprits when water stops flowing from one or both spouts. Hard water leaves calcium behind that blocks the tip over time.
Remove Calcium from Spout Tips
If you have a single spout model with no flow, the tip is likely clogged with scale.
1. Turn off and unplug the dispenser for safety.
2. Remove the spout tip if your model allows it.
3. Soak the tip in white vinegar for 15 to 20 minutes.
4. Rinse thoroughly under cool water until the smell is gone.
5. Reinstall the tip and test the flow.
Pro Tip: Perform this cleaning monthly if you live in a hard water area to prevent future blockages.
Soak Spigots to Remove Debris
Powdered flavorings or calcium can lodge inside the spigot mechanism itself.
* Remove the spigot from the cooler completely.
* Immerse it in distilled white vinegar for 20 minutes.
* Rinse until no vinegar scent remains.
* Reattach securely and check for leaks.
Replace spigots every few years if they show signs of cracking or persistent leaking.
Secure Loose Hose Connections
A loose or improperly seated hose is the leading cause of total water failure even if the pump sounds like it is running.
Check Probe and Pump Inlets
If the pump runs but no water moves, the hose may not be fully inserted at both ends.
1. Unplug the unit and remove the water bottle.
2. Locate the pickup tube inside the bottle compartment.
3. Push the tube firmly into the probe head.
4. Trace the hose to the pump inlet and ensure it is seated tight.
5. Wait 30 seconds before plugging the unit back in.
Visual Cue: A properly seated hose will not wiggle easily. If it pulls out with light tugging, it is not secure.
Eliminate Air Locks in the Line
Trapped air prevents water from flowing even with a full bottle.
* Remove the bottle from the unit.
* Open both hot and cold taps to release pressure.
* Drain any residual water inside the dispenser.
* Reinstall the bottle firmly and wait 30 minutes.
This process often resolves sudden stoppages immediately after changing bottles.
Prime the Water Pump Manually
After replacing a jug, the pump may lose its prime and fail to draw water.
Execute the Priming Procedure
Use this method when the pump runs but creates no suction.
1. Place a new water bottle on the floor in front of the unit.
2. Hold the pickup tube and submerge the end in the water.
3. Press and hold the internal door button that activates the pump.
4. Move the tube up and down while keeping it submerged.
5. Listen for the pump to kick in and draw water.
6. Insert the tube fully into the bottle and close the door.
Warning: Never run the pump dry for more than 30 seconds as it can overheat and fail permanently.
Realign the Internal Bottle Lever
A blinking amber light despite a full bottle usually indicates a misaligned internal lever.
Reset the Sensor Mechanism
The lever can shift when you remove the bottle, tricking the system into thinking it is empty.
1. Ensure the bottle is fully seated with the handle facing forward.
2. Locate the small plastic lever inside the bottle compartment near the base.
3. Push it firmly back until you feel a distinct click.
4. Close the door tightly to engage the safety switch.
Critical Check: The dispenser will not operate if the door is not fully latched. Always verify the door is closed.
Diagnose Pump Suction Failure

If the pump runs but draws no water after priming, the pump itself or a bypass hose may be faulty.
Test Pump Functionality
Rule out blockages by testing suction directly.
1. Unplug the unit and disconnect the hose from the probe.
2. Submerge the hose end in a cup of water.
3. Plug the unit back in with switches off.
4. Press the dispense button.
Results: If water is drawn, the pump works and the probe is clogged. If no water is drawn, the pump is likely defective.
Inspect Bypass Hoses
Some models have a short vent hose near the pump that may disconnect.
* Inspect all internal hoses for loose connections.
* Reconnect any detached lines especially on the top left side.
* Ensure no kinks or bends restrict flow.
Thaw a Frozen Water Reservoir
Exposure to cold temperatures can freeze the internal reservoir and stop all flow.
Follow Safe Thawing Steps
- Unplug the unit immediately.
- Remove the water bottle and spill-proof lid.
- Wait 4 to 6 hours for the ice to melt naturally.
- Wipe out excess water before restarting.
Temperature Adjustment: Turn the brass thermostat screw on the back one-quarter turn counter-clockwise to prevent re-freezing. If freezing persists, replace the thermostat.
Replace or Remove the Air Filter
A wet or clogged air filter can block airflow and disrupt normal dispensing operations.
Inspect Filter Condition
- Locate the air filter near the back or base of the unit.
- Remove it and check for saturation or dirt.
- Replace it if soaked or leave it out entirely for home use.
Note: Most home units do not require an air filter unless located in a dusty workshop environment.
Perform a Full Power Reset
Electrical glitches can freeze sensors or disable the dispensing mechanism entirely.
Reset the Control Board
- Unplug the dispenser from the wall.
- Wait 5 to 10 minutes for standard resets.
- Wait up to 24 hours if temperature sensors are involved.
- Plug back in and test the buttons.
This clears false error signals and resets the internal logic boards effectively.
Reset Heating and Cooling Systems
If water temperature is incorrect, perform a system reset.
* Cooling: Unplug for 30 minutes then wait 1 to 2 hours after replugging for chilling.
* Heating: Confirm the red switch on the back is ON before resetting power.
Inspect for Leaks and Damage
Leaks can shut down operation or indicate deeper plumbing issues within the unit.
Identify Leak Sources
- Check the bottle for cracks and replace if damaged.
- Tighten the connector between the paddle and tap if leaking from the lever.
- Empty the internal drip tray if water pools underneath.
Mains-Fed Units: Turn off the blue isolation valve on the back immediately if a leak persists.
Verify Bottle Installation
Improper jug seating breaks the water seal and stops flow instantly.
Ensure Proper Jug Placement
- Push the bottle straight down until it clicks into place.
- Make sure the pickup tube goes directly into the bottle cap.
- Keep the jug upright to maintain the vacuum seal.
Pro Tip: Rotate the bottle slightly when removing it to prevent the internal lever from misaligning.
Address Mains-Fed Specific Issues
Units connected directly to plumbing rely on external valves for water flow.
Restore Flow to Mains Dispensers
- Confirm the unit is plugged in and powered.
- Check the blue water valve on the back and turn it to ON.
- Ensure the isolation tap on the wall pipe is open.
- Press the reset button if your model has one.
No flow after this suggests a blockage or valve failure requiring a technician.
Diagnose Cooling System Failures

If water is not cold, the issue may involve the compressor or refrigerant.
Spot Compressor Problems
Warning Signs:
* Water warming up gradually.
* Unit is silent when it should be cooling.
* Hissing noise or oily residue indicating a leak.
Clean condenser coils on the back with a soft brush to improve efficiency.
Reset the Cooling System
- Unplug for 24 hours to allow full system reset.
- Check for visible leaks or damage.
- Plug back in and wait 1 to 2 hours.
- Test water temperature.
If still not cooling, the compressor or refrigerant needs professional repair.
Prevent Future Dispenser Issues
Regular maintenance keeps your Honeywell water dispenser not working scenarios to a minimum.
Monthly Maintenance Checklist
- Clean spouts with a vinegar soak.
- Inspect hoses for kinks or cracks.
- Wipe down exterior and drip tray.
- Check bottle lever alignment after each change.
When to Replace Components
Replace the pump if priming fails, the thermostat if freezing occurs, or spigots if cracked. Most parts are available from appliance suppliers.
Know When to Call a Professional
Some issues are not safe or practical to fix yourself without specialized tools.
Call a Technician If:
- Pump fails after priming and testing.
- You suspect a refrigerant leak.
- Compressor makes loud grinding noises.
- Electrical issues like burning smells occur.
- Problem persists after all troubleshooting steps.
Warranty Note: DIY repairs may void your coverage. Check your warranty status before opening the unit.
Frequently Asked Questions About Honeywell Water Dispensers
Why is my Honeywell dispenser blinking amber with a full bottle?
This usually means the internal lever is misaligned. Push the lever inside the bottle compartment back into place until it clicks. Ensure the door is fully closed.
How do I prime the pump after changing the bottle?
Submerge the pickup tube in water, hold the internal door button, and move the tube up and down until suction starts. Then insert the tube fully and close the door.
What causes no water flow even when the pump runs?
A loose hose connection at the probe or pump inlet is the most common cause. Check both ends of the hose and push them in firmly.
How do I fix a frozen water reservoir?
Unplug the unit and remove the bottle. Let it sit for 4 to 6 hours to thaw. Adjust the thermostat screw counter-clockwise to prevent recurrence.
Can I remove the air filter from my dispenser?
Yes, most home units do not need an air filter. You can remove it or leave it out if it becomes wet or clogged with dust.
Why is my water not getting cold?
Check if the condenser coils are dirty or if the compressor is running. Reset the unit by unplugging it for 24 hours. If issues persist, the compressor or refrigerant may be faulty.
Key Takeaways for Fixing Your Honeywell Water Dispenser
Most Honeywell water dispenser not working issues resolve by clearing spout blockages, reseating loose hoses, or realigning the internal bottle lever. Start with these simple checks before assuming the pump or compressor has failed.
Regular maintenance like monthly vinegar soaks and proper bottle installation prevents most flow interruptions. If basic troubleshooting and power resets do not restore function, contact a professional technician to avoid safety risks or voiding your warranty.


