

Few things are more frustrating than pressing the cold water button on your Glacier Bay water dispenser and getting warm water in return. This common issue usually traces back to small electrical parts rather than a broken compressor. The most frequent culprits are the starter relay and overload protector, which help the compressor start and stay protected during operation.
This guide walks you through how to fix a Glacier Bay water dispenser not cooling, with step-by-step instructions for the most common causes. You will learn how to restore cold water for under $10, identify when a simple repair will work, and recognize situations that require professional service.
Confirm Cooling Failure Symptoms
Before opening the unit, verify the signs of a true cooling failure. Rushing into repairs without confirming symptoms can lead to wasted time and money.
Listen for Compressor Hum
A faint hum from the back of the unit means the compressor is receiving power but failing to start fully. This sound points directly to a faulty starter relay or overload protector.
- No sound at all? Check the power supply first.
- Loud buzzing or repeated clicking? Could indicate a seized compressor or electrical short.
Check Indicator Lights and Buttons
If the cooling light won’t turn on and the dispensing buttons are unresponsive, the issue likely affects shared electrical components. The hot water function may also fail when the control board isn’t receiving proper power.
Test Water Temperature
Place a glass under the cold tap after 24 hours of operation. If the water reads above 60°F, cooling is not working properly. A functioning unit should reach 47–50°F within 24 hours.
Fix the Starter Relay and Overload Protector

This repair resolves the majority of no-cool issues when you hear a faint hum from the compressor area.
Replace Faulty Starting Components
The starter relay delivers the initial jolt needed to start the compressor. The overload protector cuts power if the compressor overheats. When either fails, cooling stops even though the unit has power.
Tools and Parts Needed
- Replacement starter relay matched to your model
- Replacement overload protector
- Small screwdriver
- Needle-nose pliers
- Safety gloves (optional)
Total cost: Under $10 for both parts.
Access the Compressor
Remove the back panel that covers the cooling coils.
- Unscrew the panel from the rear of the unit.
- Gently bend the coils aside to expose the compressor.
- Some models have an access door while others require full panel removal.
Remove the Compressor Cover
Locate the small retaining clip on the side of the cover.
- Use a screwdriver to release the clip.
- Pull the cover off and keep the clip for reassembly.
Disconnect the Wires
Two wires connect to the relay and protector assembly.
- The red wire attaches to the overload protector on top.
- The white wire connects to the starter relay on the bottom.
Carefully unplug both wires. The components will come out with the wires still attached.
Remove Old Components
Unplug the three-pin connector from the overload protector.
- Note the pin layout since some models vary between center pin and side terminal designs.
- Confirm your replacement part matches your specific configuration.
Install New Overload Protector
Insert the new protector into the socket.
- Ensure it clicks firmly into place.
- If the new model has a side terminal, verify compatibility with your unit before proceeding.
Attach New Starter Relay
Align the two-pin relay with the mounting holes.
- Press firmly until it seats completely.
- Reconnect the white wire to the relay.
The relay and protector should now sit “sandwiched” together in a tight and secure configuration.
Reconnect Red Wire
Attach the red wire to the top terminal of the overload protector.
- Use needle-nose pliers to tighten the connection.
- A loose wire can cause future failure, so verify a snug fit.
Reassemble and Test
- Reattach the compressor cover by rotating it into place and securing the clip.
- Replace the back panel and screws.
- Return the unit to its upright position.
Power on the unit and wait 30 to 60 seconds.
Expected Results
- The lower left indicator light turns blue, confirming cooling is active.
- Cold water reaches approximately 47.8°F, close to the target of 47°F.
- Hot water function returns and buttons respond normally.
Troubleshoot Power and Electrical Supply
If the unit is completely silent or all lights are dead, the issue may be simpler than a failed compressor.
Test the Outlet and Plug
Ensure the dispenser is plugged into a working outlet.
- Plug in a lamp or phone charger to confirm power.
- Check the circuit breaker or fuse box and reset if tripped.
Inspect the Power Cord
Look for fraying, kinks, or burn marks along the cord.
- A damaged cord can interrupt power to internal components.
- Replace the cord immediately if any damage is visible.
Verify Internal Fuses
Some models include an internal fuse near the power entry point.
- Use a multimeter to test continuity.
- Replace only with the exact fuse rating specified by the manufacturer.
Clean the Condenser Coils
Dust buildup reduces cooling efficiency and can mimic component failure. Regular maintenance prevents many cooling problems.
Locate the Coils
Coils are typically found on the back or bottom of the unit.
- Access may require removing a rear panel or carefully lifting the dispenser.
Clean With Vacuum or Brush
Use a soft brush or vacuum nozzle to remove dust and debris.
- Do not bend or damage the delicate fins.
- Clean every 6 months to maintain peak efficiency.
Pro Tip: A coil brush from any hardware store works best. It is gentle yet effective at removing stubborn dust.
Diagnose Thermostat and Evaporator Fan
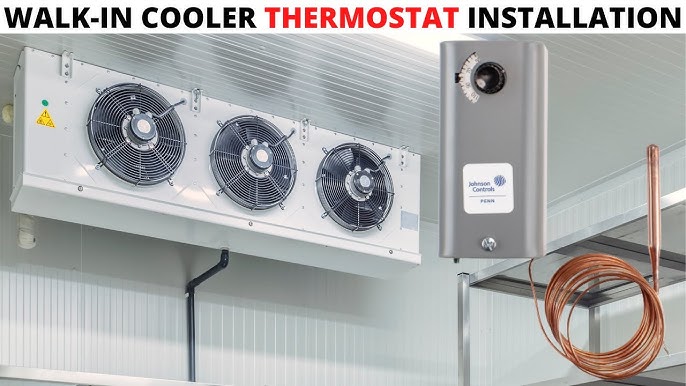
If the compressor runs but cooling remains weak, the issue may lie elsewhere in the system.
Test the Thermostat
The thermostat signals the compressor to turn on when water becomes warm.
- Use a multimeter to check for continuity.
- If no continuity exists, replace the thermostat.
Warning: Do not bypass the thermostat. Doing so can cause serious compressor damage.
Check Evaporator Fan Operation
This fan circulates cold air around the water tank.
- Open the cooling compartment.
- Listen for fan noise when the unit runs.
- If silent, check for obstructions or test the motor with a multimeter.
No fan spin? Replace the fan assembly, which usually requires removing just 4 screws.
Fix Glacier Bay BY570 Dispenser Button Issues
If one side of the dispenser doesn’t work while the other operates normally, the problem is likely mechanical rather than electrical.
Identify Missing Actuator Lever
The actuator is a small 90-degree plastic piece that connects the button to the water valve.
- If missing, pressing the button does nothing.
- It often pops out during cleaning or routine maintenance.
Disassemble Without Full Front Removal
You don’t need to remove the entire front panel to access this part.
Remove Housing Screws
- Unscrew all visible screws on the cooler housing.
- Hand-tighten them back in temporarily to keep track of each piece.
Swing the Cover Aside
- Gently move the housing to the side.
- Copper lines are flexible and can bend slightly without damage.
Cut Zip Ties on Wiring Harness
Multiple zip ties bind the harness and limit movement.
- Cut all ties to free up slack.
- This step is crucial since the brown ground wire is especially tight.
Pro Tip: Replace the original ground wire cap with a standard orange plastic wire cap. These are easier to find and more durable.
Break or Cut Plastic Tabs
Two 1/16-inch plastic tabs on each side lock the top panel in place.
- A small snap is normal when lifting since tabs break on purpose.
- For future repairs, use a razor blade to cut both tabs completely during first disassembly.
- This allows easy top-panel access without full disassembly later.
Reinstall the Actuator
- Find the correct slot on the valve side.
- The actuator fits only one way, so push it in firmly.
- No glue is needed since a loose fit allows future replacement.
Now, pressing the lever will lock into place and trigger water flow properly.
Reassemble the Unit
- Lower the top panel until it snaps back into place.
- Reattach all screws securely.
- Re-zip-tie copper lines if desired, though this is not required due to ample slack.
- Replace the ground wire cap with an orange plastic cap.
Avoid Refrigerant System Repairs
Low refrigerant causes poor cooling, but you should never attempt to refill it yourself.
Signs of Low Refrigerant
- Compressor runs constantly but cooling remains weak.
- Frost or ice appears on copper lines.
- Hissing or bubbling sounds come from the cooling system.
Why DIY Is Not Safe
- Refrigerant handling requires EPA certification.
- Specialized tools and gauges are necessary.
- Puncturing lines can release hazardous gases.
Call a Professional
If you suspect refrigerant loss, contact a certified technician. This is a sealed system repair and not a DIY job.
Replace the Compressor (Last Resort)
If all other fixes fail, the compressor itself may be dead.
Signs of Compressor Failure
- No hum, no vibration, and no power to the unit.
- Overheating smell or burn marks on the casing.
- Multimeter shows no continuity across terminals.
Replacement Challenges
- Compressors are model-specific and expensive.
- Requires soldering, refrigerant recovery, and vacuum sealing.
- Labor often exceeds the cost of a new unit.
Cost-Benefit Decision
A new Glacier Bay dispenser costs $200–$400. A compressor replacement can run $150–$300 in labor and parts. In most cases, replacement is more cost-effective than repair.
When to Call a Technician
Seek professional help if any of these situations apply:
- Refrigerant recharge is needed.
- Compressor shows no signs of life after component replacement.
- Electrical faults persist after relay and protector swap.
- Internal wiring is burned or melted.
Technicians have the tools and training to safely handle sealed systems and high-voltage components.
Quick Fix Flow for Non-Cooling Glacier Bay Dispensers

- Verify power and outlet by plugging in a test device and resetting breakers if needed.
- Listen for compressor hum. Hum present means replace the starter relay and overload protector. No sound means check the power cord, fuse, and internal wiring.
- Clean condenser coils every 6 months to prevent efficiency loss.
- Test thermostat and fan using a multimeter for continuity and replace if faulty.
- Inspect BY570 actuator lever. A missing lever means no water flow, so reinsert firmly without glue.
- Avoid refrigerant repairs and leave that work to certified professionals.
- Replace the unit if the compressor is seized, since repair costs often exceed replacement.
Frequently Asked Questions About Glacier Bay Water Dispensers Not Cooling
Why is my Glacier Bay water dispenser not cooling but still has power?
A Glacier Bay water dispenser not cooling while still receiving power usually points to a failed starter relay or overload protector. These small parts help the compressor start and stay protected. When they fail, the compressor hums faintly but never engages fully, leaving water warm and buttons unresponsive.
How much does it cost to fix a Glacier Bay water dispenser that won’t cool?
The most common repair, replacing the starter relay and overload protector, costs under $10 total. You only need a small screwdriver and needle-nose pliers. More complex repairs involving the compressor or refrigerant system can cost $150–$300, which often exceeds the price of a new unit.
Can I replace the starter relay on my Glacier Bay dispenser myself?
Yes, you can replace the starter relay yourself with basic tools. The process involves removing the back panel, disconnecting two wires, swapping the relay and overload protector, and reassembling the unit. The entire repair takes about 30 minutes and requires no special certification.
How do I know if my water dispenser compressor is bad?
A bad compressor typically shows no hum, no vibration, and no power response. You may also notice an overheating smell or burn marks on the casing. A multimeter test across the terminals showing no continuity confirms compressor failure. In most cases, replacing the unit is more cost-effective than compressor replacement.
Why is only one side of my Glacier Bay BY570 dispenser working?
When only one side works on a BY570 model, the problem is usually a missing or dislodged actuator lever. This small 90-degree plastic piece connects the button to the water valve. It often pops out during cleaning and can be reinserted firmly without glue, restoring full function immediately.
How often should I clean the condenser coils on my Glacier Bay dispenser?
Clean the condenser coils every 6 months to maintain cooling efficiency. Dust buildup restricts airflow and forces the compressor to work harder, which can lead to component failure. Use a soft brush or vacuum nozzle and avoid bending the delicate fins during cleaning.
Key Takeaways for Fixing Your Glacier Bay Water Dispenser
A Glacier Bay water dispenser not cooling is usually a simple and affordable fix. In most cases, replacing the starter relay and overload protector for under $10 restores full function. For BY570 models, a missing actuator lever is a common but easy repair that requires no special tools.
Start with power checks and coil cleaning before moving to component replacement. Avoid refrigerant work and major compressor repairs unless you hold proper certification. With basic tools and this guide, you can get cold water flowing again without calling a technician.


