

You press the lever on your Amana refrigerator, but no water comes out. This frustrating silence often points to a frozen line, a clogged filter, or a simple setting you missed. Many homeowners panic and call a technician immediately, yet most causes of an Amana water dispenser not working are fixable with basic tools.
This guide walks you through every step to restore your water flow quickly. You will learn how to check pressure settings, thaw frozen tubes, and test electrical parts like switches and valves. Follow these proven methods to diagnose the issue and get your dispenser running again today.
Verify Control Lock and Sabbath Mode Settings

Before you grab a toolbox, check if a safety feature has disabled your dispenser. Many users mistake these settings for mechanical failures because the unit appears completely dead.
Disable the Control Lock Feature
The Control Lock prevents accidental dispensing during cleaning or keeps children from playing with the machine.
* Look for a lock icon on your display panel.
* Press and hold the Lock button for 3 to 10 seconds.
* Wait for the icon to disappear before trying to dispense water again.
Some models require pressing two buttons simultaneously. Consult your specific owner manual if the single-button method fails.
Exit Sabbath Mode
Sabbath Mode turns off all electronic displays and functions for religious observance.
* Check if all lights on the panel are off.
* Hold the Sabbath Mode button for 3 seconds to deactivate.
* Unplug the refrigerator for one minute if the button press does not work.
Your dispenser will remain unresponsive until you successfully exit this mode.
Test Water Supply Pressure and Lines
:max_bytes(150000):strip_icc()/ice-maker-refrigerator-water-line-2718666-06-af39527441ae4d79903172ae4d450e8b.jpg)
Low water pressure is a leading cause of dispenser failure. Your Amana unit requires specific pressure levels to push water through the filter and valve.
Measure Water Pressure
The water inlet valve needs at least 20 psi to open correctly.
1. Turn off the water supply valve behind the fridge.
2. Disconnect the water line from the refrigerator.
3. Place the line end into a bucket and open the valve briefly.
4. Observe the flow strength.
A strong, steady stream means your pressure is good. A weak trickle indicates a supply issue that prevents the valve from opening.
Inspect Supply Line Conditions
Even with good house pressure, physical barriers can stop flow entirely.
* Ensure the shut-off valve is fully open.
* Check for kinks or pinches in the tubing behind the unit.
* Verify you are using ¼-inch O.D. copper or PEX tubing.
* Avoid using self-piercing saddle valves as they clog easily.
Leave a service loop of tubing behind the fridge to prevent strain when moving the unit.
Inspect and Replace the Water Filter

A clogged filter restricts flow more often than any other component. Regular maintenance prevents most water dispensing issues.
Follow Replacement Schedules
Replace your water filter every 6 months or after 300 gallons of use.
* Watch for slow flow rates or bad tastes.
* Heed indicator lights on your control panel.
* Use everydrop® filters to ensure proper fit and sealing.
Generic filters often fail to seal correctly, causing leaks or flow restrictions.
Perform the Filter Removal Test
You can isolate the filter as the problem with a simple test.
1. Remove the water filter from its housing.
2. Attempt to dispense water without the filter installed.
3. Reinstall the filter if water flows, ensuring it clicks into place.
Run two to three full glasses of water after installing a new filter to clear air and carbon particles.
Check Filter Housing Integrity
Inspect the housing unit for cracks or damaged O-rings. A broken housing prevents a proper seal even with a new filter. Replace the housing if you see visible damage or leaks around the base.
Clear a Frozen Water Line in the Door
Water lines running through the freezer door often freeze, especially in cold garages or over-cooled units.
Diagnose a Frozen Tube
Listen for a humming sound when you press the dispenser lever.
* Disconnect the water line at the bottom door hinge.
* Try to dispense water or blow air through the line.
* If water flows from the valve but not the door line, the tube is frozen.
This issue often presents as intermittent flow that stops and starts as ice melts and refreezes.
Thaw the Line Safely
Never use boiling water or sharp objects to clear the ice.
* Use a hair dryer on a low heat setting.
* Apply a heat gun on low to the dispenser area.
* Wrap warm towels around the door hinge.
Focus your heat on the nozzle and the hinge entry point. Allow 15 to 30 minutes for the ice to melt completely.
Prevent Future Freezing
Adjust your freezer temperature to stay between 0°F and 10°F.
* Avoid placing the fridge in unheated spaces.
* Minimize how long you leave the door open.
* Use a thermometer to verify your actual freezer temperature.
Overcooling your freezer significantly increases the risk of line freezing.
Test the Dispenser Switch and Actuator
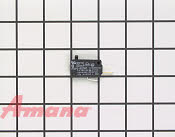
If you hear no sound when pressing the lever, the switch or actuator may be faulty. These components trigger the entire dispensing sequence.
Inspect the Dispenser Actuator
The actuator is the plastic piece behind the paddle that trips the internal switch.
* Look for cracks or warping on the plastic.
* Press the paddle to feel for a firm click.
* Replace the actuator if it feels mushy or broken.
A damaged actuator cannot physically engage the micro switch to start water flow.
Test the Micro Switch
Use a multimeter to verify the switch sends a signal when pressed.
1. Unplug the refrigerator for safety.
2. Remove the dispenser cover to access the switch.
3. Set your multimeter to Ohms or Continuity mode.
4. Touch probes to the switch terminals while pressing the button.
The meter should show infinite resistance when unpressed and 0–1 ohm when pressed. Replace the switch if the reading does not change.
Test the Water Inlet Valve

The water inlet valve opens to let water into the fridge when signaled by the control board.
Locate and Access the Valve
Find the valve at the back of the refrigerator where the water line connects. It contains solenoids for the dispenser, ice maker, and filter.
Test the Solenoid Coil
A faulty solenoid will not open the valve even with good pressure.
1. Disconnect the wire harness from the valve.
2. Set your multimeter to Ohms.
3. Touch probes to the dispenser solenoid terminals.
4. Check for a reading between 100 and 500 ohms.
No reading or a value far outside this range means the coil has failed. You must replace the entire valve assembly.
Clean or Replace the Valve
Sometimes debris clogs the small screen inside the valve.
* Remove the valve and inspect the inlet screen.
* Rinse the screen under running water to clear particles.
* Install a new valve if cleaning does not restore flow.
Always use OEM or Amana-recommended parts for reliable performance.
Check the Control Board Functionality
The control board acts as the brain, sending power to the valve when you press the switch.
Identify Board Failure Symptoms
Look for signs that the entire system has lost logic control.
* No lights appear on the display panel.
* The dispenser makes no sound at all.
* Other functions like the ice maker also fail.
Diagnose the Control Board
Test individual components like the switch and valve first.
* Confirm the switch sends a signal when pressed.
* Verify the valve receives power during activation.
* Replace the board if inputs work but outputs do not.
Take photos of wire connections before removing the board to ensure correct reinstallation. Match the exact part number for your model.
Fix Intermittent Dispenser Problems
Intermittent issues where the dispenser works sometimes but fails later suggest loose connections or partial blockages.
Identify Common Causes
- Loose wiring at the switch or valve terminals.
- Corroded connectors that lose contact over time.
- A solenoid failing internally after vibration.
- A water line that refreezes quickly after thawing.
Troubleshoot Intermittent Faults
Inspect all wire connections and tighten any loose terminals. Test the switch repeatedly to ensure consistent continuity. Apply heat to the door line to rule out recurring freezing. Replace the inlet valve if it only works after physical shock.
Address Water Taste and Odor Issues
Poor water quality can make a functioning dispenser seem broken. Bad tastes often stem from old filters or plumbing issues.
Resolve Taste Problems
- Replace old filters that have exceeded their lifespan.
- Flush new plumbing lines by discarding the first three ice batches.
- Use copper or PEX supply lines instead of rubber or vinyl.
- Store food in airtight containers to prevent odor transfer.
Clean your ice bin monthly to prevent bacterial growth and bad smells.
Prevent Future Dispenser Failures
Regular maintenance keeps your Amana water dispenser working smoothly for years.
Follow a Maintenance Checklist
- Replace the water filter every 6 months.
- Check supply lines for kinks after moving the fridge.
- Maintain freezer temperatures between 0°F and 10°F.
- Clean the dispenser nozzle with vinegar monthly.
- Inspect door seals for ice buildup regularly.
Know When to Call a Professional
Seek expert help if you are uncomfortable testing electrical components. Contact a technician if the main control board needs replacement or if the water line is frozen deep inside the door structure. Persistent leaks after repair attempts also warrant professional service.
Frequently Asked Questions About Amana Water Dispensers
Why is my Amana water dispenser not working after changing the filter?
Air trapped in the system or an improperly seated filter usually causes this. Remove the filter and reinstall it until it clicks firmly. Run two to three gallons of water to flush air and carbon particles from the new filter.
How do I know if my water line is frozen?
Listen for a humming sound when pressing the lever with no water flow. Disconnect the water line at the door hinge and try dispensing. If water flows from the valve but not the door line, the tube inside the door is frozen.
What water pressure does an Amana dispenser need?
Your refrigerator requires a minimum of 20 psi to operate correctly. Low pressure prevents the inlet valve from opening fully. Test your supply line flow into a bucket to verify you have a strong, steady stream.
How often should I replace my Amana water filter?
Replace your filter every 6 months or after dispensing 300 gallons of water. Neglecting this schedule leads to slow flow, bad tastes, and potential damage to the ice maker.
Can a locked control panel stop water dispensing?
Yes, the Control Lock feature disables the dispenser to prevent accidental use. Look for a lock icon on your display and hold the Lock button for 3 to 10 seconds to unlock the system.
Key Takeaways for Fixing Your Amana Water Dispenser
Most cases of an Amana water dispenser not working stem from simple issues like frozen lines, clogged filters, or low water pressure. You can solve ninety percent of these problems by checking your settings, testing your supply pressure, and replacing old filters. Always start with the easiest fixes before moving to electrical testing.
Take action today by checking your control lock status and inspecting your water filter. These quick checks often restore flow immediately without needing tools. If basic steps fail, use a multimeter to test your switches and valves systematically. Your dispenser will be running smoothly again with patience and the right approach.


