A missing air gap on your water softener drain could allow sewage to siphon directly into your family’s drinking water supply. This specific failure point is why plumbing codes strictly mandate an open physical break between your softener and the waste line.
This guide details the exact height requirements, three approved installation methods, and critical safety checks you need for a compliant water softener air gap installation. You will learn how to choose the right fittings, avoid common inspection failures, and test your system to ensure total protection against backflow.
Decode the Air Gap Requirement for Safety
Your water softener discharges brine and sediment during backwash cycles multiple times each month. If a clog occurs in your main sewer line or sudden pressure drops happen, negative pressure can pull wastewater backward into your softener tank. This phenomenon, known as back siphonage, contaminates your entire potable water system with sewage and bacteria.
Mechanical check valves often fail over time due to worn seats or debris. An air gap provides a “no-fail” barrier because it has no moving parts to break. Even if every mechanical valve in your home fails, this physical open space prevents dirty water from ever reaching your clean water lines.
Why Mechanical Valves Are Not Enough
Relying solely on internal check valves leaves your home vulnerable to mechanical failure.
* Moving parts wear out and get stuck open.
* Debris can prevent the valve from sealing completely.
* Negative pressure can overcome weak spring tension.
The Physics of Back Siphonage
Back siphonage occurs when suction pulls non-potable water upstream. Without an air gap, this suction draws contaminated drain water straight into your kitchen faucet or shower head. The open gap breaks this suction instantly by introducing air into the line.
Meet Minimum Height Standards for Compliance
Plumbing codes dictate precise measurements to ensure your water softener air gap installation passes inspection. The distance between the drain outlet and the flood rim of the receiving fixture is not a suggestion but a legal requirement. Getting these dimensions wrong voids your protection and violates local building codes.
Calculate the Required Gap Distance
The rule states the gap must be at least two times the diameter of the indirect drain line or a specific minimum height, whichever is greater.
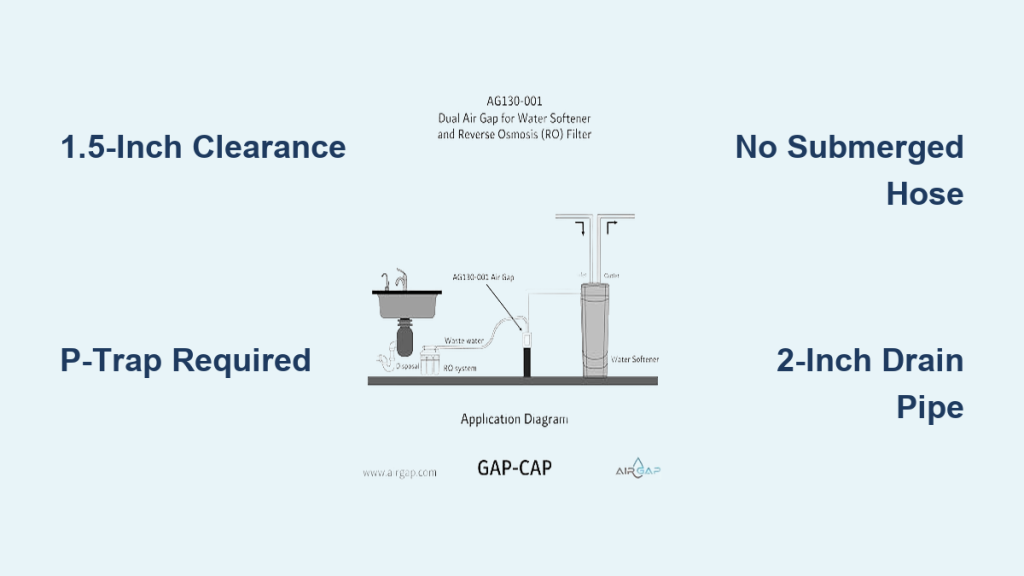
* Whole House Systems: Minimum of 1.5 inches above the flood rim.
* Point-of-Use Systems: Minimum of 1 inch above the flood rim.
* Diameter Rule: Always measure twice the width of your discharge hose.
Apply Dimensions to Your Setup
If your softener uses a 5/8-inch drain hose, two times that diameter equals 1.25 inches. However, since the code requires a minimum of 1.5 inches for whole-house units, you must maintain the larger 1.5-inch clearance. Never install the discharge point lower than this threshold, even if space feels tight.
Use a Dedicated Air Gap Fitting for Permanent Setup
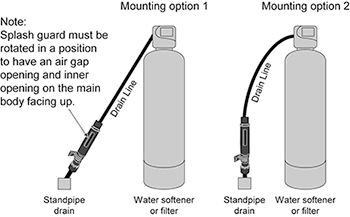
The most reliable method for a water softener air gap installation involves a specialized PVC fitting designed for this exact purpose. These fittings feature a threaded port for your softener hose and a barb for secondary drains like dehumidifiers. They provide a clean, professional look that inspectors appreciate.
Install on 1.5-Inch PVC Pipe
Cut your vertical drain stack at a height of 6 to 12 inches above the floor. Slide the dedicated fitting over the pipe end and secure it with PVC primer and cement. Ensure a P-trap sits below the fitting to block sewer gases from entering your utility room.
Adapt for 2-Inch Drain Lines
Most dedicated fittings do not slip directly over 2-inch pipe without an adapter.
1. Obtain a 2-inch PVC coupling.
2. Insert the air gap fitting inside the coupling.
3. Glue the assembly together before attaching it to the main drain line.
4. Verify the deflector chamber points downward for proper flow.
Build a Custom Air Gap with Standard Fittings

When a pre-made unit is unavailable, you can fabricate a compliant air gap using standard plumbing components. This DIY approach requires careful assembly to ensure the geometry prevents splashing while maintaining the required open space.
Gather Required Plumbing Components
You will need specific parts to construct the deflector system correctly.
* 1.5-inch to 3/4-inch reducer bushing
* 3/4-inch 45-degree and 90-degree street elbows
* Short section of 3/4-inch PVC pipe (3 to 4 inches)
* 1.5-inch brass coupler
* PVC cement, primer, and Teflon tape
Assemble the Deflector System
Glue the reducer bushing into your main drain line first. Attach the 45-degree elbow followed by a short vertical pipe and the 90-degree elbow pointing up. Cut a notch halfway down a piece of 3/4-inch PVC to act as a deflector and glue it in place. Finally, cut a one-third notch into the brass coupler, wrap threads with Teflon tape, and screw it onto the top. This notch allows air entry while directing flow down.
Route Drain Lines to Existing Fixtures Safely

You may discharge softener water into a laundry sink, standpipe, or floor drain if you cannot hard-pipe a dedicated fitting. The key is ensuring the hose end never touches the water in the fixture. This indirect method relies on maintaining the air gap manually through proper positioning.
Connect to a Laundry Sink
Run the drain hose so it terminates at least 1.5 inches above the sink rim. Secure the hose with a stainless steel clamp to prevent it from slipping. Be aware that if someone plugs the sink and fills it with water, the hose end could become submerged, bypassing the air gap protection.
Drain Into a Sump Pit or Floor Drain
Hang the discharge hose well above the maximum water level expected in the pit. Maintain a downward slope of 1/4 inch per foot to prevent water from pooling in the line. Secure the hose to a wall bracket so it cannot fall into the standing wastewater during operation.
Optimize Drain Line Performance and Flow
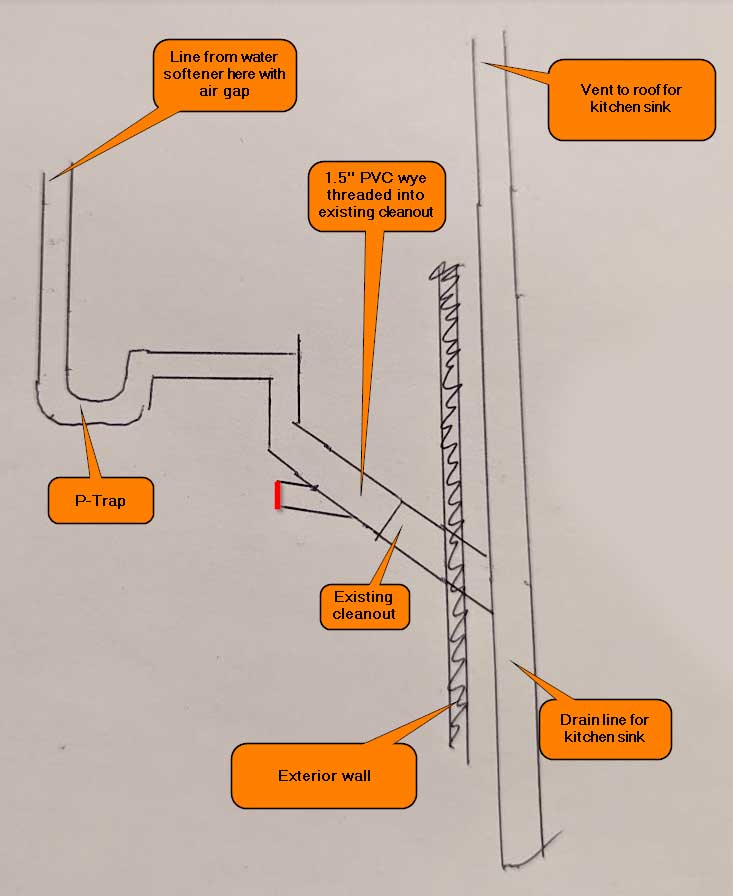
Proper pipe sizing ensures your softener can discharge water quickly enough during regeneration. If the drain line is too small or has too many bends, back-pressure can stop the backwash cycle. This leads to resin fouling and reduced softening capacity over time.
Size the Pipe for Maximum Flow
Use 2-inch PVC pipe for the main drain run whenever possible. Softeners can release up to 7 gallons per minute during backwash. A 1.5-inch line may struggle with this volume, especially if the run is long. If you must use 1.5-inch pipe, keep the run under 10 feet and minimize bends.
Minimize Bends and Maintain Slope
Every 90-degree elbow adds resistance to the flow. Use 45-degree bends where direction changes are needed to keep water moving smoothly. Ensure horizontal sections slope downward at 1/4 inch per foot. This prevents standing water that can breed bacteria and cause foul odors in your utility area.
Avoid Flexible Hoses in Permanent Runs
Flexible tubing is acceptable only for the final 2 to 3 feet connecting to the air gap. Do not use flexible hose for the entire drain line run. Flexible materials collapse over time, kink easily, and degrade under heat or UV exposure. Rigid PVC ensures long-term reliability and quieter operation.
Install Critical Support Components

A complete water softener air gap installation includes more than just the gap itself. You must include specific components to handle sewer gases and pressure equalization. Skipping these parts can lead to smelly utility rooms or gurgling drains.
Add a P-Trap to Block Sewer Gases
Install a P-trap directly below the air gap fitting. This U-shaped pipe holds a small amount of water that creates a seal against methane and hydrogen sulfide gases. Without this trap, sewer smells will enter your home freely through the drain line.
Include a Vent to Prevent Airlocks
Wastewater needs air to flow smoothly. Install a vent pipe that rises vertically above the air gap or connects to your main stack within 5 feet. This vent equalizes pressure, preventing the water from gurgling or draining slowly during high-volume backwash cycles.
Use a Check Valve as Secondary Protection
While the air gap is your primary defense, a check valve adds an extra layer of security. Install it upstream of the air gap on the softener’s drain line. It stops minor reverse flow but cannot replace the air gap since mechanical parts can still fail.
Avoid Common Installation Errors
Many DIY installations fail because of simple mistakes that compromise the entire system. Avoiding these errors ensures your water softener air gap installation remains effective and code-compliant for years to come.
Never Submerge the Drain Line
Do not push the discharge hose deep into a standpipe or floor drain. If the end of the hose sits below the water surface, you have eliminated the air gap. In a pressure drop event, contaminated water will siphon directly into your softener.
Don’t Skip the 1.5-Inch Clearance
Some installers route the hose just an inch above a sink to save space. This violates code for whole-house systems. The 1.5-inch minimum is non-negotiable. Measure carefully from the hose outlet to the highest possible water level in the fixture.
Prevent Standing Water with Proper Slope
A flat drain line traps brine and water. This stagnant fluid promotes bacterial growth and corrosion. Always maintain the recommended downward pitch. If your layout requires water to rise, you must use a pump system rather than relying on gravity.
Test and Maintain the System
Once installed, verify that your system works correctly before considering the job done. Regular maintenance keeps the air gap clear and functional. Neglecting these steps can lead to unexpected failures during a critical backwash cycle.
Run a Manual Regeneration Test
Initiate a manual backwash cycle immediately after installation. Watch for smooth flow through the gap with no spraying. Check that the drain empties completely without backing up. Inspect all glued joints for leaks while the system is under full flow.
Inspect Annually for Obstructions
Debris and mineral scale can build up in the air gap notch over time. Once a year, disconnect the hose and clean the gap with a small brush or vinegar solution. Verify the P-trap still holds water by running a quart of water through it to refill if necessary.
Monitor for Odors or Slow Drainage
Sewer smells indicate a dry or cracked P-trap. Gurgling sounds suggest poor venting. Both issues compromise safety and should be addressed immediately. Replace brittle PVC or corroded brass components as soon as wear becomes visible.
Frequently Asked Questions About Water Softener Air Gaps
Can I use a check valve instead of an air gap?
No, plumbing codes do not allow check valves to replace air gaps. Mechanical valves can fail, whereas an air gap provides a physical barrier that cannot fail. You may use a check valve as secondary protection, but the air gap is mandatory.
What happens if the air gap is too low?
If the gap is less than 1.5 inches for whole-house systems, it violates code and risks contamination. Low installation allows back siphonage to occur if the drain line floods, pulling sewage into your drinking water supply.
How do I stop water from spraying out of the air gap?
Spraying usually means the internal deflector is misaligned or the flow rate is too high for the fitting size. Adjust the deflector angle or ensure you are using a 2-inch drain line to handle the volume properly.
Do I need a P-trap if I have an air gap?
Yes, an air gap prevents backflow but does not stop sewer gases. You must install a P-trap below the air gap to create a water seal that blocks methane and other harmful gases from entering your home.
How often should I clean the air gap fitting?
Inspect the air gap annually for debris or mineral buildup. Clean the notch and deflector with a brush or vinegar solution if you see scale. Regular cleaning ensures the gap remains unobstructed during backwash cycles.
Key Takeaways for Water Softener Air Gap Installation
Proper installation protects your home from dangerous contamination and ensures code compliance. Always maintain at least 1.5 inches of vertical clearance and use rigid 2-inch piping for optimal flow. Include a P-trap and vent to handle gases and pressure effectively.
Run a manual test cycle immediately after setup to verify there are no leaks or spraying issues. Schedule annual inspections to clear debris and check the P-trap water level. Following these steps guarantees your water softener operates safely and efficiently for years.