
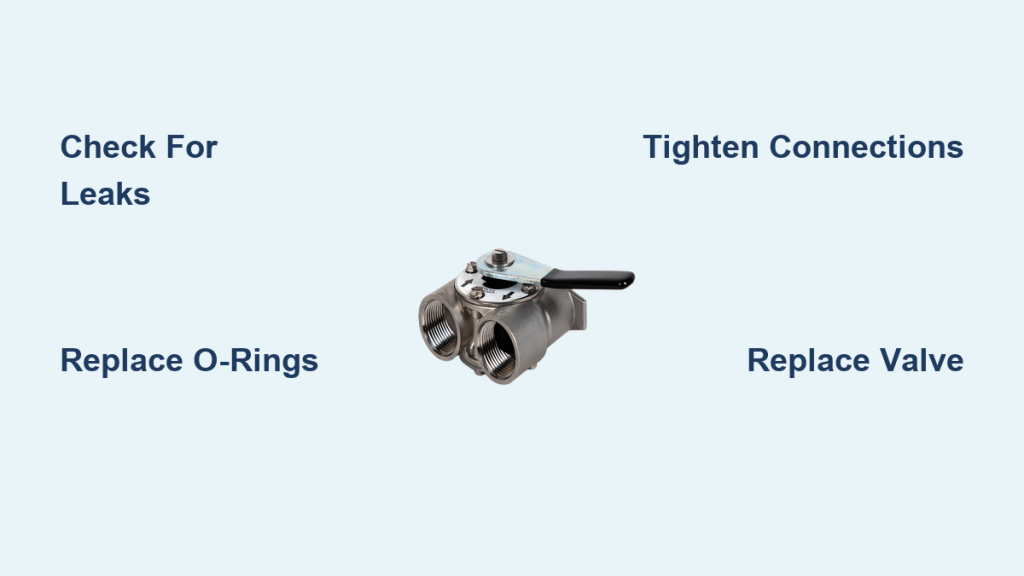
A water softener bypass valve leaking under your unit often signals worn seals or a cracked diverter body. Ignoring this drip can waste gallons of water daily and cause significant property damage over time.
This guide helps you identify the leak source, apply immediate fixes, and replace faulty valves using proven methods. You will learn specific steps to stop leaks in Autotrol, Fleck, and Kinetico systems safely.
Identify the Exact Leak Source on Your Valve

Confirming the leak originates at the bypass valve prevents unnecessary part replacements. Water pooling near the base often comes from the tank or drain line rather than the valve itself.
Check Connection Points for Moisture
Wipe all joints dry with a paper towel to spot fresh moisture. Focus your inspection on the inlet and outlet fittings where plumbing lines attach. Look closely at the diverter valve body seams and the interface where nuts meet the valve.
Look for Mineral Buildup Signs
White crusty deposits around the valve indicate chronic micro-leaking. These minerals accumulate as water evaporates and leave behind calcium and magnesium traces. Such scaling often traps debris that increases the risk of the valve sticking.
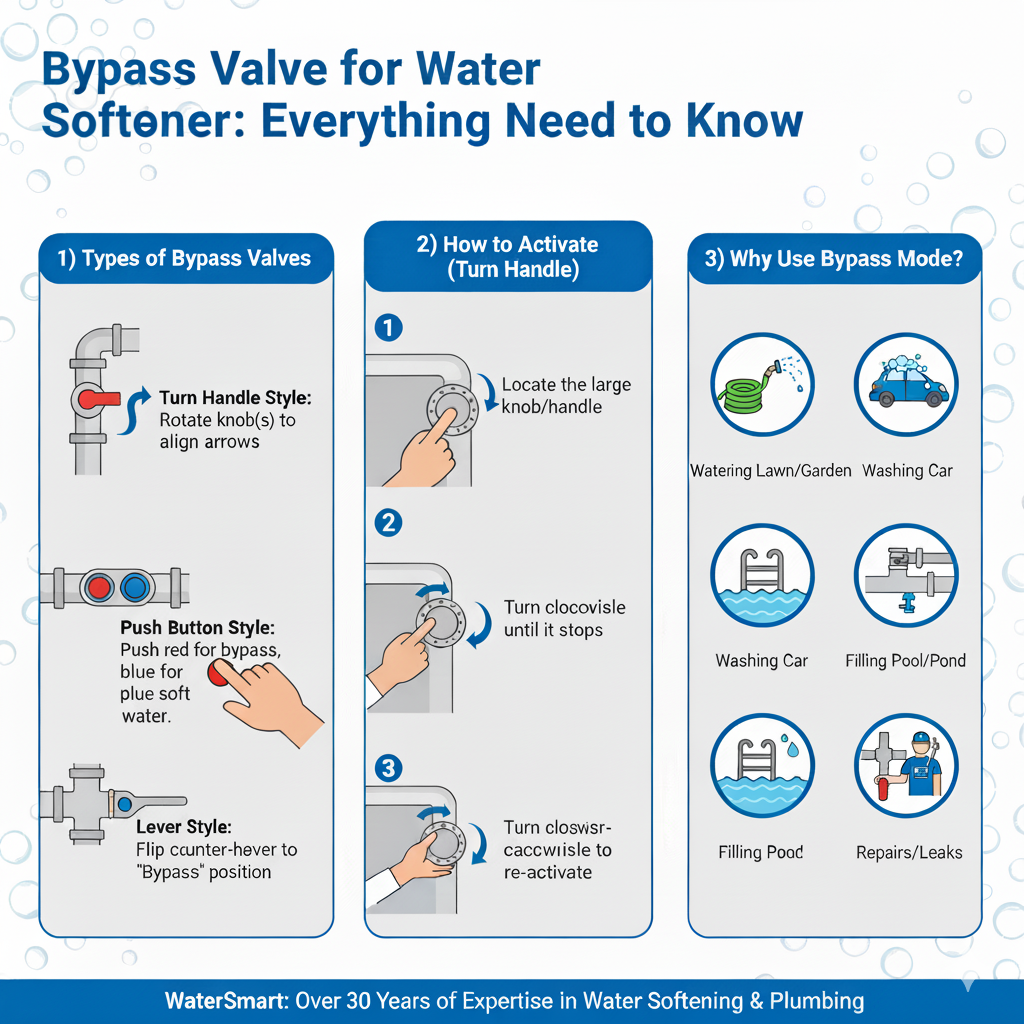
Test System in Bypass Mode
Set the valve to bypass and open a faucet to check flow behavior. If the leak stops in this mode, the issue likely lies within the softener internals. Persistent dripping while in bypass mode points directly to failed seals or a cracked housing.
Common Causes of Bypass Valve Leaks
Understanding why your valve fails helps you select the correct repair strategy. Most issues stem from natural wear, installation errors, or environmental factors affecting the unit.
Worn O-Rings and Seals
Rubber O-rings lose elasticity after five to seven years of service. They harden, crack, or compress unevenly which breaks the watertight seal required for operation. This remains the most common cause of leaks in units older than a decade.
Pro Tip: Replacement kits usually include only softener-side washers. Buy a separate set for the supply line connections since many leaks stem from overlooked supply-side seals.
Cracked Diverter Valve Body
Some models like Autotrol 1040930, 268, and 269 develop housing cracks over time. Leaks persist at the inlet even after replacing washers and applying pipe compound. The crack may be hairline and invisible until water pressure builds inside the unit.
Improper Installation Errors
Misaligned valve seats during setup create uneven pressure on internal seals. Fleck and Kinetico units are especially sensitive to this type of mechanical stress. If the valve was over-torqued or not hand-tightened evenly, the seat distorts under normal water pressure.
Mineral Deposits and Debris
Hard water leaves scale inside the valve mechanism that prevents proper seating. This buildup stops the diverter from closing fully during regeneration cycles. You might notice the handle sticks or fails to turn smoothly when this occurs.
Loose Connections from Vibration
Water softeners cycle on and off causing vibrations that loosen connections gradually. Even a quarter-turn of slack can break the seal enough to cause dripping. Check nuts and fittings every six months especially if your plumbing uses rigid copper lines.
DIY Fixes That Stop Leaks Fast
Minor leaks often respond well to simple low-cost solutions before you consider full replacement. Follow these steps to address common failure points effectively.
Shut Off Water Supply First
Always begin by turning off the main shutoff valve to stop water flow. Open a nearby faucet to drain residual pressure from the lines safely. Set the softener to bypass mode to isolate the unit from the rest of the system.
Tighten Connections Carefully
Use two channel locks to hold the valve body while gently tightening the nut. Do not over-tighten since turning more than one-eighth of a revolution past hand-tight causes damage. Over-torquing cracks plastic housings or distorts metal seats making leaks worse.
Clean the Valve Mechanism
Disassemble the bypass valve and inspect the diverter for obstructions. Soak parts in white vinegar for 30 minutes to dissolve mineral deposits effectively. Use a soft brush to scrub away debris before reassembling and testing the unit.
Replace O-Rings and Washers
Remove old seals and replace them with compatible ones from a quality kit. Lubricate new O-rings with silicone grease to ensure smooth seating and prevent premature wear. Reuse existing nuts if they are undamaged to avoid cutting pipes unnecessarily.
Apply Temporary Epoxy Fix
If a crack is visible and you cannot replace the valve immediately, apply waterproof epoxy. Ensure the surface is dry and clean before application for best adhesion results. This is a short-term solution only so plan for full replacement within days.
When to Replace the Valve Entirely
Some problems cannot be fixed with tightening or new seals alone. Full replacement becomes necessary when structural integrity is compromised or repairs fail repeatedly.
Persistent Leaks After Repair
If the inlet still drips after replacing washers and tightening properly, the valve body is likely cracked. This issue is common in aging Autotrol models where the housing itself fails. No amount of sealant will fix a fractured housing permanently.
Cracked or Brittle Housing
Inspect the plastic body for discoloration, warping, or fine lines indicating stress. Flexing the valve slightly may reveal hidden stress fractures that cause sudden failure. Replace immediately since failure could lead to sudden flooding in your home.
Frequent Sticking or Misalignment
If the valve handle sticks or won’t hold position, internal components are damaged. Cleaning may help temporarily but recurring issues signal mechanical failure. Continuing to use a stuck valve risks complete system breakdown.
Systems Over 10 Years Old
Age is a major risk factor for bypass valve failure in water softeners. After a decade, seals degrade, plastic becomes brittle, and metal parts corrode significantly. Proactively replace the bypass valve if your system is in this range even without active leaks.
Step-by-Step Valve Replacement Guide
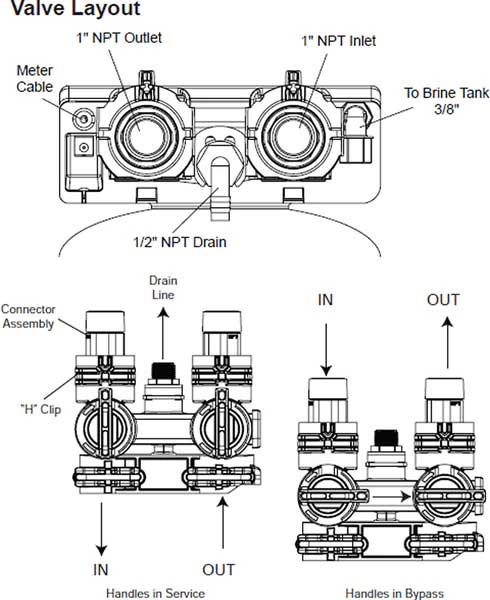
Replacing the bypass valve takes under an hour with basic tools and careful attention. Follow this procedure to ensure a watertight installation.
Gather Tools and Parts
You will need a new bypass valve that matches your model exactly. Bring channel locks, replacement washers for supply lines, silicone grease, and towels. Do not assume the new valve comes with all necessary seals so verify kit contents first.
Remove the Old Valve Assembly
- Shut off water and relieve pressure in the lines.
- Set softener to bypass mode.
- Disconnect the PVC drain line carefully.
- Use channel locks to loosen the valve from the softener head.
- Remove securing nuts and pull the assembly free.
- Inspect washers to note which ones are worn or missing.
Install the New Valve
- Reuse existing nuts if they are undamaged and fit properly.
- Hand-tighten the new valve into place ensuring alignment.
- Tighten only one-eighth turn past hand-snug to avoid cracking.
- Reconnect the drain line and secure all fittings.
Test for Leaks Thoroughly
- Close both diverter valves to isolate the system.
- Slowly turn water back on to pressurize lines.
- Check all connections under static pressure for drips.
- Open valves to restore flow through the softener.
- Re-inspect under full pressure especially at the inlet.
- Confirm no drips appear after 10 minutes of observation.
Success Tip: If a leak appears, tighten no more than another one-eighth turn. If it persists, disassemble and check washer alignment before proceeding.
Brand-Specific Leakage Issues

Not all bypass valves fail in the same way across different manufacturers. Knowing your model’s weak points helps you diagnose faster.
Autotrol Models 1040930, 268, 269
These units commonly develop cracks in the diverter body especially at the inlet connection. Users report leaks continuing after washer replacement and pipe dope application. Diagnosis confirms that if tightening doesn’t help, the housing is cracked requiring replacement.
Fleck and Kinetico Units
These brands are prone to seat misalignment due to pressure changes during operation. If the valve was over-tightened during install, the metal seat deforms permanently. The fix requires replacing the valve and ensuring even gentle torque during installation.
Prevent Future Leaks Effectively
Stop leaks before they start with simple maintenance habits and regular inspections. These strategies extend the life of your water softener system significantly.
Schedule Visual Inspections
Check the bypass valve area every three to six months for issues. Look for moisture trails, mineral crust, or loose connections that indicate trouble. Catching small issues early prevents them from flooding your basement later.
Clean Around the Valve
Wipe down the assembly quarterly to remove dust and debris accumulation. Removing these materials prevents moisture trapping and accelerates corrosion prevention. A clean valve operates more reliably than a dirty one.
Avoid Over-Tightening Connections
Remember that one-eighth turn past hand-tight is enough for most connections. The system handles up to 150 psi so excessive force cracks plastic and warps seals. Conservative tightening maintains integrity without causing damage.
Replace Seals Proactively
For systems eight years or older, replace O-rings and washers every two to three years. Do this even if no leak is visible to prevent unexpected failures. It is cheaper than paying for water damage repairs later.
Secure Plumbing Against Vibration
Ensure supply lines are anchored securely to reduce movement. Use foam insulation or straps to minimize vibration that loosens connections over time. Stable plumbing reduces stress on the bypass valve assembly.
When to Call a Plumber
Some situations demand professional help to avoid further damage or injury. Know when DIY efforts should stop and expert intervention begins.
Internal Valve Damage
If the leak is inside the control head or diverter stem, specialized tools are needed. Disassembly requires calibration that most homeowners lack. A pro can rebuild or replace internal components safely and correctly.
System-Wide Pressure Issues
If water pressure drops throughout the house when the softener cycles, the bypass valve may be restricting flow. A plumber can test pressure and diagnose hidden blockages or valve misalignment accurately.
Failed DIY Repairs
If you have replaced washers, tightened connections, and still have a leak, the problem may be deeper. Issues like a cracked tank or faulty control valve require expert diagnosis. A licensed technician can assess the full system effectively.
Complex Plumbing Configurations
If your softener connects to PEX, CPVC, or a manifold system, improper disassembly causes leaks elsewhere. A pro ensures watertight reconnections in complex setups. This prevents collateral damage to your plumbing infrastructure.
Frequently Asked Questions About Water Softener Bypass Valve Leaking
How do I know if my bypass valve is leaking?
Look for water pooling around the unit, white mineral deposits, or unexpected increases in your water bill. You may also notice inconsistent water hardness or decreased pressure during operation.
Can I fix a leaking bypass valve myself?
Yes, many leaks stem from worn O-rings or loose connections that DIYers can fix. Replace seals, clean debris, and tighten connections carefully following manufacturer guidelines.
How often should I replace bypass valve seals?
Replace O-rings and washers every two to three years for systems over eight years old. Proactive replacement prevents sudden failures and costly water damage incidents.
Why does my Autotrol valve keep leaking after repair?
Autotrol models 1040930, 268, and 269 often develop cracks in the diverter body itself. If leaks persist after washer replacement, the housing is likely fractured and needs full replacement.
What happens if I over-tighten the bypass valve?
Over-tightening cracks plastic housings or distorts metal seats, making leaks worse. Limit tightening to one-eighth turn past hand-snug to maintain system integrity.
When should I call a plumber for a leaking valve?
Call a plumber if leaks persist after DIY repairs, internal damage is suspected, or pressure issues affect the whole house. Professional help is also needed for complex plumbing configurations.
Key Takeaways for Fixing Water Softener Bypass Valve Leaking
A water softener bypass valve leaking is often caused by worn O-rings, loose connections, or cracked housings. Most issues can be resolved with basic tools, proper tightening techniques, and timely seal replacement.
Start with a visual inspection and gentle tightening before attempting full replacement. Remember that over-tightening causes more problems than it solves, so limit torque to one-eighth turn past hand-snug. For persistent leaks or cracked bodies, replace the entire valve assembly.
Prevent future issues by scheduling regular inspections and cleaning mineral deposits quarterly. If you are unsure about your repair skills or the leak persists, contact a licensed plumber to avoid costly water damage.


