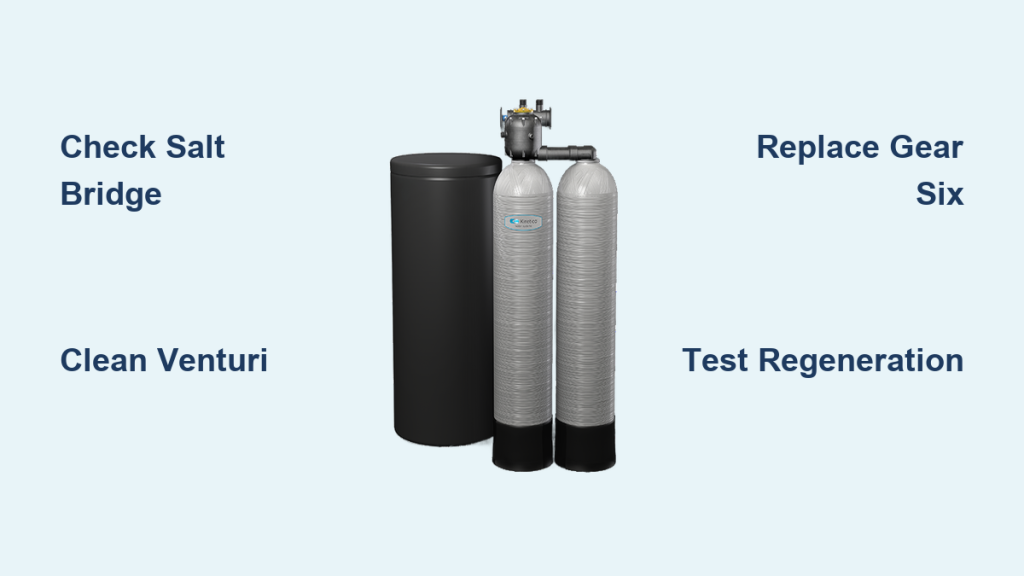
Gritty water, spotted dishes, and dry skin signal that your Kinetico water softener has stopped working properly. Unlike electric models, these units run on water pressure alone, making internal gear or venturi failures the usual suspects when regeneration halts.
This guide explains how to diagnose common issues, clean clogged components, and replace worn gears to restore soft water. You will learn specific steps to test your meter, clear blockages, and reassemble your valve head without causing damage.
Diagnose Common Failure Symptoms in Your Unit
Hard water output often stems from simple oversights like a bypassed valve or an empty salt tank. Before disassembling anything, verify the blue bypass knob is set to “service” and ensure the salt level is adequate.
Check for Salt Bridges and Empty Tanks
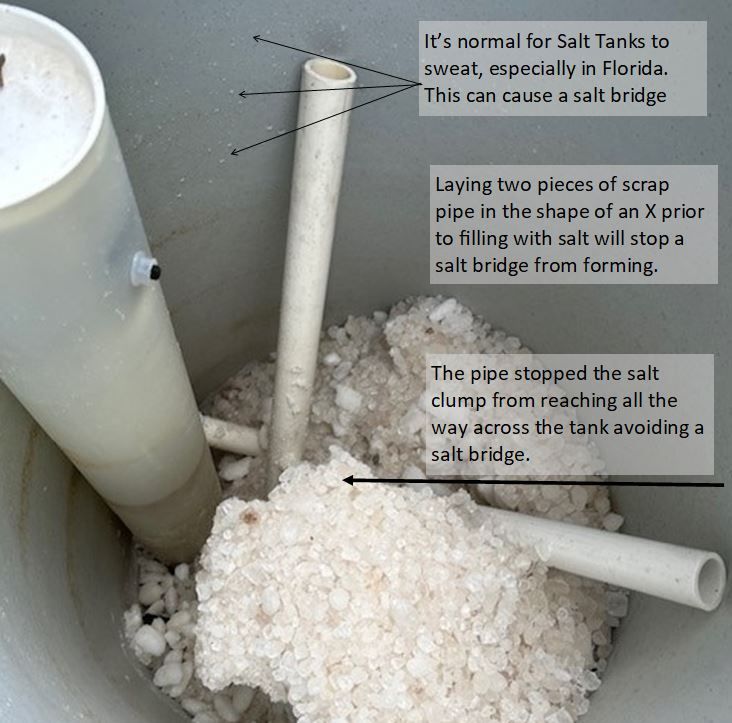
A hard crust known as a salt bridge can prevent salt from dissolving into the brine solution. Tap the side of the tank to listen for a hollow sound or use a broom handle to gently break any solid layers you find.
- Ensure salt levels remain between half and two-thirds full at all times.
- Break any hard crusts forming on the surface of the salt pile.
- Refill the tank before the water level becomes visible at the bottom.
Test for Low Water Pressure Issues
Low pressure usually indicates a clogged pre-filter cartridge rather than a softener defect. Replace this filter every three to six months to maintain optimal flow rates throughout your home.
If pressure remains low after filter replacement, the resin bed may be fouled by iron or sediment. This condition often requires professional cleaning or complete resin replacement to resolve.
Identify Strange Noises or Continuous Running
Constant gurgling or water flow suggests the system is stuck in a regeneration cycle. You can manually advance the cycle using a screwdriver to see if the noise stops.
Persistent noise after resetting indicates damaged internal seals or pistons. Place the unit in bypass mode immediately to prevent water waste while you prepare for disassembly.
Verify Metering and Regeneration Function
The metering system tracks your water usage and triggers regeneration at the correct intervals. If this mechanism fails, your resin never cleans itself, leading to hard water output.
Observe Meter Pawl Movement
Run a high-flow fixture like a bathtub to test if the meter is engaging correctly. Watch the meter pawl through the clear cap on top of the valve head during this test.
- A healthy system advances the pawl one tooth per 12 to 17 gallons used.
- Low-flow fixtures may take up to ten minutes to register any movement.
- No movement indicates a jammed turbine or broken gear train inside the head.
Force a Manual Regeneration Cycle
Insert a Phillips screwdriver into the center cap and press down while turning clockwise. Listen for distinct clicks as the system moves through backwash and brine rinse stages.
- Brine Rinse: Expect a soft hiss with light drain flow.
- Backwash: Listen for a loud rush and strong drain flow.
- Finish: Flow should slow down and stop completely.
Failure to progress or make noise confirms a faulty drive mechanism requiring repair.
Inspect and Clean the Venturi System

A clogged venturi causes ninety percent of vacuum failures in these systems. This component creates the suction needed to draw brine from the salt tank into the resin tanks.
Remove and Clean the Venturi Assembly
Shut off the water and depressurize the system using the bypass valve before disconnecting lines. Use pliers to pull the venturi straight out without crushing the plastic housing.
- Blow air through both ends to clear loose debris.
- Use a needle or tip cleaner to clear the small internal port thoroughly.
- Inspect the O-ring for cracks and replace if necessary before reinstalling.
Test Brine Elbow for Vacuum Integrity
Reassemble the system and advance it to the brine rinse position to test suction. Loosen the brine riser nut slightly to check for water spray.
Water spraying out confirms the vacuum is working correctly. A weak drip or no flow means the venturi is still blocked or an internal seal has failed.
Replace Failed Metering Gears

Gear number six is a nylon pinion gear that frequently wears out due to high water pressure. This specific failure prevents the system from advancing through its regeneration cycles.
Access the Gear Assembly Safely
Depressurize the system and remove the impeller from the top of the valve to access the gears. Take out the cradle holding the gear train to inspect each tooth for damage.
- Focus your inspection on gear number six for flattened or worn teeth.
- Replace damaged parts with a genuine Kinetico OEM gear kit.
- Avoid generic parts as they often lack the required precision fit.
Prevent Future Gear Damage
High water pressure accelerates wear on these plastic components significantly. Install a pressure-reducing valve to maintain pressure around 58 psi for long-term reliability.
Frequent on-off cycling also stresses the gears, so ensure all plumbing valves remain fully open during normal use. Lubricate gear stems with food-grade silicone grease during reassembly.
Disassemble the Valve Head Safely
Proper disassembly prevents water damage and protects the plastic threads on your valve head. Rushing this step can lead to cracked bases or stripped bolts.
Depressurize and Disconnect Lines
Turn the bypass knob to the bypass position or shut off your main water supply completely. Run a faucet to release remaining pressure before disconnecting the brine and drain lines.
Have a bucket ready if your drain line runs overhead, as water will spill out. Use compression fittings carefully to avoid damaging the tubing during removal.
Remove Head Bolts Correctly
Use only a 5/16-inch nut driver to remove the head bolts without damaging them. Never use drills or impact drivers on these plastic components.
- Place removed bolts in the salt tank lid to keep them safe.
- Move both tanks together to avoid cracking the base connection.
- Remove the E-clip by prying one side up and shifting the bypass.
Inspect Internal Valve Levels
The valve head consists of five distinct levels, each performing a specific function in the softening process. Inspect each level for debris, binding, or broken parts.
Level-by-Level Component Check
Start with level one and check the control disc and stems for any binding issues. Move down through the levels to inspect gaskets, seals, and rocker arms for wear.
- Level 3: Holds quad seals and the venturi, replace if cracked.
- Level 4: Contains rocker arms that must move freely.
- Level 5: Base with drain valves that verify free movement.
Look for the teeter-totter, a small plastic piece vital for water delivery. If this part is missing or broken, regeneration will fail completely.
Reassemble with Precision
Correct reassembly ensures your valve head seals properly and functions without leaks. Skipping alignment steps can lead to cross-threaded bolts or failed seals.
Align and Seat Valve Levels
Place the venturi and gasket on level three before attaching level four with its gasket. Wet all seals to help them slide into place without rolling or pinching.
- Reinstall the teeter-totter before adding level five.
- Align drain valves into their holes on the base level carefully.
- Install level two with the brine flow control seated correctly.
Use the locating dimples on the head and levels to ensure perfect alignment.
Tighten Bolts in Star Pattern
Start at the 12 o’clock bolt and turn counterclockwise until you feel a click to align threads. Tighten bolts in a star pattern moving from 12 to 6 to 3 to 9 repeatedly.
Use only hand strength to tighten these bolts to avoid stripping plastic threads. Over-tightening can crack the base or make future repairs impossible.
Restore and Test the System
Reconnect all lines and engage the bypass valve slowly to fill the system with water. Check for leaks around the head and connections before proceeding.
Trigger Test Regeneration
Use a P2 screwdriver to manually click the system into the backwash cycle. Listen for the change in sound that confirms vacuum formation and proper water flow.
- Test the brine elbow by loosening the nut to check for spray.
- Run backwash for ten seconds then brine rinse for thirty seconds.
- Let the system complete the full cycle automatically.
Wait two to three hours before testing water hardness with a test strip.
Maintain for Long-Term Reliability
Regular maintenance prevents most common failures and extends the life of your softener. Simple habits like checking salt levels and replacing filters keep the system running smoothly.
Prevent Salt Bridges and Clogs
Keep the salt level between half and two-thirds full to prevent bridging. Use clean pellet or cube salt instead of rock salt to avoid impurity buildup.
Check the tank monthly and break any crusts forming on the surface. Drain and clean the brine tank every two to three years for optimal performance.
Replace Pre-Filter and Seals Regularly
Change the pre-filter cartridge every three to six months to protect internal parts. Inspect quad seals every three to five years and replace them if they look cracked.
Lubricate connection pins with food-grade silicone grease during every service call. This simple step ensures smooth operation and prevents leaks.
Know Your Model and Age
Check the top screen color to determine if your unit was made before or after 2008. White screens indicate older models while smoked brown screens indicate newer ones.
AC and HF models have different gears and nozzles that are not interchangeable. Always verify part compatibility before ordering replacements for your specific model.
Frequently Asked Questions About Kinetico Water Softener Repair
Why is my Kinetico water softener not using salt?
This issue usually results from a clogged venturi or a failed vacuum seal preventing brine draw. Clean the venturi assembly and check the brine elbow for proper suction to resolve the problem.
How often should I replace the gears in my Kinetico system?
Gears typically last many years but may need replacement if water pressure exceeds 58 psi frequently. Inspect gear number six during routine maintenance if regeneration stops working.
Can I use generic parts to repair my Kinetico water softener?
No, you should always use genuine Kinetico OEM parts for repairs. Generic parts often lack the precise engineering required for the multi-level valve assembly to function correctly.
What causes the constant running sound in my softener?
Continuous running usually indicates a stuck valve, damaged seal, or failed diaphragm inside the head. Manually advance the cycle to see if the noise stops or place the unit in bypass.
How do I know if my Kinetico unit is regenerating?
Listen for increased noise and strong drain flow during the backwash stage of the cycle. You can also verify regeneration by observing the meter pawl advancing after heavy water use.
Key Takeaways for Repairing Your Kinetico Water Softener
Most Kinetico water softener failures stem from clogged venturis, worn gears, or salt bridges that prevent proper regeneration. Regular maintenance and prompt attention to symptoms like hard water or strange noises can extend your system life beyond twenty years.
Always use genuine parts and follow precise reassembly steps to avoid damaging plastic components. Start by diagnosing your specific symptom, then follow the relevant repair procedure outlined above to restore soft water to your home.