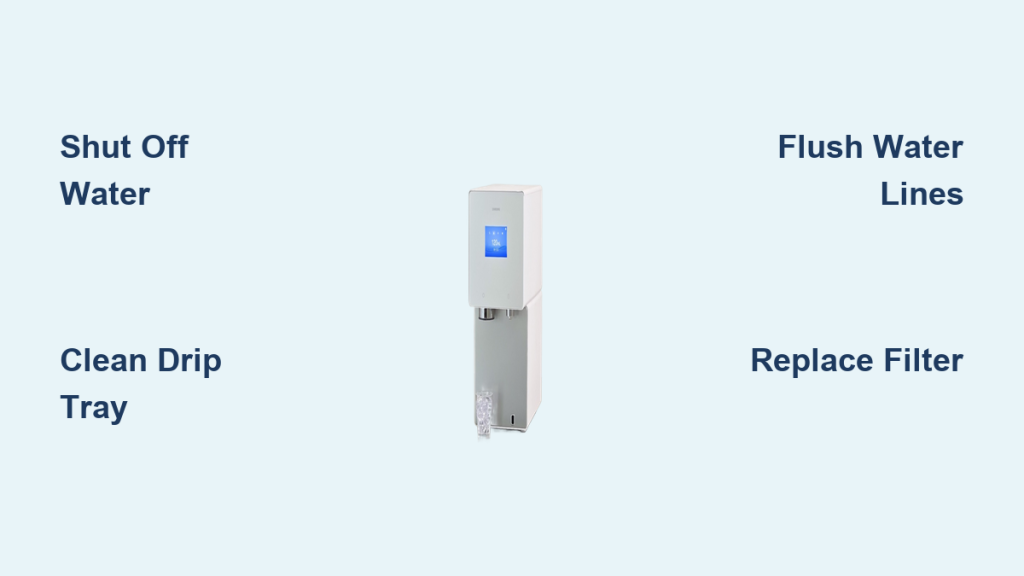
Is your Samsung refrigerator water dispenser dispensing slow streams or leaving a weird aftertaste in your glass? Mineral buildup and bacteria often clog the nozzle and internal lines, requiring you to learn how to clean Samsung water dispenser components effectively.
This guide details the exact steps to deep clean your drip tray, nozzle, and water lines using simple household items. You will discover how to restore fresh flow and ensure your drinking water remains safe within an hour.
Shut Off Water and Power for Safe Cleaning

Safety is your top priority before touching any internal parts of your refrigerator. A live water line or active electrical connection poses serious risks during the cleaning process.
Turn Off the Water Supply Valve
Locate the shutoff valve controlling water to your fridge. This is typically found under the sink, behind the unit, or near your water heater. Turn the valve clockwise until it stops completely to halt water flow.
Unplug the Refrigerator Unit
Disconnect the power cord from the wall outlet. This step prevents electrical shocks while you handle components near the water system. It also stops the ice maker from cycling during your work.
Place Towels to Protect Flooring
Lay an old towel directly beneath the dispenser area. This catches accidental drips when you remove the drip tray or disconnect water lines. It saves your floor from water damage and sticky vinegar solutions.
Remove and Deep Clean the Drip Tray
The drip tray collects spills and becomes a breeding ground for mold and mineral deposits. Cleaning this part thoroughly prevents bad odors from entering your kitchen air.
Extract the Drip Tray Carefully
Gently pull the drip tray straight out from the dispenser recess. Some models require a slight lift or button press before removal. Consult your manual if you meet resistance to avoid breaking plastic clips.
Wash With Mild Soap and Warm Water
Rinse the tray under warm running water to remove loose debris. Use a soft sponge with mild dish soap to scrub away surface grime and sticky residues. This initial wash removes the bulk of daily dirt.
Soak in Undiluted White Vinegar
Submerge the tray in a container filled with undiluted white vinegar if crusty deposits remain. Let it soak for 15 to 30 minutes to dissolve calcium and magnesium buildup naturally.
Scrub Rinse and Dry Completely
Scrub the softened residue with a sponge after the soaking period. Rinse the tray thoroughly with clean water and dry it completely before reinserting. Moisture left behind encourages new bacterial growth.
Clear Mineral Buildup From Dispenser Nozzle
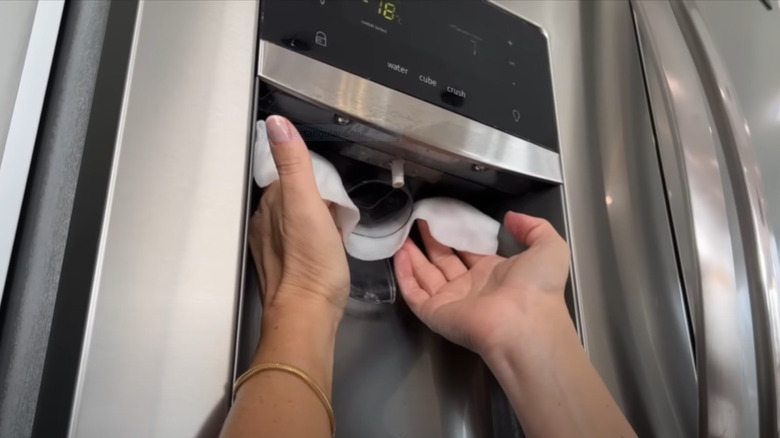
The nozzle is the exit point for your water and often harbors hidden bacteria. Mineral deposits here restrict flow and contaminate every glass you pour.
Prepare a Vinegar and Water Solution
Mix equal parts white vinegar and water in a small bowl. This solution is strong enough to kill bacteria but gentle on refrigerator finishes.
Apply Solution Without Scrubbing Hard
Hold a vinegar-soaked cloth against stainless steel nozzles to let the acid work. Avoid aggressive scrubbing that could scratch the delicate metal surface. Use an old toothbrush for plastic areas or stubborn crevices.
Wipe Area Dry to Prevent Spots
Wipe the nozzle and surrounding panel with a dry cloth immediately after cleaning. This prevents new water spots from forming as the area dries. It also stops minerals from re-adhering to the clean surface.
Sanitize the Dispenser Lever or Paddle
The lever you press to get water collects fingerprints and germs daily. Properly cleaning this component ensures you do not reintroduce bacteria to your hands or water.
Clean Non-Removable Levers Thoroughly
Dampen a cloth with your vinegar-water solution and wipe the lever front and sides. Follow up with a water-dampened cloth to remove any vinegar residue. Dry the lever thoroughly with a clean towel.
Remove and Soak Detachable Levers
Check your manual to see if your lever pulls out for cleaning. If removable, soak it in the vinegar mixture, rinse with warm water, and dry before snapping it back. This allows for a deeper clean of the attachment points.
Clear and Sanitize the Ice Chute Area
The ice chute often gets overlooked but traps ice fragments and mold spores. Neglecting this area leads to contaminated ice and potential blockages.
Remove Ice Maker Unit If Possible
Take out the ice maker tray if your Samsung model allows easy removal. Discard any old ice cubes down the sink to start with a clean slate.
Spray Interior With Cleaning Solution
Spray the inside and outside of the chute with your vinegar-water mix. Let the solution sit for two to three minutes to loosen any gunk. This dwell time is crucial for breaking down sticky residues.
Treat Stubborn Buildup With Soaked Cloth
Stuff a vinegar-soaked cloth into the chute for five minutes if residue persists. The extended contact time helps dissolve tough mineral deposits. Wipe the area clean with a dry cloth afterward.
Reassemble and Ensure Dryness
Replace the ice maker unit once the chute is spotless. Ensure the entire area is fully dry to prevent freezing or mold regrowth. Moisture left in the chute causes ice clumps quickly.
Flush Internal Water Lines Effectively
Flushing the water line is necessary if you notice taste issues or have not cleaned in six months. This step removes biofilm and mineral deposits inside the tubing.
Disconnect Water Line From Valve
Ensure the water supply is off before disconnecting the line from the valve. Have a bowl ready to catch any residual water in the tube. This prevents accidental spills on your floor.
Inject Vinegar Solution Into Line
Use a turkey baster or small funnel to pour the vinegar mixture into the tube. Fill about six to eight inches of the line with the solution. This targets the internal surfaces where bacteria hide.
Let Solution Soak Inside Tubing
Allow the solution to sit inside the line for up to 10 minutes. This waiting period loosens biofilm and mineral deposits effectively. Do not rush this step for best results.
Flush Line With Clean Water
Pour clean water through the line to rinse out vinegar and debris. Reconnect the line securely to the water supply valve. Check for leaks before proceeding to the next step.
Run Five Gallons Through System
Dispense at least five gallons of water to clear all vinegar residue. This volume ensures your drinking water tastes fresh and safe. Skipping this step leaves an unpleasant vinegar aftertaste.
Replace Water Filter Regularly

A clogged filter reduces flow and fails to remove contaminants effectively. Replacing it is a critical part of maintaining water quality.
Check Filter Age and Alerts
Replace your water filter every six months or when the alert light activates. Ignoring this schedule leads to poor taste and reduced efficiency. Your Samsung panel often tracks this for you.
Install New Filter Correctly
Twist out the old filter and insert the new one according to instructions. Reset the filter indicator on your control panel if your model supports it. This ensures accurate tracking for future replacements.
Prevent Buildup With Routine Care
Consistent maintenance keeps your dispenser running smoothly and reduces deep cleaning frequency. Small habits make a huge difference in long-term performance.
Wipe Nozzle Weekly
Wipe the nozzle with a dry cloth after weekly use. This prevents splashes from drying and forming crusty deposits. It takes only seconds but saves significant effort later.
Clean Drip Tray Monthly
Rinse the drip tray with soapy water once a month. This prevents the accumulation of slimy biofilm. Regular rinsing keeps the deep cleaning process much faster.
Flush After Periods of Inactivity
Run two to three glasses of water if you return from vacation. This clears stagnant water that may harbor bacteria. It ensures your first drink is always fresh.
Increase Frequency in Hard-Water Areas
Clean your system every three months if you live in a hard-water area. Mineral deposits accumulate faster in these regions. Consider a whole-house water softener for added protection.
Troubleshoot Common Dispenser Issues

Understanding common problems helps you fix them quickly without panic. Here are solutions to frequent issues you might encounter.
Fix Bad Taste or Smell
Bad taste usually stems from bacteria or an old filter. Clean the dispenser thoroughly and replace the filter immediately. Flush five gallons of water to remove any lingering odors.
Resolve Slow Water Flow
Slow flow often indicates a clogged filter or mineral blockage. Replace the filter first, then clean the nozzle with vinegar. Flush the water line if the problem persists.
Stop Leaking Under Dispenser
Leaks typically result from an overflowing drip tray or misaligned nozzle. Clean the tray and ensure it sits properly in its slot. Check for ice blockages in the chute as well.
Clear Ice Chute Blockages
Frozen debris or buildup often blocks the ice chute. Soak the chute with vinegar solution to loosen the ice. Clear the ice manually and dry the area thoroughly.
Frequently Asked Questions About Cleaning Samsung Water Dispensers
How often should I deep clean my Samsung water dispenser?
You should perform a deep clean every three to six months. Households in hard-water areas or with high usage should clean every three months.
Can I use bleach to clean my Samsung water dispenser?
No, never use bleach or harsh chemicals on your dispenser. Stick to white vinegar and mild dish soap to avoid damaging seals and plastic components.
Why does my water taste like vinegar after cleaning?
This happens if you did not flush enough water through the system. Run at least five gallons of water to remove all vinegar residue completely.
What do I do if my drip tray will not come out?
Do not force the tray as it may break. Consult your specific Samsung user manual for the correct release mechanism for your model.
Is it normal for water flow to be slow after cleaning?
Flow should improve after cleaning. If it remains slow, check your water filter age or look for mineral blockages in the nozzle.
Key Takeaways for How to Clean Samsung Water Dispenser Systems
Maintaining your dispenser requires regular attention to the nozzle, drip tray, and internal lines. Following a strict schedule prevents bacterial growth and ensures your water tastes fresh. Remember to replace your filter every six months for optimal performance.
Start your cleaning routine today by gathering vinegar and a few simple tools. Your health and the longevity of your Samsung refrigerator depend on this simple maintenance task.