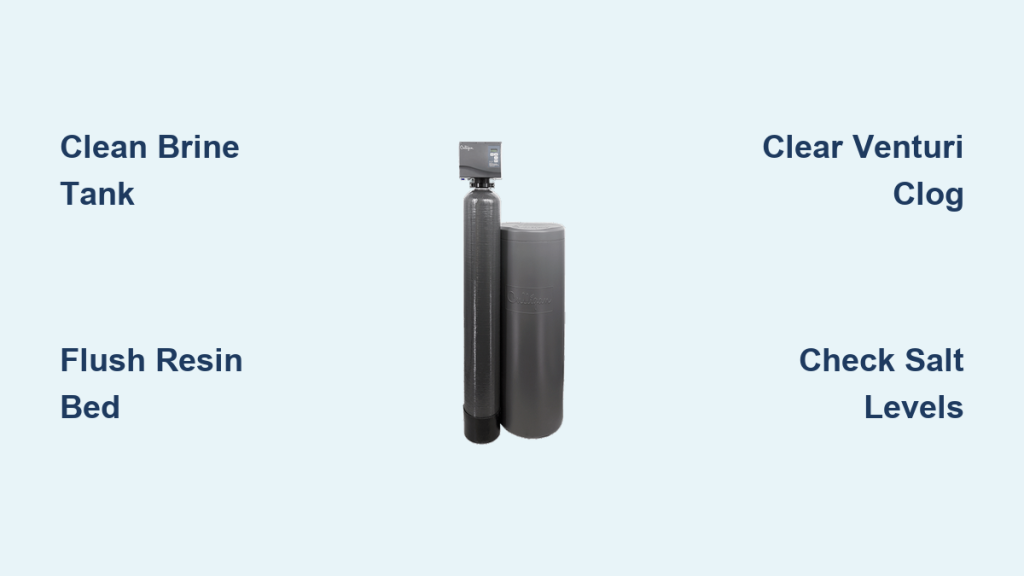
Is your Culligan water softener failing to produce lather or leaving spots on your dishes? Mineral buildup and salt sludge often clog the system, requiring you to learn how to clean a Culligan water softener effectively.
This guide details every step to scrub the brine tank, sanitize the resin bed, and clear venturi clogs. You will regain peak efficiency and extend your unit’s lifespan with these proven maintenance methods.
Identify Signs Your Culligan Softener Needs Cleaning
Hard water symptoms returning to your home often signal that your softener requires immediate attention. If you notice soap scum on shower doors, dry skin after bathing, or spotty glassware, the system is likely not regenerating properly. These issues frequently stem from salt bridging or a clogged brine line that prevents salt from reaching the resin bed.
Inspect for Sludge and Foul Odors
Lift the lid of your brine tank to check the interior conditions carefully. A slimy film, dark residue, or foul smell indicates bacterial growth or significant iron buildup within the tank. While not always immediately harmful, these contaminants reduce system efficiency and can taint your overall water quality.
Monitor Salt Consumption and Pressure
Abnormal salt usage patterns often reveal underlying mechanical issues inside your unit. If salt disappears too quickly or remains untouched for weeks, it could signal mushing or bridging problems. Additionally, a sudden drop in water pressure may point to clogs in the venturi valve or resin bed that need clearing.
Gather Essential Tools and Prepare the System
Collecting the right supplies before starting ensures a thorough cleaning without damaging sensitive components. You need specific cleaning agents like white vinegar, household ammonia, hydrogen peroxide, and a dedicated resin bed cleaner. Basic tools include a scoop, bucket, garden hose, long-handled brush, sponge, screwdriver, and a fishnet for debris removal.
Engage the Bypass Valve Safely
Turn off water flow to the unit to prevent leaks or dangerous pressure buildup during maintenance. For Culligan Aqua Essential models, turn the blue bypass knob on the back counterclockwise to engage bypass mode. Smart softener owners can use the Culligan Connect app to engage bypass remotely, but always wait for the system to depressurize before removing caps.
Never skip this step as working on a pressurized unit can cause serious injury or significant flooding in your utility area.
Empty the Brine Tank Completely
Remove all salt and water from the tank to access internal parts for deep cleaning. Scoop out dry salt into a clean container for potential reuse if it appears clean and free of sludge. Discard any wet, sludgy, or discolored salt, and drain remaining brine into a bucket rather than pouring it on grass.
Deep Clean the Brine Tank Interior
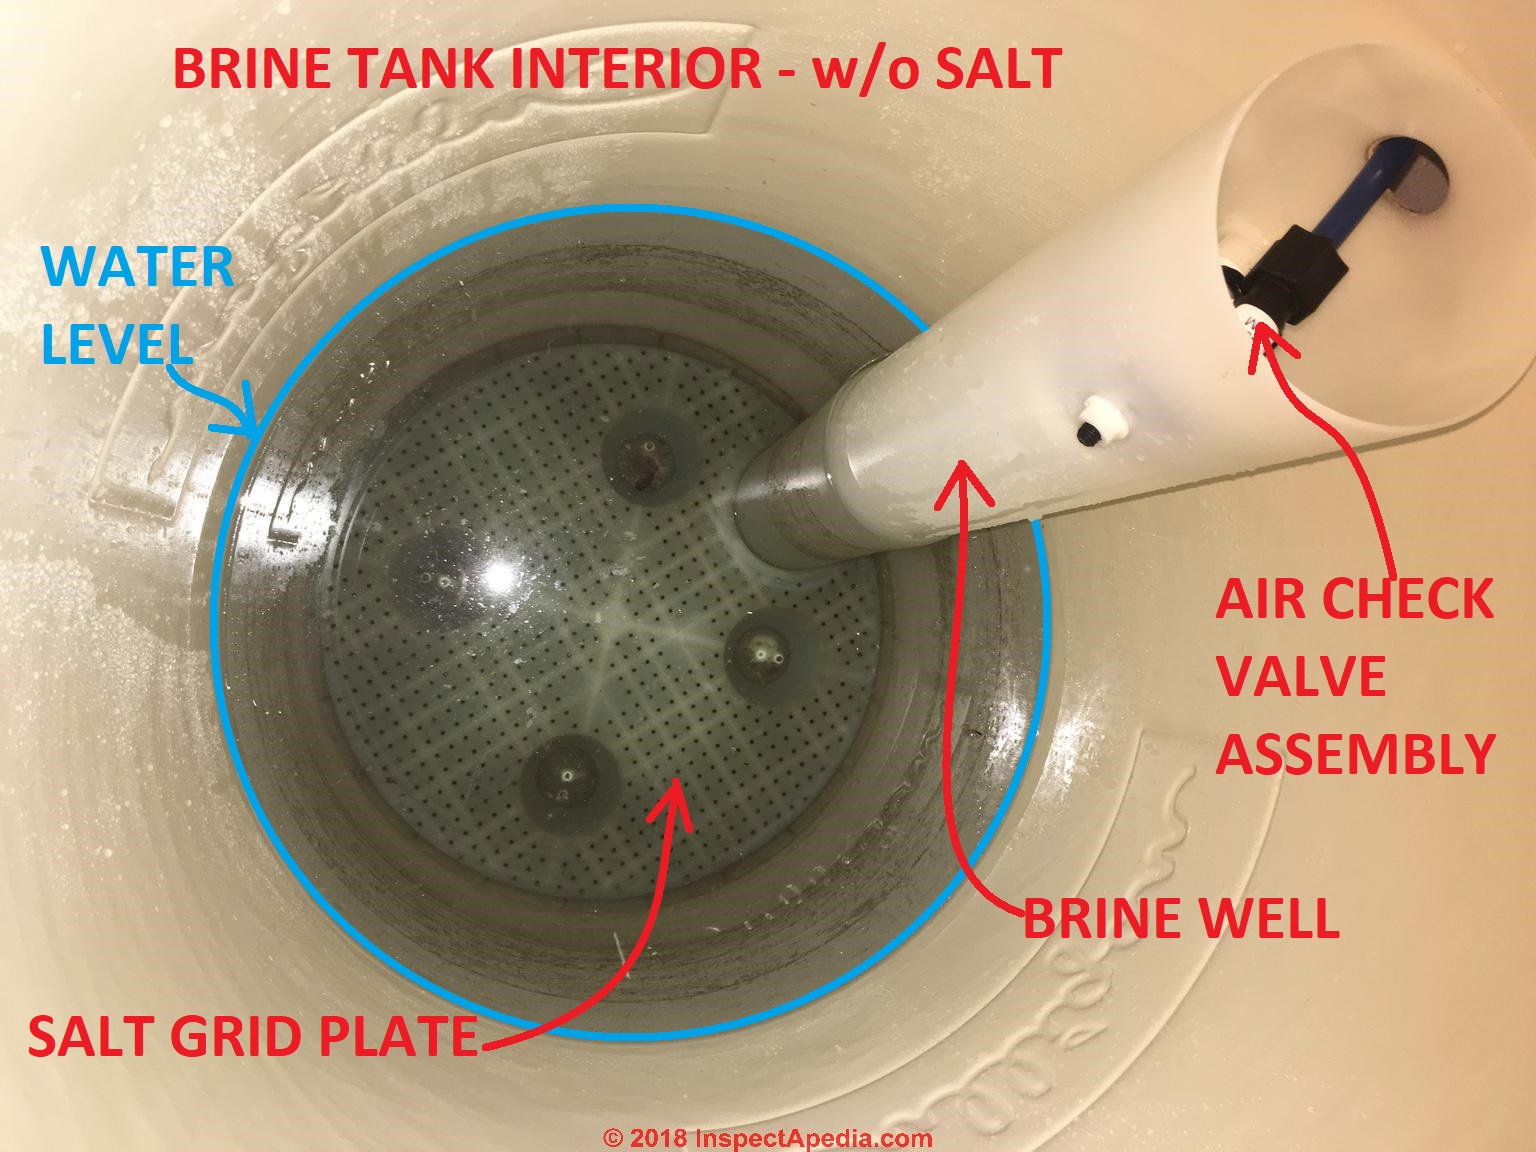
Start the physical cleaning process by removing internal components to access all surfaces. Take off the cover and unscrew the brine valve chamber, then lift out the brine valve while keeping it upright to avoid spillage. Remove the salt plate from the tank bottom and set all components aside for individual inspection and cleaning.
Scrub Tank Walls and Components
Rinse the empty tank by laying it on its side and using a garden hose to flush out loose residue. Choose a cleaning solution based on your needs, such as mild soap and water for general maintenance or a mix of one part white vinegar and one part ammonia for deep cleaning. Apply your chosen solution with a long-handled brush to break down organic matter and mineral deposits effectively.
Soak the brine valve and pipe in the same solution to clear internal clogs thoroughly. If you suspect bacterial contamination, pour a bottle of hydrogen peroxide into the brine well and let it sit for two to three hours to kill bacteria.
Reassemble and Refill with Care
Place the salt plate back at the bottom of the tank before reinstalling the brine valve chamber. Secure the chamber with screws, insert the brine valve, reconnect the line, and replace the cap tightly. Add four to six inches of water to the tank, then fill with high-purity salt pellets up to half or two-thirds full.
Never overfill the tank as this increases the risk of salt bridging. Avoid using rock salt which leaves more residue than evaporated pellets.
Maintain the Resin Bed and Mineral Tank
Inspect the mineral tank near the valve after a regeneration cycle to check for contamination. Dark residue found here is usually organic buildup or iron rather than mold, and it can be wiped away with a vinegar-dampened rag. A brief blue tint may appear after cleaning but will flush out during normal operation.
Flush with Resin Bed Cleaner
Remove iron, silt, and bacteria by pouring a resin bed cleaner directly into the brine well. Manually start a regeneration cycle immediately to draw the cleaner through the resin bed thoroughly. Let the system complete the full cycle, which takes about one hour, to ensure all contaminants are flushed out.
Repeat this process every two months if your water source has high iron or sediment content. This routine keeps resin beads active and maintains maximum softening efficiency.
Clean the Venturi Valve Twice a Year
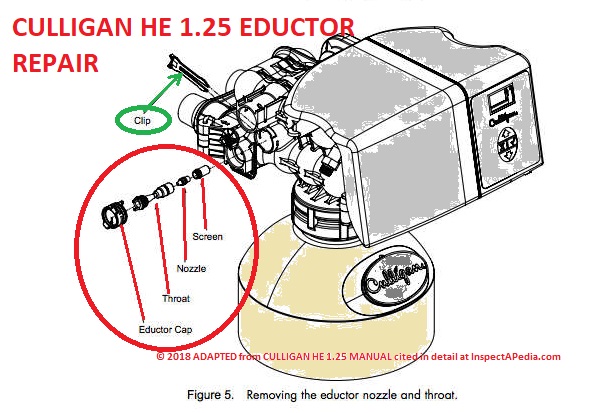
The venturi valve creates the suction needed to pull brine into the system, so clogs here stop regeneration. Unscrew the valve cover and remove the nozzle and venturi components for inspection. Rinse these parts under running water to remove sand and debris, then reassemble them carefully to prevent leaks.
Perform this maintenance semi-annually to prevent performance drops and ensure consistent water softening.
Restart and Regenerate the System
Force a regeneration cycle immediately after cleaning and refilling the tank to prime the system. Press and hold the regeneration button on the control valve to begin a full one-hour cycle. This process draws brine, flushes lines, and removes any remaining cleaning residue from the resin bed.
Verify Water Level and Softness
Check the brine tank after regeneration to ensure the water level returns to the standard four to six inches. Test your water softness by mixing half a teaspoon of liquid soap in a bottle of tap water. Soft water will lather easily while hard water will form scum or fail to bubble.
If lather is weak, repeat the regeneration cycle or check for remaining clogs in the system.
Troubleshoot Common Performance Problems
Salt bridging occurs when a hard crust forms across the top of the salt tank, creating a void below. Use a broom handle to gently break the bridge without puncturing the tank, then remove loose salt and clean the area. Switch to evaporated salt pellets to prevent recurrence, as bridging fools the system into thinking salt is present.
Fix Salt Mushing Issues
Salt mushing happens when salt dissolves and recrystallizes into a wet sludge at the bottom of the tank. Empty the tank completely to remove all mush and clean the base thoroughly before refilling. Use high-purity pellets to prevent this issue, as mushing blocks brine draw and can damage the system if ignored.
Clear Clogs in the System
If hard water returns despite cleaning, check the venturi, brine line, and drain hose for blockages. Flush lines with water or use a pipe cleaner to remove obstructions causing flow issues. Contact a professional if the issue persists, as internal valve repairs require specialized expertise.
Optimize Long-Term Performance and Lifespan

Stick to a consistent cleaning schedule to maintain optimal performance year after year. Clean the brine tank every six to twelve months, or every three months if your water has high iron content. Treat the resin bed with cleaner every two months and inspect the venturi valve twice a year.
Use High-Quality Salt Products
Choose evaporated salt pellets over rock salt to minimize sludge and improve overall efficiency. These pellets dissolve cleanly and reduce the likelihood of bridging when stored in a dry environment. High-quality salt is a small investment that protects your equipment and maintains water quality.
Monitor with Smart Features
Utilize the Culligan Connect app if you have a Smart Softener to track salt levels and schedule cleanings. These tools provide regeneration alerts and leak detection to help you stay ahead of maintenance needs. Smart monitoring ensures your system runs efficiently without constant manual checks.
Frequently Asked Questions About Cleaning Culligan Softeners
How often should I clean my Culligan water softener brine tank?
You should clean the brine tank every six to twelve months under normal conditions. If your water has high iron content or visible buildup occurs, clean it every three months to prevent efficiency loss.
Can I use bleach to clean my Culligan water softener?
No, do not use bleach or abrasive cleaners on the exterior or interior of the unit. Bleach can damage the finish and internal components, so stick to vinegar, ammonia, or manufacturer-recommended cleaners.
What causes salt bridging in my water softener?
Salt bridging is caused by humidity, improper salt types, or overfilling the tank. This creates a hard crust that prevents salt from dissolving, so use high-quality pellets and avoid filling the tank past two-thirds full.
How do I know if my resin bed needs cleaning?
Signs include returning hard water symptoms, dark residue in the mineral tank, or reduced lather during the soap test. Pour resin bed cleaner into the brine well and run a regeneration cycle every two months to maintain bead health.
Is it safe to mix vinegar and ammonia for cleaning?
Only mix vinegar and ammonia in a well-ventilated area and never in a closed container. Use this mixture diluted with water for scrubbing tank walls, but avoid inhaling fumes or combining concentrated chemicals.
Key Takeaways for Cleaning Your Culligan Water Softener
Regular maintenance of your Culligan water softener prevents hard water issues and extends the unit’s life to 15 years. Focus on cleaning the brine tank annually, flushing the resin bed bi-monthly, and inspecting the venturi valve twice a year.
Start your maintenance today by gathering supplies and following the step-by-step cleaning procedure outlined above. Consistent care ensures soft water for your home and protects your appliances from scale damage.