Is your Whirlpool water softener failing to soften water or flooding the basement with a stuck regeneration loop? Many homeowners face recurring issues like salt bridges and gasket failures that stop the system from working correctly. The good news is that most problems have clear causes and actionable fixes you can handle yourself.
This guide delivers precise step-by-step solutions for hard water output and excessive salt use based on real repair data. You will learn exactly how to diagnose mechanical faults and maintain your unit to save time and money.
Decode Common Failure Symptoms Quickly
Identifying the root cause starts with matching specific symptoms to mechanical faults within your system. Whirlpool softeners rely on precise water flow and vacuum pressure to function correctly. When one component fails the system often misdiagnoses itself or stops working entirely. Use these symptom-based checks to narrow down the issue fast.
Hard Water Despite System Operation
Even with power and salt present hard water output means the softening process is breaking down somewhere.
- Verify regeneration schedule: Check the control panel for correct time and day settings since a missed cycle leaves resin beads saturated.
- Test water hardness: Use a certified test kit to confirm grains per gallon and compare results to your unit capacity.
- Inspect bypass valve: Ensure it is in Service mode because a partially open valve routes untreated water into your home.
- Check resin bed health: Old or damaged beads lose ion-exchange ability so consider resin replacement if the unit is over 10 years old.
Pro Tip: If water tests hard but the system regenerates nightly suspect a failed venturi gasket or salt bridge blocking brine contact.
Brine Tank Overfilling with Water
A tank filled past 2.5 inches of water signals a critical failure in the regeneration cycle suction.
- Immediate cause: The system draws water but fails to siphon it out during the brine draw phase.
- Primary culprit: A worn rubber gasket in the nozzle and venturi assembly prevents a proper vacuum seal.
- Secondary factors: Clogged drain lines or salt mushing blocking the pickup tube can also cause this issue.
Visual Clue: If the tank fills to the top and never drains do not just clean it but replace the gasket immediately.
No Water in Brine Tank
An empty tank means no brine is being drawn which halts the entire regeneration process.
- Check supply line: Ensure the main water valve is fully open and pressure is above 20 psi.
- Inspect float valve: A stuck float may block water inflow so lift it manually to test operation.
- Examine tubing: Look for kinks or blockages in the brine well or injector tube.
- Confirm power: A dead control board will not initiate the fill phase required for operation.
Fix Regeneration Failures Effectively
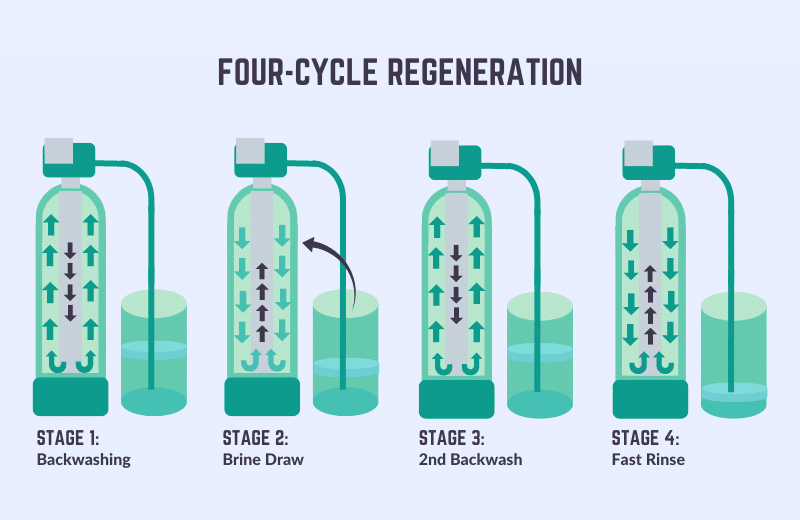
If your softener skips cycles or stops mid-regeneration the problem lies in scheduling power or brine delivery. Address these potential causes in the order listed below for best results.
Verify Timer and Settings
Incorrect programming is the most common reason for missed regeneration cycles in Whirlpool units.
- Access control panel: Press Menu or Settings on models like WHES30 WHES40 or WHEC46.
- Confirm regeneration time: Set it during low-usage hours such as 2:00 AM to avoid water pressure drops.
- Adjust hardness level: Input your water tested GPG because a mismatched setting causes under or over-regeneration.
- Force a manual cycle: Use the Regenerate button to test functionality after making changes.
Warning: After a power outage clocks reset so always check the time and date settings first.
Reset the Control Board
Transient errors can freeze the system logic and prevent normal operation.
- Unplug the unit for 30 seconds to clear temporary memory.
- Plug it back in and wait for the display to reboot fully.
- Run a manual regeneration cycle to test the system response.
- Consult the owner manual if error codes persist after this reset.
Ensure Proper Salt Supply
No salt means no brine which results in no softening capability for your home water.
- Maintain salt level: Keep pellets 1 to 2 inches above the water line and never below one-third full.
- Use the right salt: Use pellets or cubes only and avoid rock salt because it increases sludge buildup.
- Break salt bridges monthly: Tap the tank sides and insert a wooden broom handle if it sounds hollow.
Safety Note: Never use metal tools to break bridges as they can puncture the brine tank liner.
Repair Brine Tank Flooding Issues
When water fills the brine tank and does not drain the vacuum system has failed completely. This is not a cleaning issue but a mechanical failure requiring part replacement.
Replace the Venturi Gasket
This small rubber washer is the number one fix for overfilling tanks in Whirlpool systems.
Why It Fails
Over time the gasket develops ridges from sealing against vacuum ports repeatedly. These grooves create air leaks that prevent suction during the brine draw phase. The result is water entering the tank but not being pulled out causing flooding.
Step-by-Step Replacement
- Set to bypass mode: This is critical to stop water flow before disassembly.
- Unplug the unit: This prevents accidental cycling during the repair process.
- Drain the brine tank: Use a wet-dry vacuum to remove all water and loose salt.
- Locate the venturi assembly: Find it inside the main control head usually clipped in place.
- Remove the cap and housing: Carefully unscrew or pop off the top and note part orientation.
- Extract the old gasket: Look for visible indentations near the nozzle which confirm failure.
- Install a new smooth gasket: Order by model number and press firmly into place.
- Reassemble in reverse order: Ensure all clips snap back securely.
- Test without salt: Run one full regeneration cycle to verify water levels drop correctly.
Success Signal: Water level drops after regeneration which proves suction is restored.
Check the Float Valve
If the tank still overfills the float may be stuck open allowing continuous water inflow.
- Remove the brine well cover to access the float mechanism.
- Lift the float manually to see if it stops water inflow effectively.
- Clean any debris from the valve seat that might block closure.
- Replace the valve if it appears cracked or warped from age.
Resolve Low Water Pressure Problems
Softened water should flow freely through your pipes without restriction. If pressure drops the issue is likely a blockage within the system.
Clean Inlet and Outlet Filters
Clogged filters restrict flow and reduce pressure throughout your home plumbing.
- Turn off the water supply to the softener unit.
- Set system to bypass mode to isolate the unit.
- Locate filters at the valve inlets on both sides.
- Unscrew and remove the filter screens carefully.
- Rinse under running water until all debris is gone.
- Reinstall securely and return to service mode.
Maintenance Tip: Clean these every 3 months if you have well water or high sediment levels.
Inspect for Resin Bead Leakage
Resin beads in faucets mean the distributor tube is cracked and needs attention.
- Shut off water and power to the unit immediately.
- Open the resin tank to inspect internal components.
- Check the bottom screen and riser tube for damage or cracks.
- Replace the valve or tank if beads are escaping into your pipes.
Note: Resin beads are small amber-colored spheres finding them in aerators confirms internal failure.
Stop System Leaks Immediately
Leaks waste water and damage floors so you must pinpoint the source fast. Proper diagnosis prevents costly water damage to your home structure.
Inspect Connections and Seals
Loose fittings are a common source of minor leaks around the unit.
- Check all PVC or flexible hoses for cracks or wear.
- Tighten fittings by hand and do not overtighten plastic threads.
- Replace worn O-rings on the control valve and bypass adapter.
Examine the Brine Tank
Hairline cracks can develop at the base or seam of the brine tank over time.
- Look for hairline cracks at the base or seam of the plastic tank.
- Replace the entire tank if cracked because patching will not hold long term.
- Ensure the lid seals tightly to prevent evaporation and overflow issues.
Secure the Drain Line
Improper drain line placement can cause backflow or dislodging during cycles.
- Ensure the line is air-gapped 6 to 8 inches above the drain.
- Check for kinks or downward sags that trap water.
- Use a proper drain clip to prevent dislodging during regeneration.
Emergency Step: If a major leak occurs shut off the main water supply immediately.
Diagnose Error Codes Accurately

Modern Whirlpool models display digital alerts to help identify specific internal issues. Understanding these codes speeds up the troubleshooting process significantly.
Common Codes and Fixes
| Code | Meaning | Action |
|---|---|---|
| SL | Low salt | Add salt wait 24 hours and reset |
| Err1 | Communication fault | Power cycle and check wiring |
| Err2 | Valve motor failure | Call a certified technician |
| Err3 | Water leak detected | Inspect drain brine tank and connections |
Wi-Fi Models: Use the Whirlpool app to receive alerts and run diagnostics remotely.
Reset Persistent Errors
Some errors require a hard reset to clear the internal memory completely.
- Unplug the unit for 30 seconds.
- Hold Reset or Enter while powering back on.
- Follow on-screen prompts to complete the sequence.
- Contact support if the code returns as a sensor may be faulty.
Reduce Excessive Salt Use
High salt consumption increases costs and environmental impact unnecessarily. Calibrating your system correctly can save money over time.
Calibrate Salt Dosage
Adjusting settings ensures you use only the salt required for your water hardness.
- Access the control panel menu on your specific model.
- Find Salt Level or Brine Dose settings.
- Match setting to your water hardness such as 20 GPG to medium dose.
- Avoid Max settings unless hardness exceeds 30 GPG.
Prevent Salt Mushing
Salt mushing creates sludge that clogs the system and wastes product.
- Use evaporated salt pellets because they dissolve evenly.
- Do not overfill the tank past 80 percent capacity.
- Clean the brine well annually to remove sludge buildup.
Upgrade to High-Efficiency Mode
Newer models offer features that reduce overall salt consumption significantly.
- Models like WHESFC hybrid use up to 40 percent less salt.
- Consider switching if your current unit runs daily with high usage.
Perform Annual Maintenance Routines
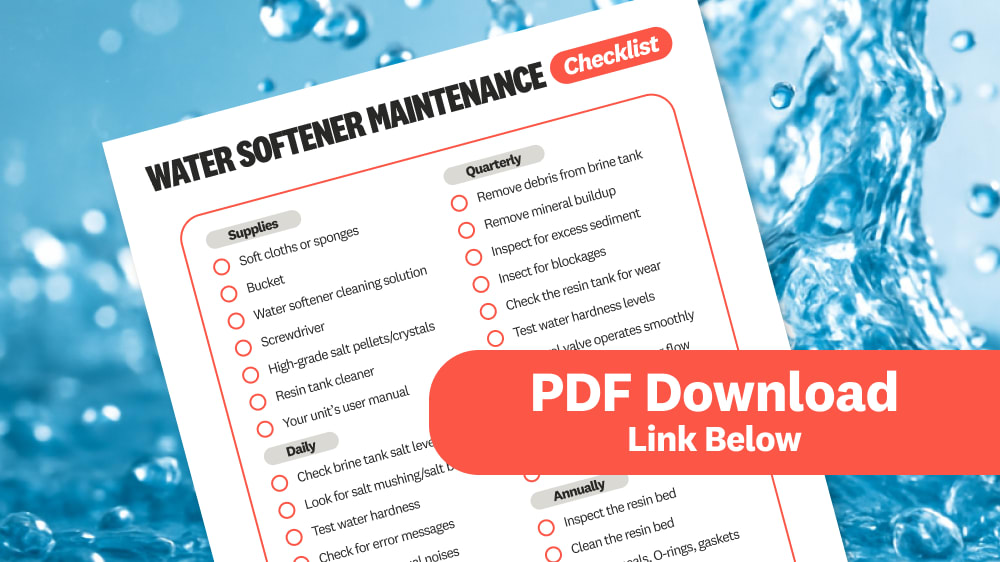
Prevent breakdowns with routine care and regular inspection of key components. A little maintenance goes a long way in extending unit life.
Deep Clean the Brine Tank
Annual cleaning removes sediment and prevents bridging issues.
- Set to bypass mode and drain all water and salt.
- Use a wet-dry vacuum to remove remaining chunks.
- Scrub the interior with warm water and a soft brush.
- Rinse and dry completely before refilling.
- Refill with fresh salt and never mix old and new salt.
Schedule: Do this once a year ideally before winter when usage patterns change.
Inspect Seals and Gaskets
Regular inspection prevents small leaks from becoming major floods.
- Check the venturi gasket annually even if no symptoms exist.
- Replace proactively every 3 to 5 years to ensure good suction.
- Lubricate O-rings with silicone grease to extend their life.
Test Water Hardness
Regular testing ensures your settings match current water conditions.
- Use a digital test strip or drop kit for accuracy.
- Adjust softener settings quarterly if source water changes.
- Aim for an ideal output of less than 1 GPG.
Know When to Call a Pro
Some issues require expert hands and specialized tools for safe repair. Recognizing these signs saves you time and prevents further damage.
Signs You Need Professional Help
Certain failures indicate internal damage beyond simple DIY fixes.
- Resin bed replacement requires special tools and knowledge.
- Cracked resin tank or control valve housing needs factory parts.
- Recurring error codes after multiple resets suggest sensor failure.
- Electrical issues like burning smells or flickering displays.
- Systems older than 10 years with multiple simultaneous failures.
Cost Note: A technician visit costs 150 to 300 dollars while new units cost 800 to 1500 dollars. For WHES30 models a 10 dollar gasket fix often beats replacement.
Frequently Asked Questions About Whirlpool Water Softener Troubleshooting
Why is my brine tank full of water and not draining?
The most likely cause is a worn rubber gasket in the venturi assembly. This gasket develops indentations over time that break the vacuum seal needed to suck brine out of the tank.
How often should I clean my Whirlpool water softener brine tank?
You should deep clean the brine tank once a year to remove salt sludge and sediment. Monthly inspections for salt bridges are also recommended to ensure proper dissolving.
What does the SL error code mean on my Whirlpool softener?
The SL code indicates low salt levels in the brine tank. Add more salt wait 24 hours for it to dissolve and then reset the system to clear the code.
Can I use rock salt in my Whirlpool water softener?
No you should avoid rock salt because it creates excessive sludge that clogs the system. Use evaporated salt pellets or cubes for best performance and longevity.
How do I reset my Whirlpool water softener after a power outage?
Unplug the unit for 30 seconds then plug it back in. Check the time and date settings and run a manual regeneration cycle to ensure proper operation.
Key Takeaways for Whirlpool Water Softener Troubleshooting
Most Whirlpool water softener problems stem from three root causes including salt bridging failed venturi gaskets and incorrect settings. By following this guide you can diagnose and repair the majority of issues yourself especially the common brine tank overflow.
Regular maintenance prevents most failures so keep salt levels stable and inspect gaskets yearly. Test water hardness quarterly and reset the system when in doubt to ensure long-term reliability.