A leaking bypass valve can flood your basement and ruin your plumbing overnight if you ignore the signs. Water softener bypass valve repair becomes urgent when you spot rust, spraying connections, or a handle that refuses to turn.
This guide walks you through isolating the unit, identifying your valve type, and replacing damaged parts safely. You will learn specific steps to fix leaks, restore pressure, and prevent future failures using basic tools.
Activate Emergency Bypass to Stop Flooding
Water pooling near your softener requires immediate action to prevent structural damage. Your first goal is isolating the unit while keeping water flowing to the rest of the house.
How to Isolate a Leaking Softener
Locate the manual bypass valve on the side or front of your unit, such as on Fleck 5600 models. Look for a handle with a notch indicating its current position relative to the plumbing flow.
Turn the handle until the notch points directly to the “bypass” label. This action redirects main line water around the softener, stopping inflow to the damaged area immediately.
Verify Bypass Engagement
A misaligned valve might still allow water into the unit, worsening the leak. Ensure the notch aligns perfectly with the bypass direction before proceeding with any repairs.
Open a faucet to test pressure. If water flows normally, the bypass is active. If you hear gurgling, recheck the valve position to ensure full isolation.
Critical: Bypassing the unit does not cut electrical power. Always disconnect electricity to the control head before starting work.
Identify Your Bypass Valve Architecture
Knowing your specific valve type determines the repair method and tools required for success. Most systems use one of three distinct designs for controlling water flow.
Rotary Valves: Twist to Control
Rotary valves feature a handle you twist to switch between service and bypass modes. The notch rotates with the handle, aligning with pipes for service or sitting perpendicular for bypass.
These common in older systems are durable but prone to seizing from mineral buildup. If the handle sticks, apply penetrating oil and gently wiggle it back and forth to loosen deposits.
Slide Valves: Push-Pull Operation
Slide valves use a linear lever that you push in for service or pull out for bypass. Newer models often feature this design because it requires less torque to operate.
Check for looseness or incomplete movement during inspection. A wobbly lever often indicates worn seals or stripped threads inside the mechanism.
Push-Button Valves: Modern Convenience
High-end systems utilize push-button bypass mechanisms that toggle modes with a single press. These offer a sleek design with minimal physical effort for the user.
If the button feels mushy or fails to engage, the internal mechanism is likely broken. These units usually require full assembly replacement rather than individual part repair.
Diagnose Common Failure Signs

Visual inspection reveals most bypass valve issues before they become catastrophic floods. You must look for specific indicators of mechanical or structural failure.
Visible Leaks and Spraying Water
A steady trickle or active spray at the base signals a failed seal or connector. Pinhole leaks frequently appear near threaded joints where rust has eaten through the metal.
Inspect all fittings where the bypass connects to the softener body. Use a flashlight to spot moisture trails, mineral crust, or active spraying under pressure.
Corrosion and Rust Buildup
Surface rust is a major warning sign of internal corrosion. Check metal connectors and threaded ends for pitting or flaky textures that indicate weakness.
Do not clean and reuse severely rusted connectors. Even if the valve operates, corroded parts will fail again quickly and cost more in water damage.
Stuck or Loose Valve Handles
If the bypass will not turn or slide, mineral deposits are likely jamming the mechanism. Try working it gently back and forth after applying penetrating oil.
A loose handle suggests stripped threads or a cracked housing. Tighten carefully, but if it remains unstable, replacement is safer than attempting a temporary fix.
Prepare for Safe Repair Work
Proper preparation prevents injury and further water damage during the repair process. Follow strict safety protocols before touching any tools.
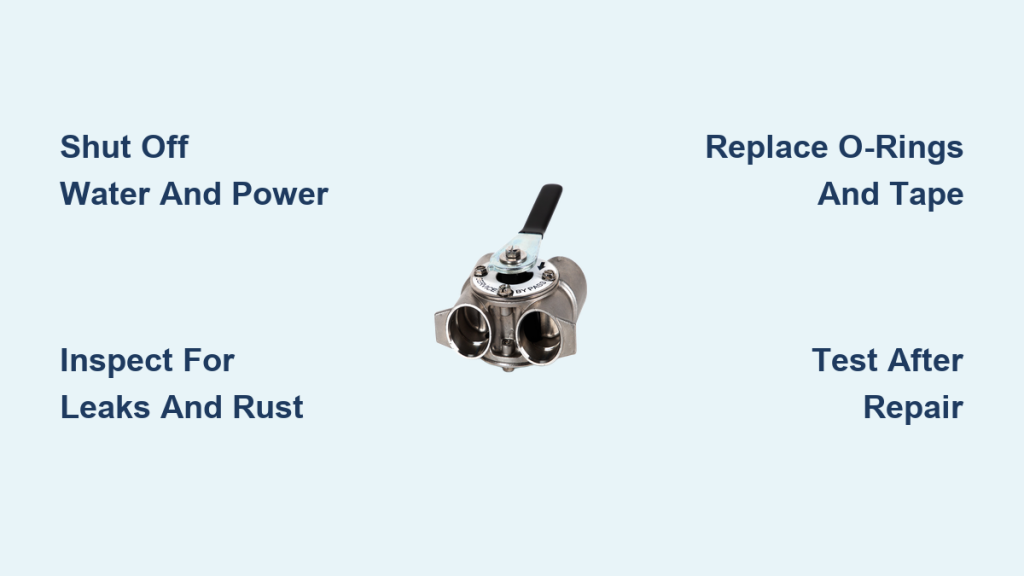
Shut Off Water and Power
Disconnect power to the softener control head as your first step. Close the main house water supply to ensure no pressure remains in the lines.
Open the bypass valve or a faucet to relieve any remaining pressure. Close isolation valves to pre-filters or the softener itself to create a dry work area.
Gather Essential Tools
You need specific tools to handle round connectors and rusted joints effectively. Having the right equipment prevents damage to the softener body.
- Pipe wrench for round connectors
- Large adjustable wrench
- Penetrating oil like PB Blaster
- High-quality Teflon tape
- Small metal file
- Vice for stability
- Replacement connectors
- New O-rings
- Bucket for residual water
Remove and Inspect the Bypass Assembly
Disassembly requires care to avoid damaging the softener body or surrounding plumbing. Work methodically to remove the unit for closer inspection.
Disconnect the Bypass Assembly
Use a large wrench to loosen the nut securing the bypass valve to the softener. Remove any mounting brackets and gently wiggle the unit free.
Expect some water to spill out even after shutting off the supply. For better access, remove the entire bypass assembly and work on it outside the unit.
Loosen Corroded Connections
Apply penetrating oil to rusted joints and let it soak for several minutes. Use a pipe wrench with steady pressure to break the first connector free.
Use two wrenches for stubborn connections, one to hold the valve body and one to turn the fitting. Avoid excessive force that could oval the pipe or damage internal threads.
Assess Damage and Plan Repair
Thorough inspection determines whether you can save parts or need a full replacement. Evaluate both the connector and the softener fitting carefully.
Check Connector and Fitting Condition
Examine the removed connector for pinholes, rust, and thread damage. Inspect the softener’s threaded port for corrosion that might compromise a new seal.
If the threads on the softener fitting are eaten away, the unit may need replacement. Partial repairs on damaged fittings often fail within months.
Decide: Repair or Replace?
Replace only the connector if the damage is isolated to that part. This costs roughly $4 to $5 and solves the immediate leak issue.
Replace the entire bypass assembly if the valve body or softener fitting is corroded. Full assemblies cost $20 to $30 and provide a more reliable long-term solution.
Repair or Replace Components
Executing the repair correctly ensures a watertight seal and restores system functionality. Follow precise steps for thread preparation and installation.
Restore Threads and Seal Joints
Clean damaged threads with a small metal file to smooth rough spots. Remove all rust and debris to prevent cross-threading during reassembly.
Wrap each threaded connection with 10 to 15 layers of Teflon tape. High-pressure systems need this extra sealing power to prevent future leaks.
Install New Connectors and O-Rings
Slide the new connector onto the pipe and push it firmly into place. Secure it with the retainer clip to ensure proper alignment.
Replace O-rings even if they look acceptable. Old seals lose elasticity and are a leading cause of slow, hard-to-detect leaks.
Reattach Bypass to Softener
Reconnect the bypass unit to the softener body and hand-tighten the nut first. Use pliers or a wrench to secure it, but do not over-tighten.
Plastic fittings can crack and metal threads can strip if forced. Tighten just until snug to avoid creating new problems during the repair.
Test and Restore System Function
Gradual pressurization protects your new seals from shock and potential failure. Monitor the system closely as you bring it back online.
Gradually Pressurize the System
Slowly open the main water supply valve to fill the lines. Rapid pressurization can shock seals and cause immediate leaks at the new joints.
Watch all connections closely as pressure builds. If you see drips or sprays, shut off the water and re-tighten or re-tape the connection.
Verify No Leaks and Full Flow
Check all repaired points once the system is fully pressurized. Close the bypass valve to send water through the softener and test multiple faucets.
If water appears cloudy, flush the lines by running water for three to five minutes. This clears debris and ensures normal flow throughout the house.
Prevent Future Bypass Failures

Regular maintenance extends the life of your softener and prevents emergency repairs. Simple habits keep the mechanism functioning smoothly.
Exercise Valve Regularly
Turn the bypass valve from service to bypass and back every three to six months. This prevents mineral buildup and keeps the mechanism moving freely.
Regular movement stops the valve from seizing even if you never use bypass mode. Think of it as lubricating a hinge to prevent rust.
Inspect O-Rings Annually
Remove and inspect O-rings yearly for cracks, flattening, or brittleness. Replace them immediately if you see any signs of degradation.
Keep spare O-rings on hand for quick swaps. A cheap O-ring can prevent thousands of dollars in basement flood damage.
Install Water Leak Alarms
Place battery-powered water leak detectors near the softener base. These devices sound an alarm when moisture bridges the sensor gap.
Early detection is critical for overnight leaks or when you are away. These devices cost only $5 to $10 and offer immense peace of mind.
Troubleshoot Common Post-Repair Issues
Some issues may persist after repair, requiring additional attention to detail. Address these common problems systematically.
Valve Won’t Turn After Reassembly
If the valve jams, it may be cross-threaded or over-tightened. Disassemble and check alignment, then reapply Teflon tape and start by hand.
Use penetrating oil if the mechanism feels stuck. Do not force it, as this can crack the housing and ruin the repair.
Persistent Leak at Connection Point
Re-check your Teflon tape application to ensure you used 10 to 15 wraps. Verify that O-rings are seated properly and not pinched.
If the fitting itself is cracked, replacement is the only viable fix. Do not attempt to patch a cracked fitting with tape alone.
Low Water Pressure After Repair
Ensure the bypass valve is fully in “service” mode. A partially engaged valve restricts flow and reduces pressure throughout the house.
Check for debris in aerators and flush all faucets to clear particles. This often resolves low pressure issues after plumbing work.
When to Call a Professional
Certain situations require expert intervention to avoid further damage. Know when to stop and call a plumber.
Internal Valve Damage Suspected
If the valve body is cracked or the internal mechanism is broken, DIY repair is not safe. Push-button and sealed units often require professional replacement.
Repeated Leaks After Repair
If you have re-taped and replaced O-rings but leaks continue, the softener inlet port may be damaged. A professional assessment prevents further harm to the unit.
Lack of Tools or Confidence
If you lack a pipe wrench or experience with pressurized plumbing, hire a pro. Water damage from a failed repair far exceeds the cost of service.
Frequently Asked Questions About Water Softener Bypass Valve Repair
How often should I exercise my bypass valve?
You should turn the valve from service to bypass and back every three to six months. This prevents mineral buildup and keeps the mechanism from seizing.
Why is my bypass valve leaking after repair?
Leaks often result from insufficient Teflon tape, pinched O-rings, or damaged threads. Ensure you use 10 to 15 wraps of tape and inspect seals closely.
Can I repair a push-button bypass valve?
Push-button valves are generally not user-serviceable if internal mechanisms fail. Most cases require full assembly replacement by a technician.
What tools do I need for bypass valve repair?
You need a pipe wrench, adjustable wrench, penetrating oil, Teflon tape, and a small metal file. A vice helps stabilize the unit during disassembly.
How much does a new bypass assembly cost?
A complete new bypass assembly typically costs between $20 and $30. Individual connectors cost only $4 to $5 but may not solve corrosion issues.
Will bypassing my softener stop all water flow?
No, bypassing only redirects water around the softener unit. Your home still receives un-softened water while the softener is isolated.
Key Takeaways for Successful Water Softener Bypass Valve Repair

Mastering water softener bypass valve repair protects your home from costly flood damage and downtime. Regular maintenance, proper tool usage, and timely replacement of corroded parts ensure long-term reliability.
Remember that full assembly replacement often beats patching old, rusted parts. Exercise your valve regularly, use ample Teflon tape, and install leak alarms for complete peace of mind.