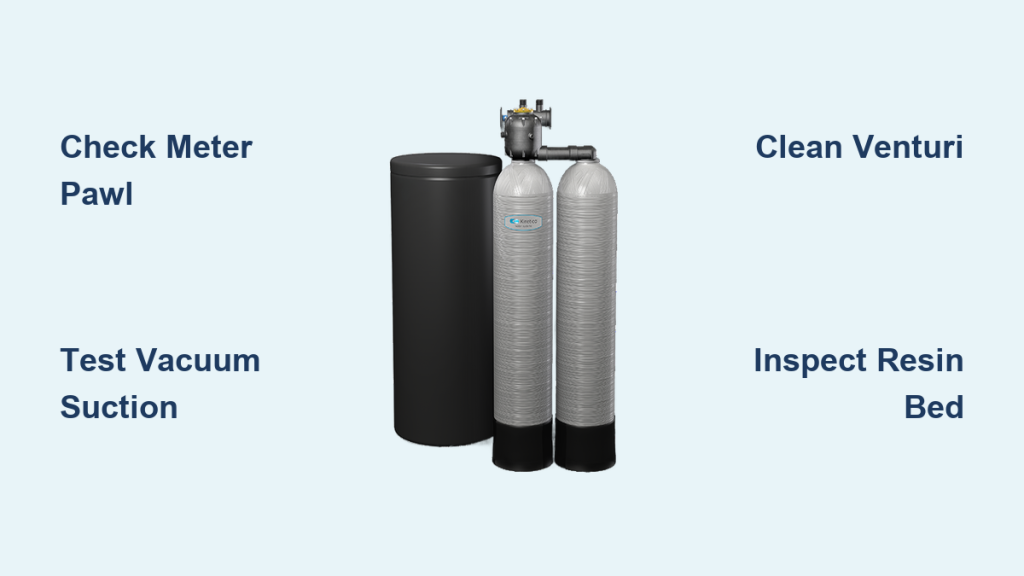
If your Kinetico water softener is not working, you likely face hard water, high salt levels, or strange noises from the unit. Unlike timer-based systems, Kinetico units regenerate based on actual water usage, so failures usually stem from mechanical blockages rather than programming errors.
This guide helps you diagnose flow sensing issues, restore vacuum for brine draw, and clean clogged components in models like the 2020 and Aqua Blue. You will learn specific repair steps to avoid costly service calls and restore soft water to your home quickly.
Confirm Water Meter Is Tracking Usage

Before disassembling parts, verify the system measures water flow correctly. Kinetico units only regenerate after a set volume passes through, so a stuck meter prevents the entire cycle.
Check Meter Pawl Movement
Run a high-flow fixture like a bathtub for one to two minutes. Look at the control head to see if the meter disc and meter pawl move.
- Working sign: The pawl jumps forward one tooth every 12 to 17 gallons.
- Low flow delay: Weak flow may take up to 10 minutes to advance the gear.
- Failure sign: No movement indicates the meter is stuck or blocked by debris.
If the pawl stays still, debris may jam the turbine. Shut off water, relieve pressure, and remove the meter cover to inspect the impeller. Clean sediment with a soft brush or replace the assembly if gears are stripped.
Test for Stuck Metering Gear Number 6
In 2020, Aqua Blue, and Infiniti models, Gear Number 6 is a known weak point. This nylon part wears down under high pressure or frequent use.
Signs of failure include no regeneration despite high water use and an unchanged salt level. The meter disc might spin while the pawl fails to advance.
- Remove the impeller from the meter housing.
- Extract Gear Number 6 and check for chipped teeth or flat spots.
- Ensure small springs on adjacent gears move freely.
Replace the gear if damaged. Install a pressure-reducing valve if your home pressure exceeds 58 psi to prevent future wear.
Diagnose Vacuum System Failure
A failed vacuum means no brine draw, so the system cannot soften water even if it cycles. This is the top cause of complaints regarding salt not being used.
Perform Brine Elbow Vacuum Test
- Let water run through the softener.
- Locate the Phillips screw in the center of the control cap.
- Press down and turn clockwise until the control disk engages.
- Rotate the disk so the black dot aligns with B&R (Brine & Rinse).
- Try to disconnect the brine valve nut from the elbow.
Results:
* ✅ Suction felt: Vacuum is working and brine can be drawn.
* ❌ Water sprays out: No vacuum exists, meaning the system cannot pull brine.
If water sprays out, the issue is likely a clogged venturi or a mechanical failure in the piston seals.
Clean the Clogged Venturi Assembly
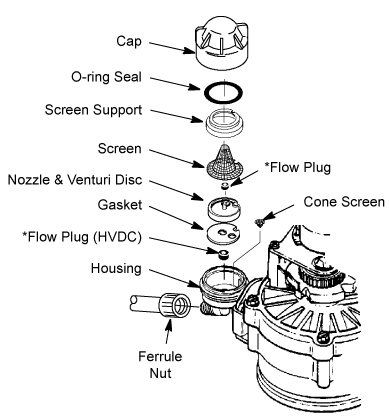
Nine out of ten cases of no salt usage result from a blocked venturi. This small component creates the vacuum needed to suck brine from the tank.
Shut Off and Depressurize System
- Use the bypass valve to isolate the softener.
- If no bypass exists, shut off the main supply and manually regenerate to drain pressure.
- ⚠️ Never disassemble under pressure due to risk of injury or cracked housing.
Remove and Inspect Venturi
- Disconnect brine and drain lines using pliers or hand tools.
- Remove E-clips securing the head to the bypass. Push elbow and head together before prying clips.
- Take out the 5/16-inch head bolts with a nut driver only. Do not use impact tools.
- Pull the venturi straight out using pliers. It has an O-ring seal.
Clear Blockage and Reinstall
- Blow through the venturi with your mouth to dislodge debris.
- Use a fine needle or torch tip cleaner for stubborn clogs.
- Inspect the O-ring and replace if cracked or flattened.
- Wet the O-ring and gasket before reinserting.
- Reinstall the venturi into Level 3 of the assembly.
Reassemble carefully because misalignment or over-tightening can cause leaks or base cracks.
Verify Regeneration Cycle Progression

Even if the system seems to cycle, it may not complete regeneration. Manually advance through phases to confirm operation.
Step Through Each Phase
With the control disk engaged, listen and watch for these signs:
- B&R (Brine & Rinse): Listen for a soft hiss and watch for light drain flow.
- K&W (Kinetic & Wash): Expect a louder sound and strong water flow to the drain.
- Rinse: Flow continues to clear residual brine.
- Hold/Service Return: As the black dot nears H, flow stops and the unit shuts down.
If flow does not stop or the unit keeps running, a piston or seal is likely stuck.
Test Both Tanks on Dual Systems
Kinetico uses twin tanks where one serves while the other regenerates. A failure on one side causes intermittent hard water.
Repeat all tests on the second tank by manually rotating to B&R and checking for vacuum. If only one tank works, the issue could be isolated to that side’s pistons, seals, or metering gear.
Inspect Piston and Seal Function

Four main pistons in Levels 3 through 6 direct water during regeneration. If any stick, the cycle fails.
Check for Free Piston Movement
During disassembly, push each piston gently. It should move smoothly without stiffness.
- Stiffness indicates scale buildup or worn seals.
- Clean calcified parts with vinegar.
- Replace damaged seals or entire piston assemblies if necessary.
Seal failures may cause continuous running, air-like gurgling sounds, or water leaking from the base.
Reinstall the Teeter-Totter Correctly
The small plastic “teeter-totter” piece from Level 5 controls water direction. If missing or misaligned during reassembly, the system will not deliver water.
Before closing the head, confirm the teeter-totter is seated in Level 5. Align holes with check stems from the base and ensure brine flow control sits over Level 3 hole before adding Level 2.
Address Resin Bed Exhaustion
If water softens after manual regeneration but turns hard within 4 to 5 days, the resin may be degraded.
Understand Chlorine Damage Risk
- Municipal chlorine breaks down standard Kinetico resin over 7 to 10 years.
- Warranty often excludes chlorine-related damage.
- Symptoms include a short softening window and beads that appear dark or mushy.
Replace or Protect the Resin
You have three main options to fix this issue:
- Replace resin bed: Requires professional service or full teardown.
- Install carbon pre-filter: Removes chlorine before it reaches the softener.
- Upgrade to chlorine-resistant resin: Extends life during replacement.
If your water is chlorinated, a carbon filter extends resin life significantly.
Maintain Salt Tank Properly
Poor salt management causes bridging, clogs, and false failure diagnoses.
Use Correct Salt Type
- ✅ Pellet or cube salt: Clean and low-impurity.
- ❌ Rock salt: Contains sediment that clogs valves and tubes.
Keep salt between ½ and ⅔ full. Refill when the level drops to ¼ or water becomes visible at the bottom.
Break Salt Bridges When Found
A salt bridge is a hard crust above the water line that prevents salt from dissolving.
- Tap the tank sides with a broom handle.
- If crust persists, insert a blunt rod and gently break it.
- For severe cases, drain the tank, remove the hardened mass, clean, and refill.
Replace Clogged Pre-Filters
Low water pressure across the house is often blamed on the softener but is usually a clogged pre-filter.
Check and Change Sediment Filter
- Located before the softener.
- Replace cartridge every 3 to 6 months.
- Use a standard 5-micron sediment filter.
Bypass the softener to test. If water pressure improves, the filter or resin bed is clogged. A clean pre-filter protects the softener from debris and improves flow.
Debunk Kitchen Sink Bypass Myths
Many users think their Kinetico is broken because the kitchen sink water is hard.
Confirm It’s a Plumbing Bypass
- Most homes bypass cold kitchen water to avoid sodium from softened water.
- This protects people on low-sodium diets.
- Drinking and cooking water stays unsoftened by design.
Test other faucets like the bathroom sink or shower. If those give soft water, the system is working.
Fix Dishwasher Film Issues
White film or spots on dishes often result from detergent mismatch rather than hard water. Soft water needs less detergent, and too much causes residue. Use rinse aid and ensure the dishwasher connects to the softened line.
Follow Safe Reassembly Practices
Improper reassembly causes cracked bases and leaks, which are top reasons for expensive replacements.
Wet All Seals Before Installing
Apply water to gaskets and O-rings to prevent pinching and ensure a proper seal.
Align Levels Correctly
Match dimples on Level 5 with base stems. Insert the teeter-totter before closing and position brine flow control over Level 3 hole.
Use Star-Pattern Bolt Tightening
- Back-thread first: Turn each bolt counter-clockwise until you hear a “click” to align threads.
- Tighten in star pattern: Go from 12 o’clock to 6 o’clock, then 3 o’clock to 9 o’clock.
- Hand-tight only: Snug with off-hand first, then final pass with dominant hand. No tools.
⚠️ Over-tightening cracks the plastic base. Never use wrenches or impact drivers.
Troubleshoot Using the Failure Matrix
Use this quick-reference table to match symptoms to causes and fixes:
| Symptom | Likely Cause | Action |
|---|---|---|
| No salt used | Clogged venturi | Clean venturi, check O-ring |
| No salt used | Worn Gear #6 | Replace metering gear |
| Hard water in 4–5 days | Bad resin | Replace resin or add carbon filter |
| Hard kitchen water only | Plumbing bypass | Test bathroom faucet |
| Low house pressure | Clogged pre-filter | Replace sediment cartridge |
| System won’t regenerate | Stuck meter pawl | Clean meter or replace assembly |
| Constant running | Failed seal or jam | Force regeneration; call pro if persists |
| White dish spots | Detergent issue | Reduce soap, use rinse aid |
Know When to Call a Pro
Some repairs go beyond DIY capabilities.
Seek professional help if internal seals or valves fail repeatedly. You may also need help if the resin bed needs replacement or if you are unsure about model-specific parts. Call a pro if the base is cracked or leaking after reassembly.
If water tests hard at all fixtures and all DIY steps fail, a full system diagnosis is needed.
Frequently Asked Questions About Kinetico Water Softener Issues
Why is my Kinetico not using any salt?
This usually indicates a clogged venturi or a failed vacuum system. Perform the brine elbow vacuum test to confirm suction. If no suction exists, clean the venturi assembly or check for worn piston seals.
How often should I replace the sediment pre-filter?
Replace the sediment pre-filter every 3 to 6 months depending on water quality. A clogged filter reduces water pressure throughout the house and can mimic softener failure.
What causes the meter pawl to stop moving?
Debris in the turbine or a worn Gear Number 6 often stops the pawl. High water pressure above 58 psi accelerates gear wear. Clean the meter assembly or replace the nylon gear to fix this.
Why is my kitchen water hard but shower water soft?
Your plumbing likely bypasses the kitchen cold line to keep drinking water unsoftened. This is a common installation practice to reduce sodium intake. Test a bathroom faucet to confirm the system works.
How do I fix white film on my dishes?
White film often results from using too much detergent in soft water. Reduce your detergent amount and use a rinse aid. Ensure your dishwasher connects to the softened water line.
Key Takeaways for Fixing Your Kinetico Water Softener
Most issues with a Kinetico water softener not working stem from simple mechanical blockages like a clogged venturi or a worn metering gear. Regular maintenance such as cleaning the venturi, checking the meter pawl, and using the correct salt type prevents most failures. Always depressurize the system before repairs and follow strict bolt-tightening patterns to avoid cracking the base.
Start your diagnosis by testing the meter movement and vacuum suction. These two checks identify the majority of problems without needing professional help. If basic cleaning and part replacements do not restore soft water, consider resin exhaustion or consult a certified technician for complex internal failures.