Does your soap refuse to lather while spots cover your clean dishes? These frustrating signs often mean your water softener needs immediate attention to restore performance. Mineral buildup and salt bridges can silently cripple your system even when it appears to run normally.
This guide explains exactly how to clean water softener units effectively to fix these common issues. You will learn to diagnose problems, break salt bridges, deep clean tanks, and rejuvenate resin beds for lasting results.
Identify Critical Signs Your System Needs Cleaning

Your water softener often gives clear warnings before it fails completely. Ignoring these early indicators can lead to permanent damage to your plumbing and appliances.
Detect Performance Drops Early
Watch for these specific symptoms that signal a problem:
* Soap fails to lather in showers or sinks
* Skin feels dry and stiff after bathing
* Dishes emerge with white spots or film
* Water pressure drops at multiple fixtures
* Salt levels remain static despite regular use
These issues suggest the ion exchange process has stalled. The resin beads are likely not recharging because the brine solution cannot form properly.
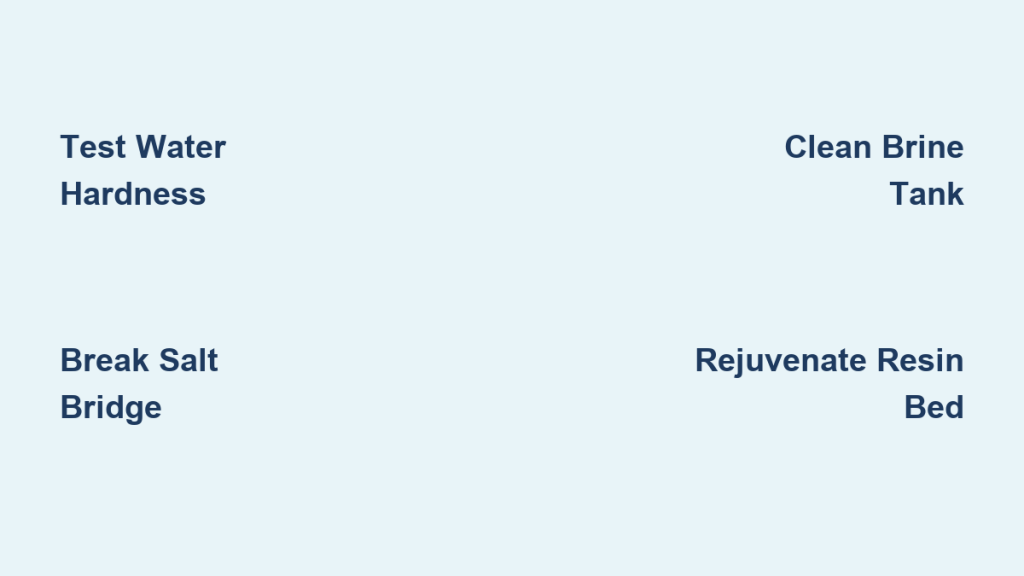
Verify Hardness With a Test Kit
Do not guess about your water status when you can test it accurately. Use a standard hardness test kit to confirm the issue.
- Collect 25 mL of hot water from the tap closest to the softener output.
- Add 5 drops of hardness indicator solution to the sample.
- Observe the color change carefully.
- Bright pink or blue means water is soft and the system works.
- Red, purple, or no change indicates hardness remains and cleaning is required.
Run the water for one minute and retest if the first result shows hardness. Proceed to inspection if the water remains hard.
Eliminate Salt Bridges and Mushing Issues
Salt problems cause the majority of water softener failures. Two specific conditions, bridging and mushing, prevent the necessary brine formation.
Break a Salt Bridge Quickly
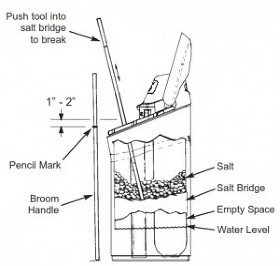
A salt bridge creates a hard crust across the top of the brine tank while leaving an empty space below. Your system thinks salt is present but cannot dissolve any into the water.
Follow these steps to fix it:
1. Empty the tank completely by scooping out all salt into a clean bucket.
2. Locate the crust by shining a flashlight inside the tank.
3. Break the layer using a rubber mallet on the exterior or pouring warm water around the edges.
4. Crack stubborn sections gently with a broom handle.
5. Wait four hours for the brine solution to reform fully.
6. Manually regenerate the system to clear the lines.
Avoid using metal tools that might scratch or puncture the tank interior.
Clear Salt Mushing Completely

Mushing occurs when dissolved salt recrystallizes into a thick sludge at the bottom of the tank. This sludge blocks the brine draw entirely.
Remove the sludge with this process:
1. Drain all water and sludge from the tank.
2. Scoop out the solidified mass manually.
3. Scrub the tank bottom thoroughly with a brush.
4. Rinse the interior well before refilling with fresh salt.
Unlike bridging, mushing usually requires a full deep clean of the brine tank.
Deep Clean the Brine Tank Thoroughly
Sludge and bacteria accumulate over time even when you use good salt. Plan to deep clean your brine tank every two to three years.
Prepare the System Safely
Shut down the unit properly before starting any cleaning work.
1. Switch to bypass mode to stop water flow to the softener.
2. Unplug the unit from the electrical outlet.
3. Disconnect the brine line using a wrench on the 5/8-inch brass nut.
4. Move the tank outdoors or to a drain-safe area away from plants.
Brine kills vegetation so dispose of it carefully in a sanitary sewer or sump pump.
Scrub and Sanitize the Interior
Remove all debris and kill odor-causing bacteria with this method.
1. Remove all salt and drain standing water.
2. Disassemble the float and valve if your model allows.
3. Rinse the interior with a garden hose.
4. Wash walls with cold water and dish soap using a long-handled brush.
5. Mix ¼ cup bleach per gallon of water for sanitization.
6. Let the solution sit for 15 minutes then scrub again.
7. Rinse three to four times until no bleach smell remains.
Never use hot water as it can warp the plastic tank components.
Refill and Restart the Unit
Get your system back online with these final steps.
1. Reconnect the brine valve and line by hand-tightening the nut.
2. Add 5 gallons of water directly into the tank.
3. Fill with 40 lbs of pellet salt or to the halfway point.
4. Air prime the line by blowing through it to lift the float.
5. Wait 2 hours for the salt to dissolve.
6. Return to service mode and plug the unit in.
The system will regenerate on its normal schedule without manual intervention.
Rejuvenate the Resin Bed Annually
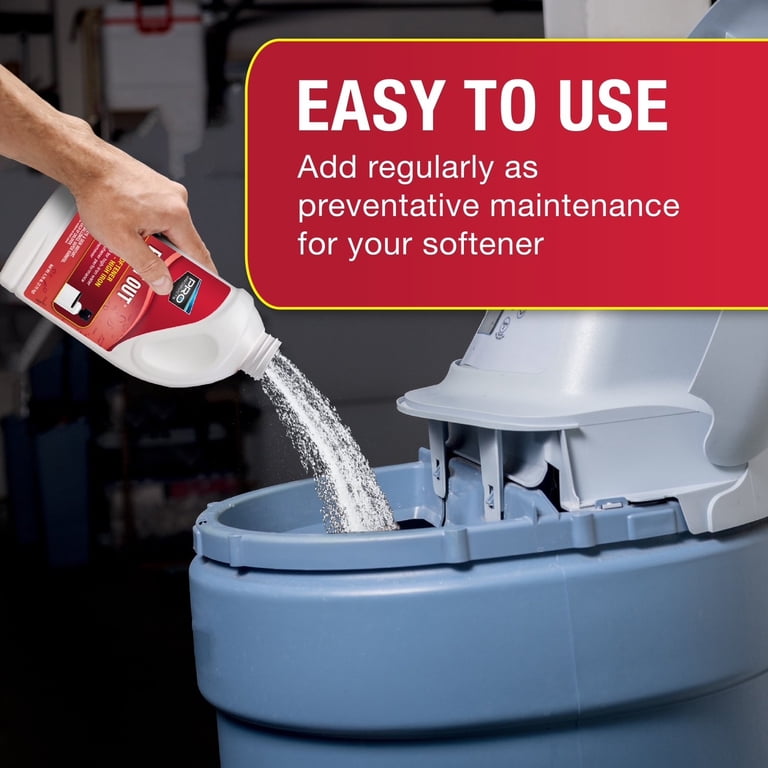
Standard regeneration does not remove iron, manganese, or organic gunk from the resin beads. These contaminants coat the beads and reduce capacity significantly.
Select the Proper Cleaner
Choose a cleaner based on your specific water contamination issues.
* Super Iron Out works best for iron and scale removal.
* Universal water softener cleaner handles broad-spectrum contaminants.
* Vinegar solution helps with light mineral buildup.
* Bleach sanitizes but does not remove minerals effectively.
Avoid rock salt as it introduces more contaminants into the resin bed.
Flush the Resin With Cleaner
Run the cleaner through the system to strip away contaminants.
1. Mix ½ gallon cold water with 1 cup of cleaner in a bucket.
2. Pour the mixture directly into the brine well inside the tank.
3. Start immediate regeneration using the digital recharge button or mechanical timer.
4. Wait 1 to 2 hours for the full flush and rinse cycle.
The system pulls the cleaner through the resin to strip away accumulated gunk.
Verify Cleaning Results
Check your water quality after the cycle completes. Run hot water for one minute to clear any residue from pipes. Test the water hardness again to ensure the system functions correctly. You should notice restored lathering and softer skin immediately.
Maintain Venturi Valves and Bypass Systems
The venturi valve creates the vacuum that draws brine from the tank. A clogged venturi stops the entire softening process.
Clean the Venturi Valve
Inspect and clean this critical component if brine is not drawing.
1. Shut off power and water to the unit.
2. Locate the venturi assembly in the control head.
3. Disassemble parts according to manufacturer instructions.
4. Rinse components and brush away sediment buildup.
5. Reassemble carefully to prevent leaks.
Check this valve annually or whenever regeneration fails.
Exercise the Bypass Valve
Prevent valves from sticking due to lack of use with monthly maintenance.
1. Turn the bypass valve to bypass mode.
2. Turn intake and outtake valves to the off position.
3. Return all valves to their original positions.
4. Switch back to service mode.
5. Check for leaks and replace washers if needed.
This simple step prevents costly valve seizures and ensures emergency isolation works.
Prevent Future Problems Effectively

Smart habits and proper supplies keep your softener running smoothly for decades. Prevention saves time and money on major repairs.
Use High-Purity Salt Only
The type of salt you use directly impacts system longevity and performance.
* Avoid rock salt due to high impurities that clog valves.
* Avoid table salt because anti-caking agents damage the system.
* Avoid solar salt as it is prone to mushing and clumping.
* Use evaporated pellet salt for the purest option available.
* Use crystal salt for a good balance of cost and purity.
Cheap salt leads to more frequent cleanings and early system failure.
Install a Sediment Pre-Filter
Place a whole-house sediment filter before the softener inlet. This trap sand, rust, and debris before they reach the resin bed. Change filter cartridges every three to six months to maintain flow.
Test Water Regularly
Check hardness every three to six months to catch issues early.
* Pink or blue indicates soft water and a working system.
* Red or purple indicates hardness and requires investigation.
Early detection saves your plumbing and appliances from scale damage.
Frequently Asked Questions About Water Softener Cleaning
How often should I clean my water softener brine tank?
You should deep clean the brine tank every two to three years for pellet salt users. If you use block salt or solar salt, clean the tank annually to prevent mushing and sludge buildup.
Can I use bleach to clean my water softener?
Yes, you can use a diluted bleach solution to sanitize the brine tank and kill bacteria. Mix ¼ cup of bleach per gallon of water, let it sit for 15 minutes, and rinse thoroughly before refilling.
What causes salt bridges in a water softener?
Salt bridges form when humidity and temperature changes cause salt to harden into a crust across the tank. Overfilling the tank or using low-quality salt increases the likelihood of bridging.
How do I know if my resin bed needs cleaning?
Signs include persistent hard water despite adequate salt levels, foul odors, or reduced water pressure. An annual resin cleaning with a specialized cleaner resolves these issues.
Is it safe to pour brine down the drain?
Yes, it is generally safe to pour diluted brine down a sanitary sewer drain or into a sump pump connected to the sewer. Avoid pouring concentrated brine directly onto vegetation or into septic systems.
Key Takeaways for Cleaning Your Water Softener
Maintaining your water softener requires regular attention to salt quality and annual resin cleaning. By breaking salt bridges immediately and deep cleaning the brine tank every few years, you ensure consistent soft water.
Start by testing your water hardness today to confirm if your system needs attention. Follow the step-by-step cleaning procedures outlined here to restore efficiency and extend the life of your unit.