
Is your LG fridge not dispensing water despite the lever feeling normal? This common issue usually stems from a locked control panel, a clogged filter, or a simple sensor glitch rather than a broken machine. Most homeowners can resolve the problem in minutes by following a specific diagnostic order.
This guide walks you through every step to fix an LG fridge not dispensing water without calling a technician. You will learn how to interpret humming sounds, test door sensors, reseat loose wiring, and replace critical components like the water inlet valve.
Unlock the Control Panel to Restore Function

A locked control panel is the single most frequent reason an LG fridge stops dispensing water. The system often locks accidentally during cleaning or when children press buttons on the display.
How to Disable the Control Lock Feature
You must verify the lock status before checking any mechanical parts. An illuminated padlock icon or a glowing “LOCK” button indicates the system is disabled.
- Locate the Lock button on your dispenser interface.
- Press and hold the button continuously for 3 to 5 seconds.
- Watch closely for the lock icon to disappear from the screen.
- Press the water lever immediately to test if flow returns.
If the light remains on after holding for 5 seconds, try holding it for up to 10 seconds. A stuck button may require a longer press to reset the internal logic.
What Error Codes Mean for Your Dispenser
Letters appearing on your digital display indicate the fridge has detected an internal fault that overrides normal functions. Common codes include Er dh or Er tE.
- Note the exact code displayed on the panel.
- Consult your user manual for specific definitions.
- Attempt a power reset by unplugging the unit for 5 minutes.
Do not proceed with other troubleshooting steps if an error code is present. These codes signal system-wide issues that must be resolved before the dispenser will operate.
Diagnose Valve Activity by Listening for Humming
Listening to your refrigerator while pressing the water lever provides critical data about the electrical status of the water inlet valve. This simple auditory test divides potential causes into two distinct paths.
What a Humming Sound Indicates
A brief buzzing or humming noise from the back or base of the unit confirms the electrical system is working correctly. The dispenser switch and wiring are successfully sending power to the valve.
If you hear humming but no water flows:
* The home water shutoff valve may be partially closed.
* The water line could be kinked behind the refrigerator.
* Low water pressure in your home plumbing might prevent operation.
* Ice may be clumped and blocking the chute if ice also fails to dispense.
Check your under-sink valve first to ensure it is fully open. Inspect the tubing where the fridge meets the wall for sharp bends or crushing.
Why Silence Points to Electrical Failure
Complete silence when pressing the lever means the electrical signal is not reaching the water valve. This scenario suggests a break in the power path rather than a water flow obstruction.
- The door sensor may think the door is open.
- The dispenser switch behind the lever could be broken.
- Wiring harnesses under the hinge might be loose.
The fridge disables the dispenser automatically if it detects an open door to prevent flooding. Your next step is verifying the door sensors are functioning properly.
Test Door Sensors to Ensure Proper Detection
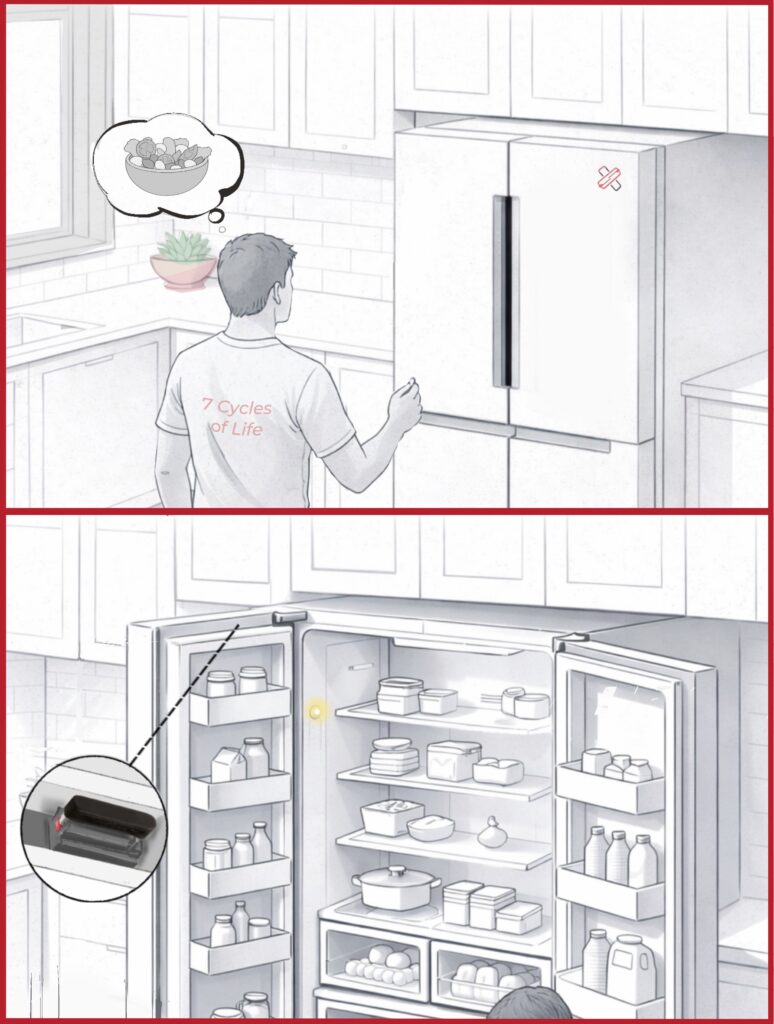
The dispenser system will not activate if the refrigerator believes the door is open. LG uses two different sensor technologies, and you must identify yours to test it correctly.
Distinguishing Between Push and Magnetic Sensors
Check your door frame to determine which sensor type your model utilizes. The testing method differs slightly for each mechanism.
Type 1: Push Switches
* Located physically on the door frame near the top.
* Test by pressing the button down gently with your finger.
Type 2: Magnetic Sensors
* Found at the top left and right corners of the frame.
* Test by holding a standard fridge magnet over the sensor spot.
Performing the Interior Light Test
The fastest way to verify sensor function is by observing the behavior of your interior lights during activation.
- Open the fridge door completely so the lights turn on.
- Activate the sensor using the method for your specific type.
- Observe the lights closely while the sensor is engaged.
- The lights must turn off when the sensor detects a closed door.
If the lights stay on while you press the switch or hold the magnet, the sensor is faulty. This failure could also indicate a loose wire connection underneath the top door hinge.
Inspect and Reseat Hinge Wiring Connections
Loose electrical connections at the top hinges are a hidden cause of dispenser failure. Wires pass through these moving hinges and can disconnect or loosen over time due to regular door usage.
Steps to Access Wire Harnesses
You only need a Phillips screwdriver to access and secure these critical connections. This process often resolves intermittent dispensing issues.
- Open the fridge door fully to expose the top hinge.
- Remove the hinge cover by unscrewing the single Phillips screw.
- Locate the white or black wire harness plugged into a socket.
- Unplug the harness and plug it back in firmly to ensure a tight fit.
- Repeat this process on the opposite door hinge if applicable.
- Replace the covers and test the water dispenser.
Pro Tip: Gently wiggle the wires while someone else presses the dispenser lever. If water starts flowing intermittently during this motion, you have confirmed a loose connection.
Replace the Water Filter for Optimal Flow

A clogged or expired water filter is a leading cause of low pressure or total flow stoppage. Regular maintenance prevents mineral buildup from blocking the system.
When to Change Your Filter
Manufacturers recommend replacing the water filter every 6 months or after filtering 200 gallons. Ignoring this schedule leads to reduced flow rates and smaller ice cubes.
Signs your filter needs replacement:
* Water trickles slowly or stops completely.
* Ice cubes appear smaller than normal.
* The filter installation date exceeds six months.
Proper Filter Replacement Procedure
Locate your filter in the top-right interior corner or the base grille depending on your model. Twist the old filter counter-clockwise to remove it.
- Inspect the old filter for cracks or heavy cloudiness.
- Install the new OEM filter by twisting it clockwise until it locks.
- Dispense 3 to 4 cups of water to clear air bubbles from the system.
- Press and hold the Reset or Filter button for 3 seconds if your model requires it.
Some models require a manual reset after filter changes. Look for the indicator light to turn blue or green to confirm the system recognizes the new filter.
Test the Dispenser Switch for Continuity
The dispenser switch sits behind the water lever and sends power to the valve when you press a cup against it. A faulty switch breaks the circuit and prevents operation.
Signs of a Failed Dispenser Switch
You may need a multimeter to confirm switch failure definitively. However, certain symptoms strongly suggest the switch is the culprit.
- The dispenser makes no humming sound.
- Neither water nor ice dispenses.
- The lever feels loose or unresponsive to touch.
How to Test Switch Continuity
This task requires basic tools and safety precautions. Unplug the refrigerator before removing any panels.
- Remove the dispenser cover to access the switch wiring.
- Set your multimeter to continuity mode.
- Touch the probes to the switch terminals.
- Press the lever and check for a beep indicating continuity.
- Replace the switch if the multimeter shows no reading.
If the switch fails this test, it must be replaced to restore function. This repair is manageable for experienced DIYers but may require professional assistance for others.
Evaluate the Water Inlet Valve Condition

The water inlet valve opens to allow water into the fridge when signaled. It can fail electrically or become clogged with debris even if the rest of the system works.
Symptoms of a Bad Water Inlet Valve
A failing valve often presents specific symptoms that distinguish it from filter or switch issues.
- You hear humming but no water flows.
- Water leaks from the back of the refrigerator.
- The water has an unusual taste or smell from internal buildup.
Replacing the Inlet Valve
Turn off the water supply and unplug the fridge before starting. The valve is typically located at the bottom rear corner of the unit.
- Shut off the water and disconnect the supply line.
- Remove the mounting screws holding the valve assembly.
- Disconnect the electrical wires and tubing from the old valve.
- Install the new OEM valve and reconnect all lines.
- Turn the water back on and test for leaks and flow.
This repair typically takes 30 to 45 minutes for a first-time attempt. Ensure all connections are tight to prevent future leaking.
Prevent Future Dispenser Issues
Regular maintenance prevents most causes of an LG fridge not dispensing water. A consistent care routine extends the life of your components.
Monthly and Annual Maintenance Tasks
Wipe the dispenser nozzle monthly to prevent mold growth. Ensure the water lever returns smoothly after every use. Listen for normal humming sounds during operation to catch issues early.
Every six months:
* Replace the water filter.
* Inspect water lines for cracks or kinks.
* Clean under the fridge to prevent overheating.
Run a vinegar flush annually by dispensing 2 to 3 cups of white vinegar through the system. This cleans internal tubing and removes mineral deposits.
When to Call a Professional Technician
Some repairs exceed safe DIY limits and require specialized tools or knowledge. Knowing when to stop prevents further damage to your appliance.
Contact a professional if:
* Multimeter tests confirm no continuity in switches.
* You smell burning or see damaged wiring.
* Water leaks persist after valve replacement.
* All troubleshooting steps fail to restore water flow.
Complex error codes like Er dh often require diagnostic tools only technicians possess. Attempting advanced repairs without proper training can void your warranty.
Frequently Asked Questions About LG Fridge Water Dispensers
Why is my LG fridge not dispensing water but the ice maker works?
This usually indicates a localized issue with the water line to the dispenser or a frozen tube in the door. Since the ice maker functions, the main water supply and inlet valve are likely working. Check for a frozen dispenser line or a clog specific to the dispenser path.
How do I know if my LG fridge water filter is clogged?
Slow water flow, small ice cubes, or a filter age exceeding six months suggests a clogged filter. If flow improves temporarily after removing the filter, replacement is necessary. Always flush the system after installing a new filter.
What does it mean if my LG fridge dispenser makes a humming noise?
Humming confirms the electrical components are receiving power and attempting to open the valve. The issue is likely a water supply problem such as a closed valve, kinked line, or low water pressure rather than an electrical failure.
Can a bad door sensor stop the water dispenser from working?
Yes, the dispenser will not operate if the fridge thinks the door is open. Test your sensors by checking if the interior lights turn off when the door closes. A faulty sensor or loose hinge connection will keep the dispenser disabled.
How often should I replace the water filter in my LG refrigerator?
Replace the water filter every six months or after filtering 200 gallons. Regular replacement prevents clogging and maintains water quality. Neglecting this schedule is a common cause of reduced water pressure.
Key Takeaways for Fixing an LG Fridge Not Dispensing Water

Most cases of an LG fridge not dispensing water resolve by unlocking the control panel, replacing an old filter, or reseating loose hinge wires. Start with these simple checks before assuming a major component has failed.
Listen for humming to distinguish between electrical and water flow issues. Test your door sensors using the interior light method to rule out false open-door signals. These steps solve the vast majority of dispenser failures.
Save this guide for quick reference during your next troubleshooting session. Keep spare water filters on hand to avoid future disruptions and maintain optimal performance.