
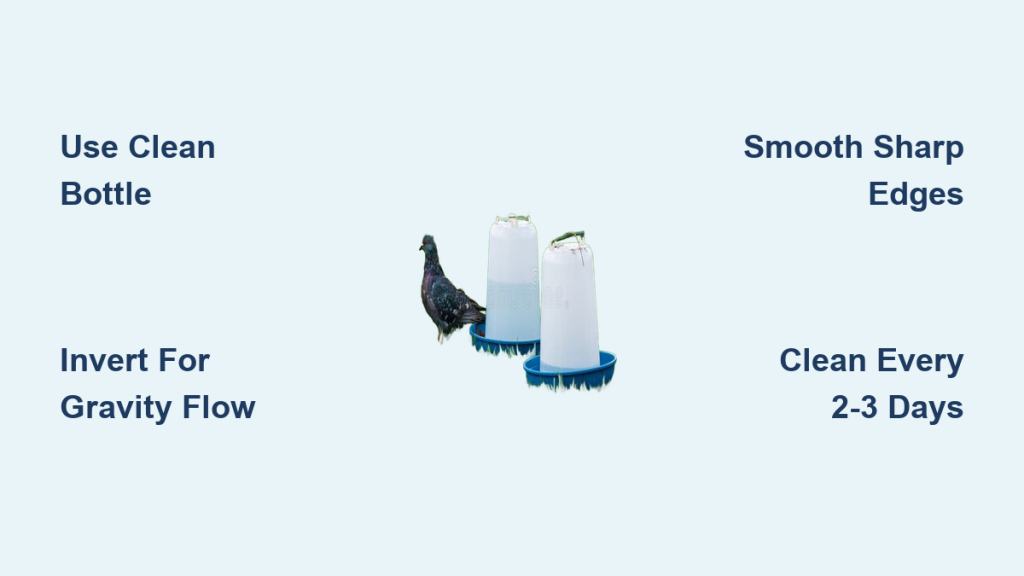
Watching birds struggle for fresh water during hot summers or freezing winters highlights the need for a reliable source. You can solve this by learning how to make a bird water dispenser using a simple plastic bottle and a bowl.
This guide details two gravity-fed methods that keep water clean while preventing spills and waste. You will discover specific steps for construction, essential safety tips, and a maintenance schedule to keep your feathered friends healthy.
Select Safe Materials for Your DIY Bird Waterer
Building a reliable system starts with choosing the right components to ensure bird safety. You need durable items that resist cracking and do not leach toxins into the water supply.
Choose the Correct Bottle Size
Select a clean plastic bottle based on the size of your target birds. A 16 oz bottle works well for small lovebirds, while a 1-liter or 2-liter bottle suits busy garden areas. Ensure the structure is sound with no soft spots or cracks that could cause leaks.
Pick a Non-Toxic Water Basin
The receiving bowl must be made of ceramic, food-grade plastic, or stainless steel. It should be shallow enough for small birds to access safely without risk of drowning. Avoid any decorated bowls unless you are certain the paint is non-toxic and water-safe.
Gather Your Essential Tools
You only need a few basic items to begin this project safely.
* Sharp scissors or a utility knife for cutting plastic.
* A drill with ¼” and ⅛” bits or a wood-burning tool.
* A Sharpie marker for marking cut lines.
* Wire or string for creating a hanger.
* Rubber bands or tape for stabilization.
Build an Inverted Gravity Waterer System

This design uses atmospheric pressure to release water only when birds drink, keeping the supply fresh. It is the most effective method for preventing overflow and reducing mess in your yard.
Cut the Bottle Below the Neck
Mark a line 1 to 2 inches below the neck of your plastic bottle using a marker. Carefully cut along this line to separate the top section from the base. Smooth any jagged edges immediately to prevent injury to birds or your hands.
Pro Tip: Use a wood-burning tool or hot glue gun to melt cut edges smooth. This prevents feather entanglement and cuts.
Invert and Assemble the Top Section
Screw the cap back onto the top piece and invert it so the neck points downward. Place this section into the base or position it above a separate bowl. The neck must hover just above the water surface to function correctly.
Position the Bowl for Optimal Flow
Place a clean bowl beneath the inverted neck to catch the water. Adjust the height so the spout sits 1 to 3 mm above the water level when full. This gap allows air to enter only when water is consumed, triggering a slow and controlled refill.
Secure the Dispenser Against Tipping
Use a rubber band or tape to hold the inverted top in place if it feels wobbly. For hanging versions, thread a folded wire through the cap and attach a metal shower curtain ring. Hang the unit in a shaded spot away from potential predators.
Adapt a Ported Bottle for Water Use
You can modify a standard ported feeder design to dispense water by carefully controlling hole size and sealing leaks. This method offers multiple access points for flocks of birds.
Mark Perch and Port Locations Precisely
On a 1-liter bottle, mark a low perch hole 1.5 inches from the bottom and an upper one at 4.5 inches. Mark water ports 1.25 inches above each perch to ensure proper flow dynamics. Stagger these holes 90 degrees apart to keep droppings away from lower perches.
Drill Holes and Smooth All Edges
Use a ¼” drill bit for perch dowels and an ⅛” bit for water ports. If using a wood-burning tool, melt the holes slowly to create a smooth rim. Never leave sharp plastic edges as they can injure birds or damage their feathers.
Install Perches and Seal for Water Control
Insert wooden dowels that extend about 5 cm on each side of the bottle. Since this design is originally for seeds, you must seal the ports with clear vinyl tubing or non-toxic silicone to create a drip valve. This prevents uncontrolled water flow while allowing birds to sip.
Add a Hanger and Fill the Bottle
Drill two small holes near the cap and thread a folded wire through to create a loop. Bend the wire ends under the cap to secure them tightly. Fill the bottle with clean water using a paper funnel and screw the cap on tight.
Prevent Disease with Regular Cleaning Routines
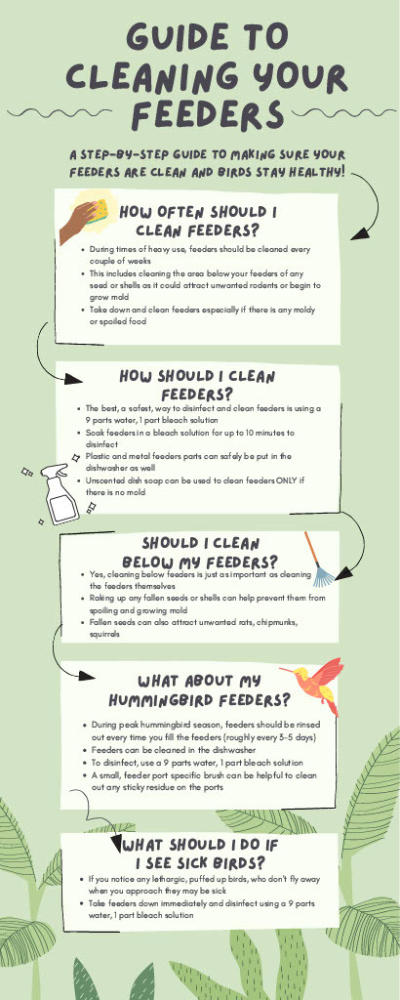
Dirty waterers spread avian flu and bacteria, making hygiene your top priority. A strict cleaning schedule ensures your dispenser remains a safe hydration station.
Clean Every Two to Three Days
Empty all remaining water and scrub the bottle with warm soapy water. Disinfect the unit with a 1:9 bleach-to-water solution and rinse thoroughly. Allow it to dry completely before refilling to ensure no chemical residue remains.
Critical: Even trace amounts of bleach can harm birds, so rinse multiple times until the smell is gone.
Replace Units When Worn
Plastic degrades under UV light and develops micro-cracks where bacteria hide. Replace your dispenser every 3 to 6 months if you notice cloudiness or odor. Recycle old bottles responsibly once they show signs of wear.
Follow Critical Safety Best Practices

Safety engineering prevents physical injury and ensures your birds remain unharmed. Always prioritize smooth surfaces and stable structures in your design.
Eliminate Sharp Plastic Edges
Cutting plastic creates jagged ends that pose a serious risk to small feet and feathers. Always melt edges with a wood-burning tool or sand them with fine-grit paper. Smooth surfaces prevent entanglement and cuts during use.
Prevent Tipping and Drowning Risks
Secure the base with tape or a weighted platform to prevent tipping. For hanging units, ensure the wire is tight and stable. Keep the water bowl under 2 inches deep to protect small birds from drowning.
Use Only Bird-Safe Materials
Avoid toxic paints, glues, or adhesives in your construction. If you paint the bottle for aesthetics, use only non-toxic, water-based acrylics. Avoid metal parts that can rust, opting instead for stainless steel or plastic components.
Optimize Water Flow and Bird Access
Proper flow mechanics ensure birds can drink easily without creating a muddy mess. You may need to adjust your setup based on how the water behaves.
Adjust for the Right Drip Rate
Water should stay static until a bird drinks, so check your flow regularly. If it overflows, raise the bottle slightly or reduce the hole size with sealant. If no water flows, check for a vacuum lock and drill a tiny air hole near the top.
Encourage Wild Birds to Use It
Wild birds may take 30 minutes to several days to trust a new object. Place the dispenser near trees or shrubs to provide escape cover. Keep it filled consistently to build trust with local wildlife.
Pro Tip: Add a small floating object like a wine cork to help birds see the water surface clearly.
Maintain Function Year-Round in All Seasons
Seasonal changes affect water quality and availability, requiring different maintenance approaches. Adapt your care routine to keep water accessible in summer and winter.
Keep It Clean in Summer Heat
Algae grows rapidly in warm weather, so clean your dispenser every 2 days. Place the unit in partial shade to slow evaporation and bacterial growth. Refill daily during peak heat to ensure a constant supply.
Prevent Freezing in Winter Cold
Check your waterer twice daily for ice formation during cold snaps. Use a larger bottle as it stays liquid longer than small ones. Bring the dispenser indoors at night if temperatures drop below freezing.
Note: Never add antifreeze or salt to the water as these substances are toxic to birds.
Troubleshoot Common Dispenser Issues
Even well-built systems can encounter problems, but most have simple fixes. Use these solutions to restore function quickly.
Water Overflows Constantly
This issue usually means the spout is too high or air cannot enter the bottle. Lower the bottle height or loosen the cap slightly to allow proper airflow.
No Water Comes Out
A vacuum lock or clogged spout often stops the flow. Drill a 1/16″ air hole in the cap or clean the neck with a pipe cleaner. Ensure the spout is not submerged too deeply in the bowl.
Birds Avoid the Dispenser
Fear of new objects or poor placement often causes avoidance. Place the waterer near natural cover and be patient. It may take several days for birds to feel safe enough to approach.
Labels Won’t Come Off
Soak stubborn labels in warm soapy water for one hour to loosen the adhesive. Use Goo Gone or nail polish remover on any remaining residue. Rub marker stains with alcohol or acetone to remove them completely.
Frequently Asked Questions About Bird Water Dispensers
How often should I clean my DIY bird waterer?
You should clean the dispenser every 2 to 3 days minimum to prevent bacteria and algae growth. Use a 1:9 bleach solution for disinfection and rinse thoroughly before refilling.
What size bottle is best for small birds like lovebirds?
A 16 oz (500ml) plastic bottle is ideal for small birds like lovebirds. Larger 1-liter or 2-liter bottles work better for high-traffic garden areas with larger species.
Why is water not flowing from my inverted bottle?
This is likely a vacuum lock preventing air from entering the bottle. Loosen the cap slightly or drill a tiny air hole near the top to break the seal.
Can I use any plastic bottle for this project?
You must use clean, structurally sound bottles without cracks or soft spots. Ensure the plastic is food-grade and free from toxic residues before starting construction.
How do I stop the water from overflowing the bowl?
Adjust the height so the spout sits just above the water surface. If it still overflows, reduce the aperture size or ensure the cap allows air to enter smoothly.
Key Takeaways for Making a Safe Bird Water Dispenser
Creating a bird water dispenser is a simple project that provides huge benefits for local wildlife. By using the inverted gravity method or a ported bottle design, you can offer clean water while minimizing waste and mess.
Remember to clean your system every few days and replace plastic bottles every few months to prevent disease. Start building your dispenser today using these safe and effective techniques to support bird health in your garden.



