

Is your Avalon water dispenser delivering water with a strange aftertaste or failing to cool properly? Mineral deposits and bacteria often build up inside the tank every few months, requiring a deep clean to restore performance and safety.
This guide explains exactly how to clean Avalon water dispenser units using citric acid or vinegar to remove scale without damaging internal pumps. You will learn specific steps for top-load and bottom-load models to ensure your water tastes fresh again.
Essential Safety Steps Before Repairing Your Vacuum
Safety is your top priority when working with electrical appliances that handle water. Skipping these precautions can lead to electric shock or permanent damage to your unit’s internal pump system.
Disconnect Power Completely
Turn off the hot, cold, and night light switches on your control panel immediately. Unplug the unit from the wall outlet before touching any screws or drains to eliminate electrical hazards.
Let Hot Water Cool Fully
Wait at least 30 minutes if you recently used the hot water function. The internal tank holds water near 175°F, and opening it too soon risks severe burns from steam or hot liquid.
Prevent Negative Pressure Damage
Keep the cabinet door open on bottom-load models when no bottle is installed. Closing the door without a water source creates negative pressure that can crush your internal pump mechanism permanently.
Required Tools and Cleaning Solutions for Avalon Models
You need specific supplies to effectively descale your unit without leaving harmful residues behind. Using the wrong tools or concentrations can void your warranty or leave unsafe chemicals in your drinking water.
Citric Acid Mixture for Top-Load Units
Mix 200 grams of citric acid crystals with 4 liters of warm water in a clean bucket. Stir until fully dissolved to create a powerful descaling solution that removes mineral buildup safely.
Vinegar Solution for Bottom-Load Units
Combine 4 cups of distilled white vinegar with 4 cups of water, then add an extra half cup of each to reach 9 cups total. Pour the vinegar first to ensure even distribution within the reservoir.
Necessary Equipment List
• Clean 5-gallon bucket for draining and mixing
• Mini screwdriver for removing panel screws
• Measuring cup for precise solution ratios
• Filtered water for final rinsing cycles
• Nitrile gloves for hand protection
Draining the Water System Completely
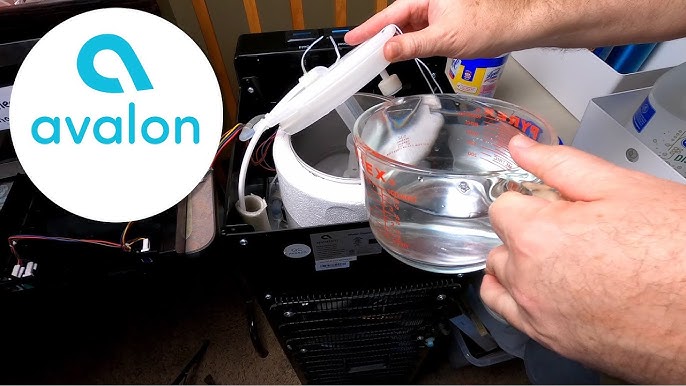
Proper drainage removes standing water and prepares the internal tanks for your cleaning solution. Failure to drain completely dilutes your cleaning agent and reduces its effectiveness.
Remove the Water Source
Lift the bottle straight off the top for top-load models. Open the cabinet door and remove the bottle from below for bottom-load units, ensuring the door stays open.
Position Your Drainage Bucket
Place a clean 5-gallon bucket directly under the drain plug located at the back bottom of the unit. This plug is usually color-coded blue or red and covered by a small protective cap.
Execute Full Drainage
Remove the protective cap and pull the drain plug outward firmly. Tilt the unit slightly forward to help gravity empty all residual water from both the hot and cold tanks until flow stops.
Accessing Internal Components by Model Type

Access methods differ significantly between top-loading and bottom-loading Avalon dispensers. Following the correct procedure for your specific model prevents damage to plastic clips and internal wiring.
Opening Top-Loading Models
- Use the included mini screwdriver to remove two screws at the rear top edge.
- Gently lift the top panel forward until it pops up and rests against the back.
- Press retaining clips to remove the cold tank lid and lift it away carefully.
- Twist slightly and lift the cold tank separator from the center hole.
Opening Bottom-Loading Models
- Locate and remove two screws on the back panel, distinct from the drain cap.
- Lift the top panel straight up, noting it is held by plastic nibs and wires.
- Avoid touching the float mechanism inside the reservoir to prevent bending.
- Inspect the area gently to ensure no obstructions block the cleaning path.
Mixing and Applying the Cleaning Solution
Correct application ensures the solution reaches all internal lines and tanks where bacteria hide. Improper mixing can leave crystals undissolved or create a solution too weak to remove scale.
Pouring Solution into Top-Load Tanks
Aim for the center of the exposed cold tank when pouring your citric acid mixture. Fill until the solution reaches the top to ensure both cold and hot tanks receive adequate coverage.
Pouring Solution into Bottom-Load Reservoirs
Carefully pour your vinegar mixture directly into the open reservoir. Avoid splashing the float mechanism as this component controls water levels and is sensitive to impact.
Securing Components Temporarily
Replace the cold tank lid and rest the top cover on the unit without screwing it back in yet. This temporary setup allows the solution to circulate while preventing spills during the heating cycle.
Circulating Solution Through Hot and Cold Lines
Circulation forces the cleaning agent through every internal pipe to dissolve mineral deposits effectively. Running the wrong switch during this phase can damage the cold pump system.
Reconnect Power Safely
Plug the unit back in but only turn on the Hot Water switch immediately. Never activate the cold pump switch while cleaning solution is inside the unit to avoid pump failure.
Run the Heating Cycle
Allow the solution to heat and circulate for 20 to 30 minutes on top-load models. Run bottom-load models for 15 minutes, checking that fluid flows from both hot and cold spouts.
Cool Before Draining
Turn off the hot switch and let the unit sit unplugged for 10 to 20 minutes. This cooling period prevents steam burns and reduces pressure buildup when you open the drain again.
Rinsing Thoroughly to Remove All Residue
Rinsing is the most critical step to ensure no cleaning taste remains in your drinking water. Leftover vinegar or acid can irritate your throat and ruin the flavor of your beverages.
Drain the Used Cleaning Solution
Reinsert the drain plug, then pull it again to drain all solution into your bucket. Dispose of the used liquid safely by pouring it down the drain or using it as a natural weed killer.
Perform Three Full Rinse Cycles
Use filtered water only for these steps to avoid reintroducing minerals that cause scale.
1. Pour 9 cups of filtered water into the tank or reservoir.
2. Dispense water from both hot and cold spouts to flush lines.
3. Drain completely via the rear plug.
Repeat this entire process three times until no odor remains.
Execute Final Spout Flush
Run 4 cups of water through the hot dispenser and 4 cups through the cold dispenser. For the cold side specifically, run 1 full gallon to ensure the cooling coil is completely clear.
Reassembling and Testing Your Dispenser
Proper reassembly ensures your unit operates safely without leaks or electrical issues. A rushed job can lead to pinched wires or misaligned components that cause future failures.
Reassemble Top-Loading Units
- Reinsert the rear drain plug tightly to prevent leaks.
- Place the separator back into the center hole and press firmly.
- Align the metal tab of the cold tank lid with the internal slot and snap clips.
- Lower the top cover, ensure no wires are pinched, and reinstall the two screws.
Reassemble Bottom-Loading Units
- Align the top panel nibs and lower it gently onto the base.
- Reattach the two back screws securely to hold the panel in place.
- Verify the drip tray is seated with the marked line aligned correctly.
- Check that all internal tubes and gaskets are fully inserted and locked.
Verify Operation and Taste
Plug in the unit and turn on both hot and cold switches to test functionality. Dispense a glass from each side and taste the water to confirm it is odorless and clean before regular use.
Preventing Future Buildup and Maintenance Issues
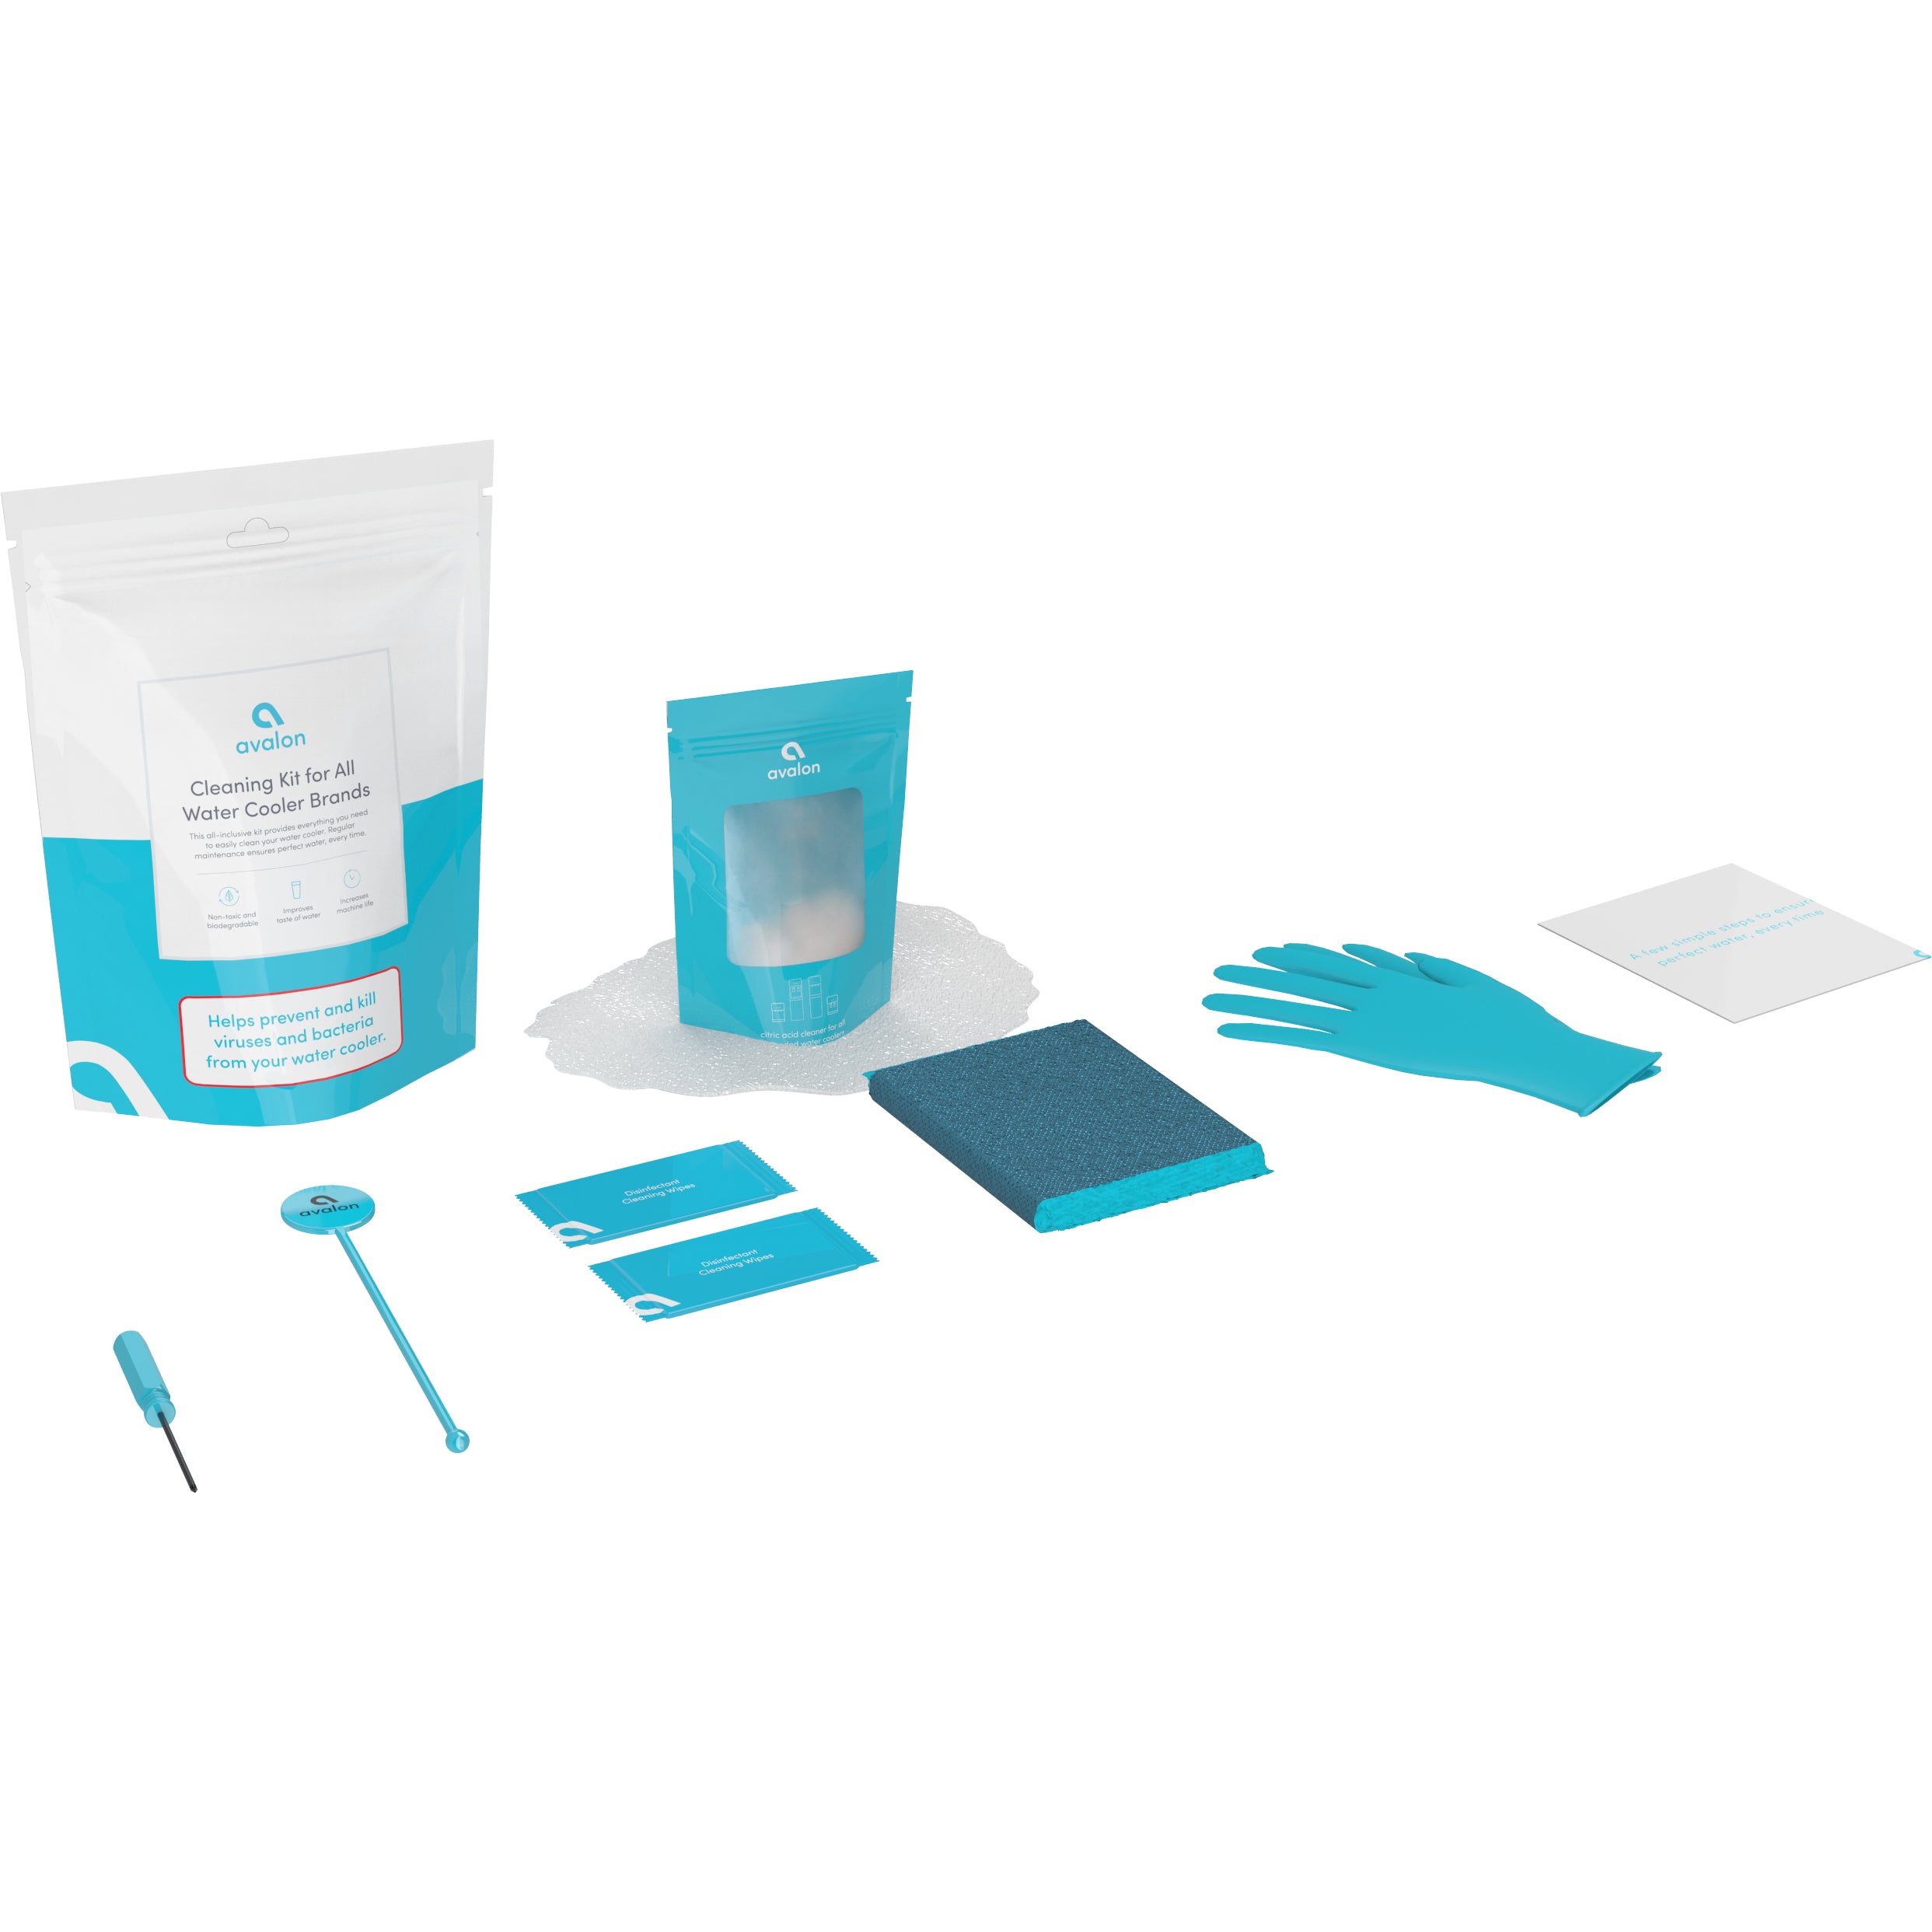
Regular maintenance extends the life of your Avalon dispenser and keeps your water tasting great. Simple habits can reduce the frequency of deep cleaning sessions significantly.
Use Filtered Water for Rinsing
Always use filtered water during your final rinse cycles to prevent new mineral deposits. Tap water contains minerals that accelerate scaling and shorten the time between necessary cleanings.
Clean Exteriors Weekly
Wipe down spouts, buttons, and the drip tray weekly with disinfectant wipes. This practice prevents mold and bacterial growth around high-touch areas where germs accumulate quickly.
Replace Worn Kit Supplies
Buy your own nitrile gloves and high-quality wipes instead of relying on kit supplies. Official kit gloves often arrive brittle and break, while wipes may be dry upon arrival.
Troubleshooting Common Post-Cleaning Problems
Even careful cleaners sometimes encounter issues like bad tastes or strange noises after maintenance. These common problems usually have simple fixes if you know what to look for.
Water Tastes Sour or Chemical
This issue indicates incomplete rinsing of the cleaning solution. Run 4 additional cups through both sides and a full gallon through the cold line to clear remaining residue.
Unit Makes Noise or Vibrates
Loose door knobs or misaligned panels often cause vibration during operation. Snap knobs securely into place and check that back panel screws are tight to stop the noise.
Empty Bottle Light Stays On
The sensor may not detect the bottle if it is not seated properly. Remove and reinsert the bottle, pressing the probe down firmly for smaller 3-gallon bottles.
Frequently Asked Questions About Cleaning Avalon Water Dispensers
How often should I clean my Avalon water dispenser?
You should clean your unit every 3 to 6 months to prevent bacterial growth and mineral buildup. Bottom-loading models specifically benefit from a strict 6-month cleaning schedule to protect the pump.
Can I use bleach instead of vinegar or citric acid?
You can use a bleach solution of 2 tablespoons per 2 gallons of water, but it requires extensive rinsing. Citric acid or vinegar is generally recommended as they are easier to rinse and less harsh on components.
Why does my water still taste like vinegar after cleaning?
Residual taste means you need more rinse cycles with filtered water. Run an additional gallon through the cold line and 4 cups through the hot line until the taste disappears completely.
Is it safe to drink water immediately after cleaning?
Yes, provided you have completed all rinse cycles and the water tastes neutral. Always perform a taste test before returning the dispenser to regular daily use to ensure safety.
What happens if I run the cold pump with cleaning solution?
Running the cold pump with concentrated cleaning solution can permanently damage the internal pump mechanism. Only activate the hot water switch during the circulation phase of cleaning.
Key Takeaways for Cleaning Your Avalon Water Dispenser
Cleaning your Avalon water dispenser every few months removes harmful bacteria and mineral scale that affect taste and performance. By following the correct steps for your specific model and rinsing thoroughly with filtered water, you ensure safe and refreshing drinking water year-round.
Start your next cleaning session by gathering citric acid or vinegar and unplugging your unit for safety. Regular maintenance protects your investment and keeps your water tasting fresh without chemical aftertastes.



