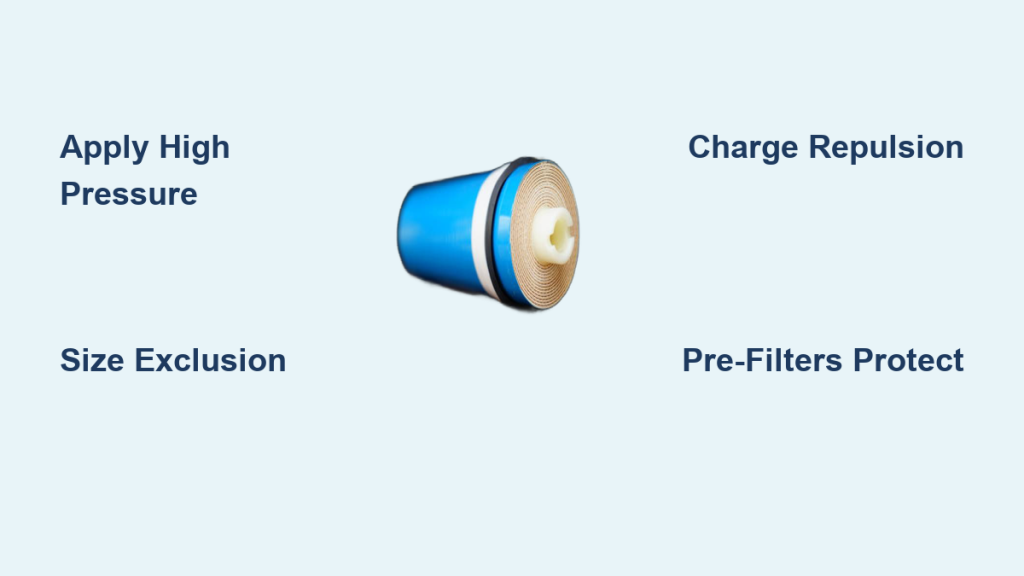

Imagine turning dirty, contaminated water into clean, drinkable water right in your own home. With a DIY reverse osmosis water filter, that’s not only possible but surprisingly affordable. Reverse osmosis removes up to 98% of contaminants, including lead, fluoride, nitrates, and microplastics, using only pressure and a semi-permeable membrane. Whether you are preparing for emergencies, living off-grid, or just want better-tasting water, learning how to make a reverse osmosis water filter gives you full control over your water quality.
You do not need a lab or special tools. Just standard plumbing parts, a few filters, and basic hand tools. This guide walks you through every step: choosing the right components, assembling them in the correct order, connecting tubing and valves, and testing performance with a TDS meter. You will build a system that matches or beats commercial units, all for under $100.
Essential Components for Your DIY RO System
Every reverse osmosis filter relies on the same core parts working in sequence. Using universal 10-inch housings and push-fit fittings keeps costs low and replacements easy. No proprietary cartridges. No vendor lock-in. Just reliable, repairable filtration.
Filter Housings and Mounting Setup
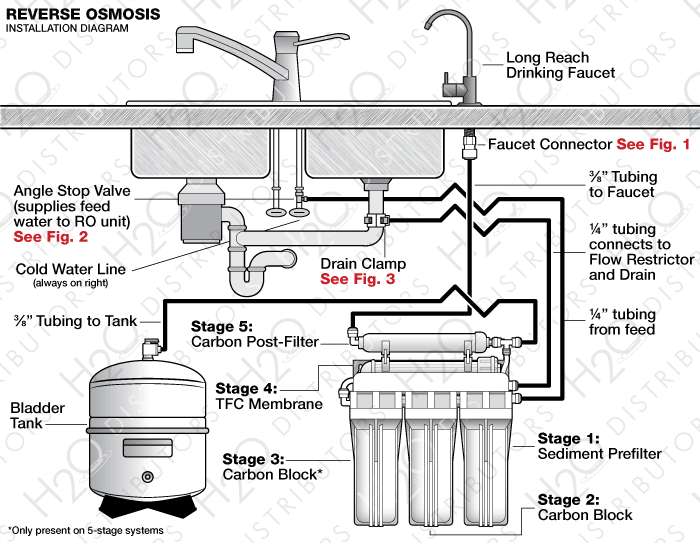
Use three standard 10-inch filter housings for pre- and post-filtration. Mount them vertically on a steel bracket screwed to a wall or frame. This layout saves space and simplifies plumbing. The housings are clear or opaque plastic, allowing you to see when filters need replacement.
Add a separate horizontal membrane housing for the RO element. It is smaller and mounts on top of the bracket. All housings use 1/4-inch quick-connect or threaded ports for easy tubing attachment.
Choose the Right Filtration Stages
Water must pass through four stages in exact order. Skipping or rearranging them risks membrane failure.
Install 5-Micron Sediment Filter First
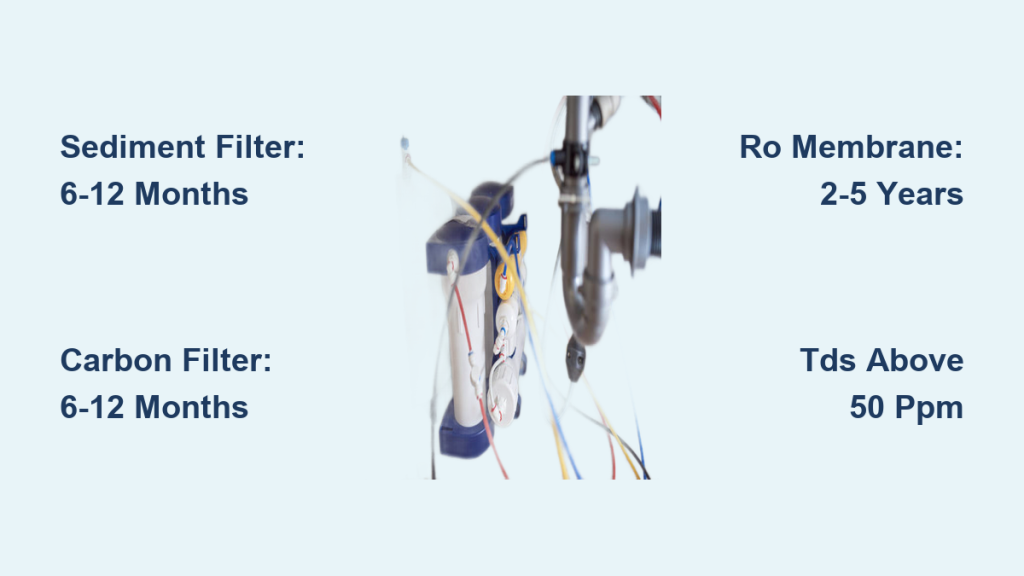
Start with a 5-micron spun polypropylene filter. It traps sand, rust, silt, and other particles. Without this stage, debris clogs the carbon block and scratches the RO membrane. Replace every 6 to 12 months, sooner if your water is cloudy.
Add Solid Carbon Block Filter
Next, insert a solid carbon block filter, not granular. It removes chlorine, chloramines, VOCs, and bad tastes. This is critical: chlorine destroys thin film composite membranes. Even small amounts cause irreversible damage. Replace this filter every 6 to 12 months, regardless of taste, because it protects your most expensive part.
Insert RO Membrane in Dedicated Housing
Use a TFC membrane rated for your water pressure and daily needs. Common sizes are 50, 100, 150, or 400 gallons per day. Higher GPD means faster filling. Handle the membrane by the tip only. Avoid touching the surface. Insert it into the housing with the o-ring seated properly. Snap the cap on. Do not over-tighten.
Finish with GAC Post-Carbon Filter
After the membrane, install a granular activated carbon filter. It polishes the water, removing any stale taste picked up during storage. Place this as the final stage before the faucet.
Never change the flow order: Sediment → Carbon Block → RO Membrane → GAC.
Connect Valves and Control Flow
Valves manage pressure, prevent backflow, and stop waste water when the tank is full. Install them correctly to avoid leaks and ensure efficiency.
Install Automatic Shutoff Valve
The automatic shutoff valve stops water flow when the storage tank reaches pressure, about two-thirds of line pressure. Without it, the system runs continuously, wasting water and wearing out the membrane. Connect it between the RO membrane permeate line and the storage tank.
Add Check Valve on Permeate Line
Install a check valve right after the membrane pure water outlet. It prevents backflow into the membrane when the system shuts off. Backflow can damage the membrane or introduce bacteria.
Match Flow Restrictor to Membrane GPD
Attach a flow restrictor to the waste line. It creates 40 to 80 PSI backpressure across the membrane, essential for separation. Use a restrictor rated for your membrane GPD. A 400 GPD membrane needs a 400 GPD restrictor. Mismatched restrictors reduce efficiency or flood the drain.
Set Up Storage and Dispensing
You need a way to store purified water and deliver it on demand. A pressurized tank and dedicated faucet make this possible.
Mount RO Storage Tank
Use a 3 to 4 gallon bladder tank. It holds purified water under 30 to 50 PSI pressure. Before installation, pressurize the empty tank to 7 to 10 PSI with an air pump, like a bike tire. This keeps the bladder functional. Connect it to the automatic shutoff valve via 1/4-inch LLDPE tubing.
Install Dedicated RO Faucet
Drill a hole in your sink or countertop for a non-venting RO faucet. It dispenses only purified water. Never connect RO water to your main faucet. Cross-contamination risks exist. The faucet has no aerator, so it will not clog with mineral deposits.
Use Correct Tubing and Fittings
Run 1/4-inch LLDPE tubing between all components. Cut ends square with a tubing cutter. Push into quick-connect fittings until you hear a click. For threaded connections, wrap fittings with 10 turns of Teflon tape to seal.
Secure tubing every 12 to 18 inches with plastic clips. This prevents kinks, sags, and stress on joints.
Add Optional Upgrades for Better Performance
Boost output, monitor quality, or adapt to low-pressure sources with these smart additions.
Use Booster Pump for Low Pressure
If your water pressure is below 40 PSI, common with wells, rain barrels, or gravity systems, add a 12V DC booster pump. It pushes pressure to 60 to 80 PSI, where membranes work best. Power it with solar panels or a deep-cycle battery for off-grid use. Install it between the carbon filter and RO membrane.
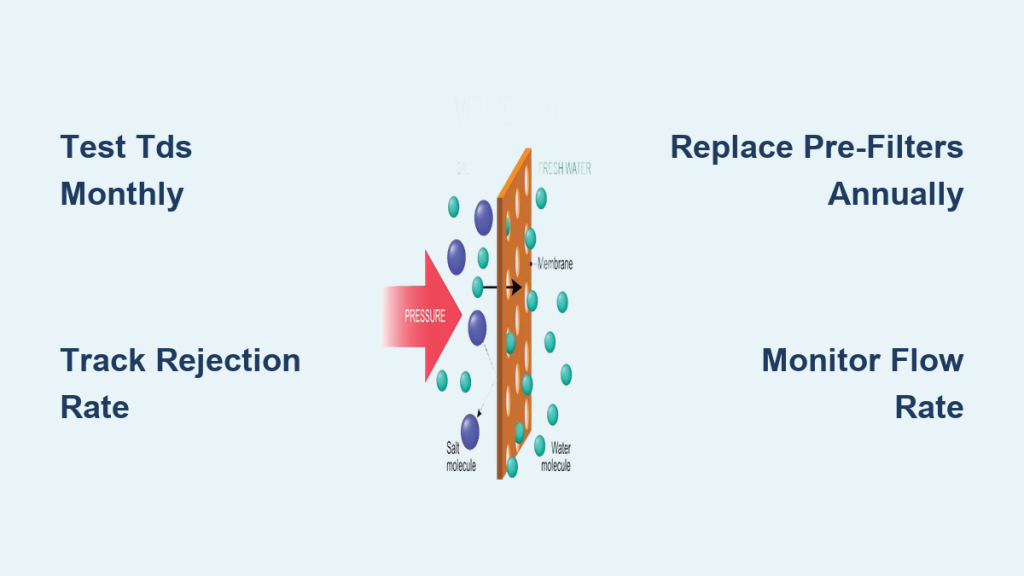
Test With TDS Meter
A 20 dollar TDS meter is the only way to verify your system works. Test tap water first, for example 300 ppm. Then test RO water. A good system cuts TDS by 90 to 98%. If RO water reads above 30 ppm with 300 ppm input, the membrane may be failing.
Install Drain Adapter Safely
Connect the waste line to your sink P-trap using a drain saddle or drilled 1/2-inch hole. Seal with plumber putty or silicone. Ensure an air gap. No direct pipe-to-drain connection prevents back-siphonage.
Collect Waste Water for Reuse
RO produces 3 to 4 gallons of waste per gallon of pure water. But it is not raw sewage. It is already filtered through sediment and carbon. Use it for watering non-edible plants, mopping floors, or flushing toilets. Route the brine line to a bucket or garden hose instead of dumping it.
Assemble the System Step by Step
Now that you have all parts, follow this exact sequence to avoid mistakes.
Mount and Align Components
Screw the filter bracket to a wall near your water source. Attach the three 10-inch housings vertically. Clip the horizontal membrane housing on top. Keep everything level and secure.
Load Filters in Correct Order
Insert the 5-micron sediment filter as stage 1. Insert the carbon block filter as stage 2. Insert the RO membrane as stage 3, handling by the tip with o-ring in place. Insert the GAC post-filter as stage 4. Snap caps on. Do not over-tighten.
Connect Pre-Filters With Tubing
Use short tubing or threaded nipples to link sediment outlet to carbon inlet, and carbon outlet to RO membrane inlet. Use Teflon tape on all threaded joints.
Attach Waste Line and Flow Restrictor
Find the brine port on the membrane housing. Connect the flow restrictor, then capillary tubing to the drain adapter. Route it to the P-trap with a downward slope to prevent pooling.
Wire Permeate Line to Tank and Faucet
Connect RO membrane permeate outlet to check valve, check valve to automatic shutoff valve, automatic shutoff valve to storage tank inlet, tank outlet to GAC filter inlet, and GAC outlet to RO faucet. Use tubing clips to secure every run.
Pressurize and Flush System
Close the feed water valve. Open the RO faucet. Slowly open the feed water valve to let air escape. Let the tank fill. This takes 2 to 4 hours depending on GPD rating.
Then flush the system for 30 to 60 minutes. This removes carbon fines and preserves membrane life. Discard the first tank of water if it tastes odd.
Optimize for Water Pressure Needs
RO membranes need pressure to work. Too little and output drops. Too much and parts fail.
Know Your Pressure Requirements
| Component | Minimum | Ideal | Maximum |
|---|---|---|---|
| RO Membrane | 40 PSI | 60–80 PSI | 100 PSI |
| Storage Tank | 7 PSI | 40 PSI | 50 PSI |
| Booster Pump | N/A | 70 PSI | 110 PSI |
If your home pressure is below 40 PSI, install a booster pump. If above 80 PSI, add a pressure regulator to protect the membrane.
Fix Low-Pressure Problems
Common causes include well systems, rainwater collection, and rural pipelines. The solution is a 12V booster pump with battery or solar setup. Place it after the carbon filter to protect the pump from chlorine.
Maintain and Monitor Performance
Even the best system fails without upkeep. Follow this schedule to keep water pure.
Replace Filters on Schedule
Replace the sediment filter every 6 to 12 months, sooner if flow drops. Replace the carbon block every 6 to 12 months. It is critical for membrane protection. Replace the RO membrane every 2 to 3 years, testing with a TDS meter. Replace the GAC filter every 6 to 12 months to prevent stale taste.
Pro Tip: Keep spares on hand. A full rebuild kit costs less than 50 dollars.
Sanitize Housings Annually
Mix 1 part bleach to 10 parts water. Run through each housing to kill biofilm. Flush thoroughly before reuse.
Check Tank Bladder Pressure
Once a year, drain the tank and check air pressure at the tire-style valve. Recharge to 7 to 10 PSI if below.
Customize for Off-Grid or High-Volume Use
Tailor your system to your needs, whether you are camping, homesteading, or serving a large household.
Build an Off-Grid RO System
Use a 12V booster pump, solar panel in the 20 to 50W range, deep-cycle battery, and portable crate enclosure. Add a 10-micron reusable pleated filter before the sediment stage for muddy water sources.
Scale Up for More Output
Need more water? Use a 400 GPD membrane. Run two membranes in parallel. Install a 10-gallon storage tank. All with the same core design, just bigger parts.
Ensure Microbiological Safety
RO blocks most bacteria and viruses, but not 100%. For untreated surface water like lakes or rivers, add a UV sterilizer after the faucet, or dose with chlorine at 2 to 4 ppm, wait 30 minutes, then filter. Never rely solely on RO for pathogen removal in high-risk water.
Troubleshoot Common Problems

Even well-built systems have issues. Diagnose fast with this guide.
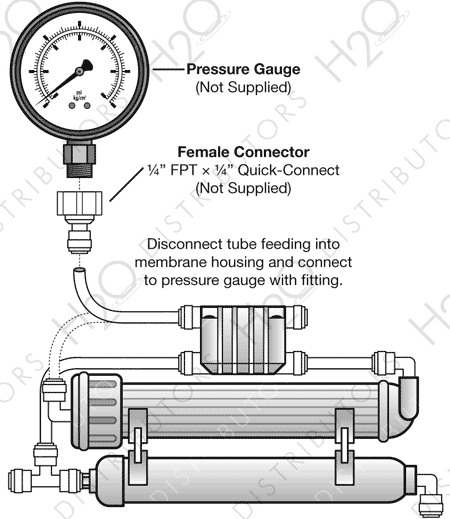
Fix Low Water Production
Causes include low feed pressure, clogged sediment or carbon filter, or failed membrane. Solutions include checking inlet pressure with a gauge, replacing pre-filters, and testing TDS. If high, replace the membrane.
Stop Leaks at Fittings
Causes include missing Teflon tape, loose connection, or tubing not fully inserted. Solutions include re-taping threaded joints, pushing tubing in until click, and using clips to relieve strain.
Resolve Bad Taste in RO Water
Causes include old GAC filter, stale water in tank, or biofilm in lines. Solutions include replacing the post-filter, sanitizing tank and flushing, and installing new tubing if needed.
Diagnose No Water at Faucet
Check if the automatic shutoff valve is closed. Check if the tank bladder is dead, with zero pressure. Check if tubing is kinked or blocked. Test tank pressure first. If it is below 5 PSI when empty, replace the tank.
Maximize Long-Term Value
A DIY RO system costs about the same as a store-bought unit, but wins in the long run.
Save Money on Replacements
Standard 10-inch filters cost 5 to 10 dollars each. Proprietary cartridges can be 30 dollars or more. Over 5 years, you save hundreds.
Avoid Vendor Lock-In
No apps. No subscriptions. No smart indicators. You control every part.
Repair, Do Not Replace
If the automatic shutoff valve fails, swap it. Membrane slow, replace it. No need to junk the whole system.
Bottom Line: Same upfront cost. Much lower lifetime cost. Total control.
Frequently Asked Questions About Making a Reverse Osmosis Water Filter
How much does it cost to build your own RO system?
Building your own reverse osmosis water filter costs under 100 dollars using standard 10-inch housings and universal fittings. This is comparable to mid-range commercial units, but you save significantly on replacement filters over time since standard cartridges cost 5 to 10 dollars each versus 30 dollars or more for proprietary ones.
What is the correct filter order for a reverse osmosis system?
The correct order is sediment filter first, then carbon block filter, then RO membrane, then GAC post-carbon filter. This sequence is critical. The sediment filter protects the carbon block and membrane from debris. The carbon block removes chlorine that would destroy the TFC membrane. The GAC filter polishes the water before dispensing.
Do I need a booster pump for my RO system?
You need a booster pump if your feed water pressure is below 40 PSI. This is common with well systems, rainwater collection, or gravity-fed setups. A 12V DC booster pump increases pressure to 60 to 80 PSI, which is ideal for membrane performance. You can power it with solar panels or a deep-cycle battery for off-grid use.
How often should I replace filters in my DIY RO system?
Replace the sediment filter every 6 to 12 months. Replace the carbon block filter every 6 to 12 months, even without taste changes, because it protects the membrane. Replace the RO membrane every 2 to 3 years, checking with a TDS meter. Replace the GAC post-filter every 6 to 12 months to prevent stale taste.
Can RO water be used for drinking straight from the faucet?
Yes, RO water is safe to drink straight from the dedicated faucet. The system removes 90 to 98% of TDS, including lead, fluoride, nitrates, and most pathogens. However, for untreated surface water like lakes or rivers, add a UV sterilizer or chlorine treatment because RO is not 100% foolproof against all microorganisms.
What should my TDS reading be after RO filtration?
A properly working RO system should reduce TDS by 90 to 98%. If your tap water reads 300 ppm, your RO water should read 30 ppm or lower. If RO water reads above 30 ppm with 300 ppm input, the membrane may be failing or the flow restrictor may be mismatched.
Key Takeaways for Building Your Own Reverse Osmosis Filter
Building your own reverse osmosis water filter is not just about saving money. It is about self-reliance. You will understand every drop, every part, and every stage. From installation to maintenance, you are in charge. Whether for daily use, disaster prep, or off-grid living, this system delivers clean water when you need it most.
The most critical points are maintaining the correct filter order, ensuring adequate water pressure, and following a regular maintenance schedule. Keep a TDS meter, spare filters, and a rebuild kit ready. Your water will stay pure for years with proper care. Start with standard components, follow the assembly sequence precisely, and you will have a professional-grade filtration system at a fraction of the commercial cost.