
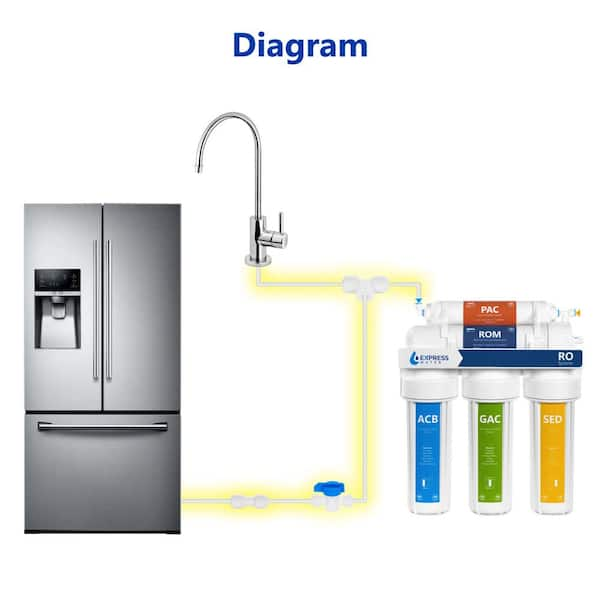
Is your refrigerator’s ice tasting faintly of chlorine? Do water dispensers deliver water that still feels “off” despite a built-in filter? The solution lies in connecting your reverse osmosis (RO) system directly to your refrigerator. This integration delivers purified, great-tasting water to both the dispenser and ice maker, removing chlorine, heavy metals, sediment, and total dissolved solids that standard fridge filters cannot fully eliminate.
By tapping into your RO system’s product water line, you upgrade your refrigerator from filtered to fully purified water. But improper installation can lead to low pressure, slow ice production, or complete flow failure. This guide walks you through every step, from selecting the right tubing and fittings to bypassing your fridge’s internal filter and optimizing flow.
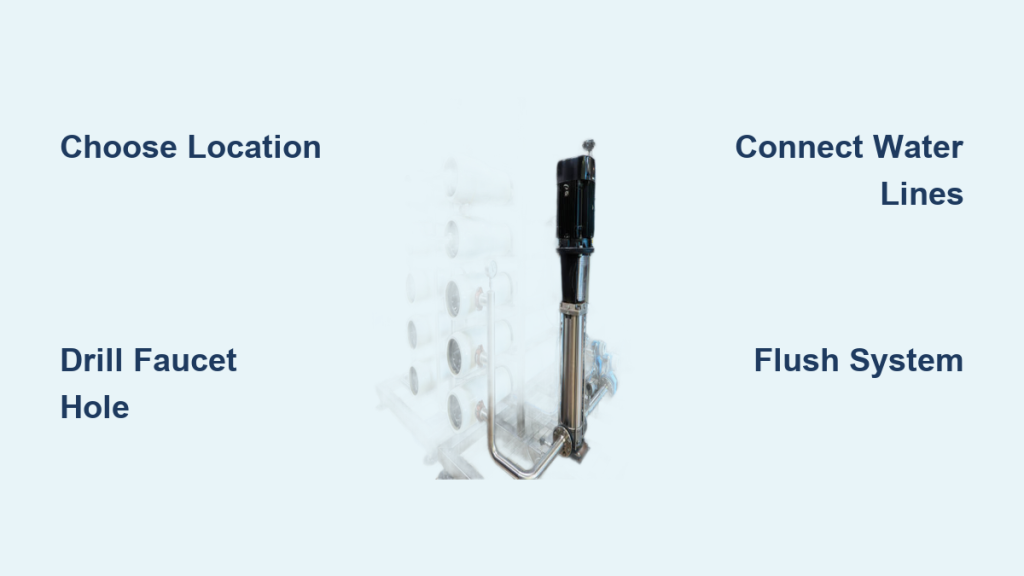
Choose the Right Water Source for RO Connection
Connect Only to Cold Water Lines
Always tap into the cold water supply. Hot water will damage the RO membrane and degrade filter performance. Most RO systems are designed for cold water below 100°F. Connecting to hot lines voids warranties and risks leaks.
Identify cold lines by material:
• PEX tubing: blue indicates cold, red indicates hot
• Copper or PVC: no color coding exists, so verify by touch after running tap for 10 seconds
• Label clearly after verification to prevent future confusion during maintenance
Verify Minimum 40 PSI Water Pressure
RO systems need at least 40 psi to operate efficiently. Ideal pressure ranges from 50 to 80 psi. Below that threshold, water will not pass through the membrane effectively.
• Use an inline water pressure gauge on the feed line to measure actual pressure
• If pressure falls below 40 psi, install a feed-side booster pump before the RO pre-filters
• Homes with well systems or upper-floor installations frequently require this additional equipment
Position Your RO System Near the Refrigerator
Keep Tubing Runs Short for Optimal Pressure
Shorter tubing means less pressure drop. The ideal setup places the RO system under the sink directly below the fridge, in a basement directly beneath the kitchen, or inside a nearby utility cabinet. Keep the RO storage tank close to the fridge to minimize lag and maintain strong flow during ice maker cycles.
Use 3/8″ Tubing for Long Runs Over 30 Feet
For runs exceeding 30 feet, upgrade from 1/4″ to 3/8″ tubing to reduce friction loss. A 3/8″ line delivers up to three times more flow over distance.
• Drill a 5/8″ hole through cabinets or floors to accommodate larger tubing
• Support tubing every 24 inches with clips to prevent sagging and kinks
• Consider a post-storage booster pump for basement setups where gravity and distance add resistance
Install a Booster Pump for Distant Setups
If your RO system is in the basement and the fridge is on the first floor, gravity and distance create significant resistance. Use a post-storage booster pump rated for continuous pressure and drinking water. Wire it to activate only when the fridge calls for water via a flow switch or solenoid trigger.
Tap Into the RO Product Water Line Correctly
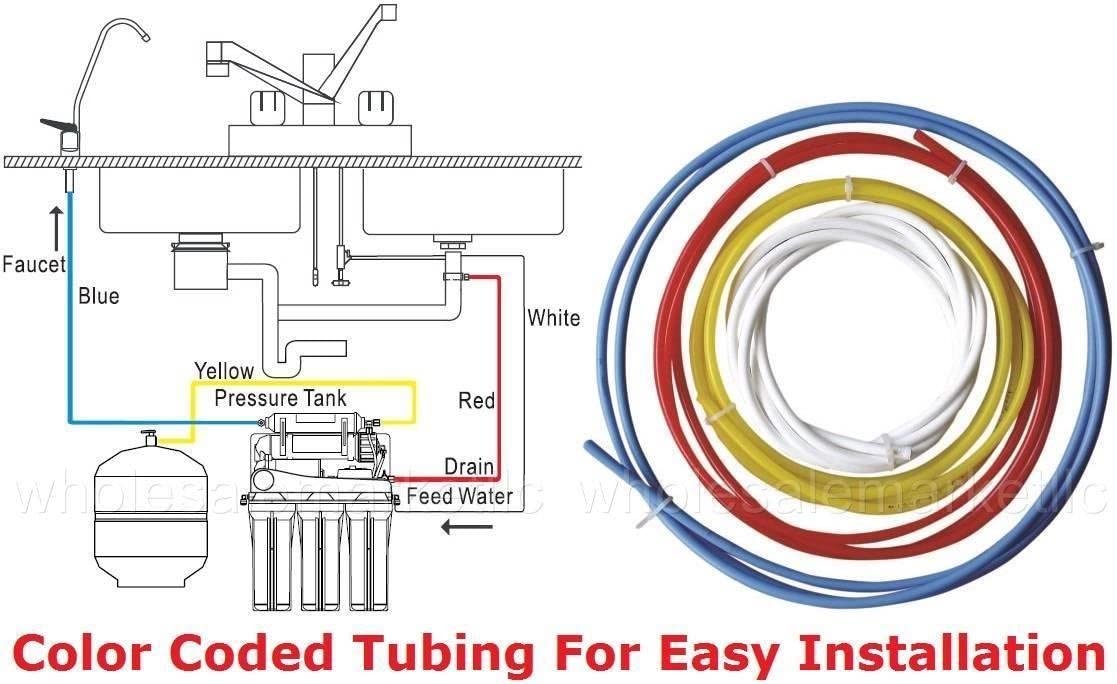
Locate the Blue 3/8″ Output Tubing
The blue tubing on your RO system carries purified water after the membrane and before the faucet. This is the only safe point to tap for refrigerator use.
Do not connect to:
• Clear or red tubing (inlet equals unfiltered water)
• Gray or black tubing (waste line equals brine water)
• Faucet outlet (not pressurized until dispensed)
Install a Brass Reducing T-Fitting
Use a 3/8″ x 3/8″ x 1/4″ brass compression T-fitting on the blue RO line. One 3/8″ port continues to the RO faucet, the second 3/8″ port connects back to the RO line, and the 1/4″ port feeds the refrigerator via new tubing. This allows simultaneous access to purified water at both the sink and fridge.
Avoid Push-Fit Fittings Under Constant Pressure
While convenient, SharkBite or similar push-fit connectors are prone to failure under constant pressure. Use compression fittings with plastic barbed inserts and Delrin sleeves instead. These create a reusable, leak-proof seal and handle high PSI reliably. Tighten just until snug, as overtightening cracks the sleeve.
Run 1/4″ Tubing to Your Refrigerator
Use Polyethylene Tubing for Standard Runs
Most RO kits include 20 to 25 feet of 1/4″ OD polyethylene tubing, ideal for runs under 30 feet. Cut cleanly with a tubing cutter, not scissors, to prevent crushing. Leave slack in coils behind the fridge to allow movement during cleaning.
Support and Route Tubing Properly
• Avoid sharp bends or kinks by using tubing clips to maintain smooth curves
• Do not pinch tubing behind appliances
• Pass through walls or floors using protective grommets to prevent abrasion
Install an Inline Ball Valve Near the Fridge
Add a 1/4″ inline ball valve in the line near the fridge. This allows you to shut off water without turning off the entire RO system. The valve is essential for filter changes, fridge maintenance, or moves. This component is included in kits like the iSpring ICEK.
Bypass Your Refrigerator’s Internal Filter

Why Dual Carbon Filtration Kills Flow
Most refrigerators have a built-in carbon filter. RO systems also end with a polishing carbon filter. Running water through both creates severe restriction, resulting in dripping dispensers, ice maker not cycling, and incomplete ice cube filling.
Install a Model-Specific Bypass Plug
The best fix is to remove the fridge filter and install a bypass plug. Search for your brand and model bypass plug, such as “Samsung RF28R7351SR bypass plug.” These are available for GE, Whirlpool, LG, Samsung, and other brands, costing $10 to $20 online.
Many users run their fridges filter-free on RO water with no issues. RO already removes chlorine and TDS, so the fridge filter becomes redundant.
Alternative: Tap RO Water Before Final Carbon Stage
If you prefer to keep the fridge filter active, tap the RO line before the final carbon filter. This sends water to the fridge before the last stage, letting the fridge filter handle minor taste polishing while preventing dual carbon restriction. Note that this slightly reduces purity, so only do this if bypass plugs are unavailable.
Pressurize and Maintain Your RO Storage Tank
Check Tank Pressure: 6 to 10 PSI When Empty
The RO storage tank must be pre-charged with air to push water out under pressure. Shut off water and open the faucet to drain the tank. Use a low-pressure air gauge on the tank’s Schrader valve, like a tire valve. Add air with a bicycle pump or small compressor if below 6 psi. Do not exceed 10 psi.
Re-Pressurize the Tank Annually
Over time, air dissipates. Low pressure equals weak flow. Re-check every 6 to 12 months, especially if ice production slows or dispenser flow drops.
Replace the Tank Every 7 to 10 Years
Bladders degrade over time. Signs of failure include water dribbling out slowly, tank feeling heavy but dispensing little, or a spongy sound when tapped.
Optimize Flow Rate and Pressure for Ice Production
Fix Slow Ice or No Water Dispensing
If the ice maker is not cycling or water trickles out, check these common issues:
Low Tank Pressure: Re-pressurize to 6 to 10 psi
Kinked or Crushed Tubing: Inspect entire run and replace if bent sharply
Clogged Pre-Filter or Membrane: Replace sediment and carbon pre-filters every 6 to 12 months, and replace RO membrane every 2 to 3 years
Undersized Tubing on Long Runs: Upgrade to 3/8″ tubing or add a booster pump
Measure Pressure at the Refrigerator
Use an inline water pressure gauge at the fridge’s inlet. Refrigerators require 20 to 120 psi. If below 20 psi, install a delivery-side booster pump. If above 120 psi, install a pressure-reducing valve.
One user had 70 psi at the source but less than 15 psi at the fridge after a 35-foot 1/4″ run, proving that tubing length and size matter significantly.
Connect When Refrigerator Has No Existing Water Line
Follow these steps for first-time installation:
- Turn off the cold water supply to the RO system
- Cut the RO product line (blue tubing) and install the T-fitting
- Run 1/4″ PE tubing from T-fitting to fridge location
- Install inline ball valve in an accessible spot
- Connect tubing to the fridge’s water inlet valve at the back
- Remove the internal filter and install the bypass plug
- Flush the RO system for 5 to 10 minutes through the sink faucet
- Check all connections for leaks
Use the iSpring ICEK kit, which includes T-valve, 20 feet of tubing, ball valve, and fittings.
Connect When Refrigerator Already Has Water Line
Redirect your existing setup with these steps:
- Turn off the water supply valve
- Dispense water to relieve pressure
- Disconnect the fridge line from the valve
- Cap the valve with a nut cap
- Install T-fitting on the RO product line
- Connect 1/4″ tubing from T-fitting to fridge line
- Use a straight compression fitting to join lines
- Bypass the fridge filter
- Flush and test
Route the Drain Line Properly
Connect to 1¼” or 2″ Drain Pipe
RO systems discharge wastewater during filtration. Use a saddle valve to tap into a drain line. Use a 1¼” valve for under-sink installations or a 2″ valve for basement or off-sink installations. Install above the P-trap to reduce gurgling noise.
Alternative Drain Options
• Discharge outside via tubing for irrigation (non-potable)
• Collect in a barrel for watering plants
• Direct to a utility sink or floor drain
Note that wastewater is safe for outdoor use, containing only concentrated contaminants removed from tap water.
Perform Final Checks and Flush the System
Flush System for 5 to 10 Minutes After Installation
After installation, flush the RO system by opening the RO faucet and letting water run for 5 to 10 minutes. This removes loose carbon fines and air from lines, preventing clogging of fridge valves or dispenser.
Check All Connections for Leaks
Inspect the RO T-fitting, compression joints, ball valve, and fridge inlet. Turn on water slowly and watch for drips. Tighten if needed, but do not over-tighten.
Test the Ice Maker Cycle
Wait 24 hours for the tank to refill. Listen for the ice maker to cycle and check for full ice cubes within 24 to 48 hours. If no ice appears, check pressure and verify the bypass filter is installed correctly.
Maintain Your System for Long-Term Performance
Replace Filters on Schedule
• Sediment pre-filter: every 6 months
• Carbon pre-filter: every 6 to 12 months
• RO membrane: every 2 to 3 years
• Post-carbon filter: every 12 months
Set phone reminders or mark your calendar to stay on schedule.
Inspect Tubing Annually
Look for cracks or brittleness, discoloration, and leaks at fittings. Replace every 5 to 7 years, even if no issues appear.
Document Your Setup
Write down tubing length and size, fitting types, bypass plug model, and booster pump specs. This documentation helps during troubleshooting or future upgrades.
Frequently Asked Questions About Connecting Reverse Osmosis to Refrigerator
Can I connect reverse osmosis to any refrigerator?
Most refrigerators can accept RO water connection if they have a water dispenser or ice maker. You need a cold water source, adequate space for tubing routing, and a way to bypass or remove the internal filter. Check your refrigerator’s specifications to confirm compatibility.
Why does my ice maker stop working after connecting RO?
The most common cause is dual carbon filtration. Your refrigerator’s internal filter combined with the RO system’s final carbon filter creates severe flow restriction. Install a bypass plug to remove the fridge filter, or tap the RO line before the final carbon stage.
What tubing size should I use for long runs?
For runs over 30 feet, use 3/8″ tubing instead of the standard 1/4″. This reduces pressure drop significantly and can triple flow capacity over distance. Alternatively, install a booster pump between the RO tank and refrigerator.
Do I need a booster pump for basement installations?
If your RO system is in the basement and the refrigerator is on the first floor, gravity and distance create resistance that often requires a booster pump. Measure actual pressure at the fridge with an inline gauge to determine if additional pressure is needed.
How often should I repressurize my RO storage tank?
Check tank pressure every 6 to 12 months. The tank should maintain 6 to 10 psi when empty. Repressurize with a bicycle pump if pressure drops below 6 psi, as low pressure causes weak flow and poor ice production.
Key Takeaways for Connecting Reverse Osmosis to Your Refrigerator
Connecting reverse osmosis to your refrigerator transforms water quality by delivering crisp, clean water and clear ice. Success depends on three critical factors: tapping the correct RO product water line (the blue tubing after the membrane), avoiding dual carbon filtration by bypassing the fridge filter, and maintaining adequate pressure through proper tubing size and tank maintenance.
Follow the step-by-step installation process for your specific scenario, whether your fridge has an existing water line or needs first-time connection. Use brass compression fittings instead of push-fit connectors, install an inline ball valve for serviceability, and flush the system for 5 to 10 minutes after completion.
Replace filters on schedule, check tank pressure annually, and document your setup for future reference. With correct installation, your refrigerator will run on pure, great-tasting RO water for years to come.