

Is your Brio water dispenser beeping, showing an F6 error, or refusing to dispense water? You’re not alone. Thousands of users face similar issues every month with their countertop and freestanding units.
The good news: most Brio water dispenser problems can be fixed with a proper reset, often in under 30 minutes and for less than $20. This guide shows you exactly how to reset your Brio water dispenser for every common issue, from filter alerts to frozen reservoirs. No guesswork, no unnecessary replacements.
Perform a Full System Reboot First
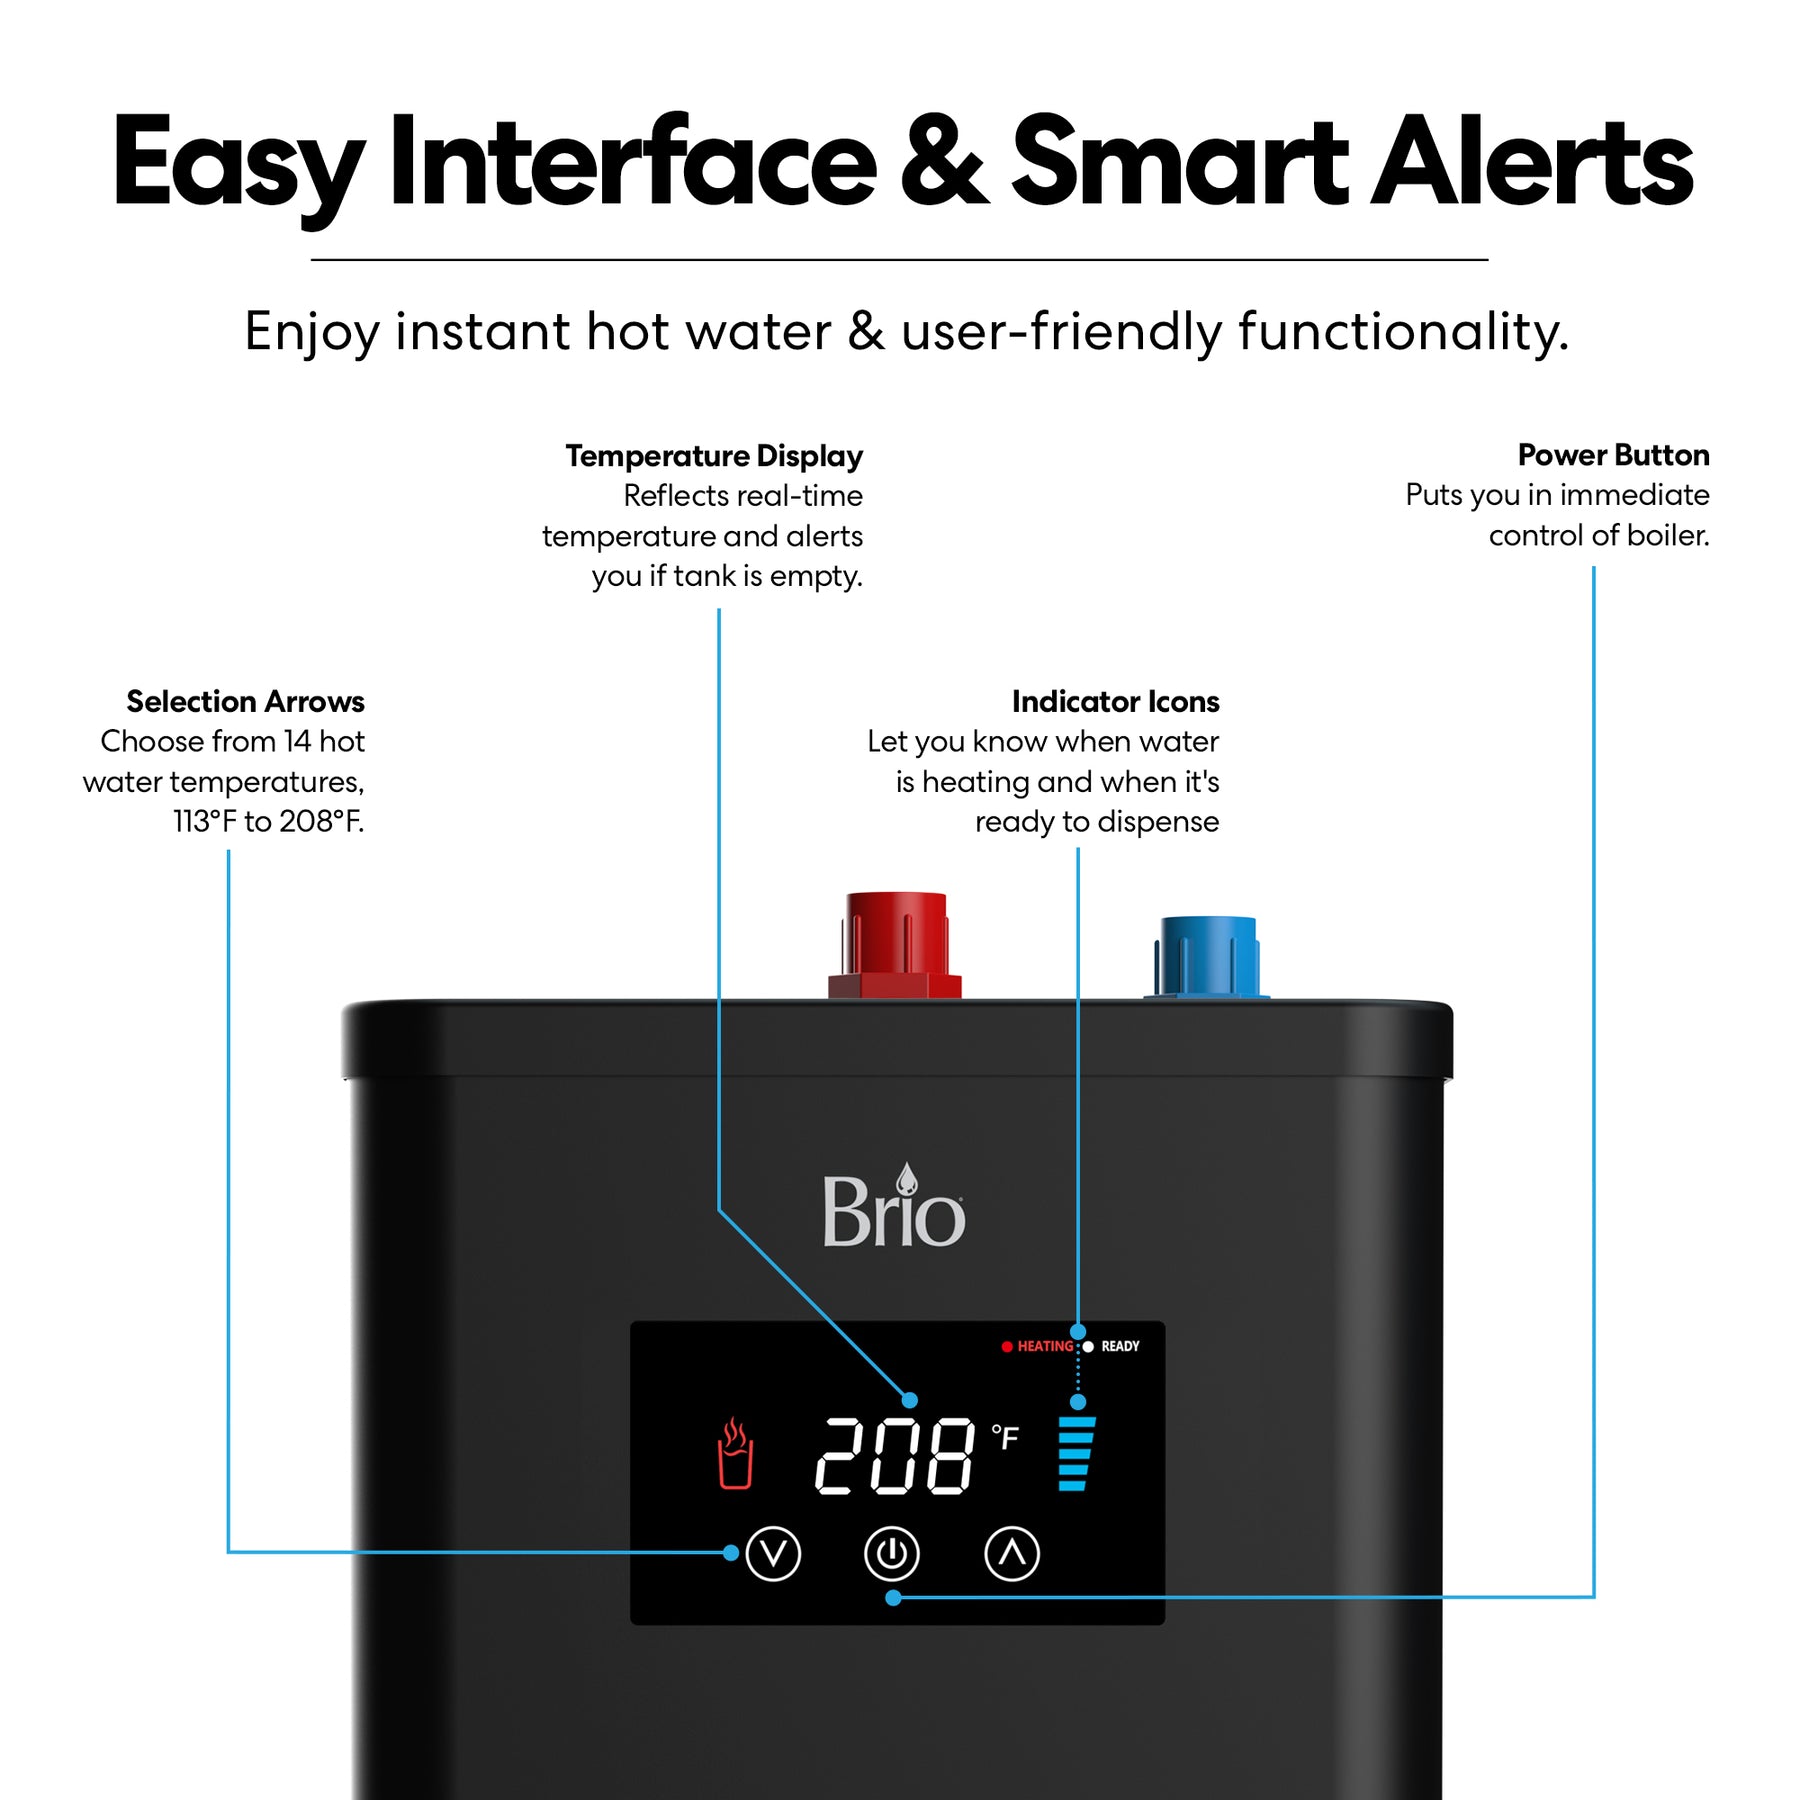
When your Brio dispenser acts up with no water, strange lights, or unresponsive controls, a complete system reboot should be your first move. This clears internal errors and resets all functions.
Why a Reboot Solves Most Issues
The Brio dispenser runs on an embedded control system that can lock up due to power surges, sensor triggers, or software glitches. A reboot flushes temporary errors and restores default operation, much like restarting a frozen computer.
Reboot in 6 Steps
- Turn off all switches on the back of the unit.
- Unplug the dispenser from the wall outlet.
- Wait 2 hours to allow the internal memory to fully discharge.
- Plug the unit back in.
- Dispense water from all buttons (hot, cold, room temp) to prime the system.
- Turn the switches back on and wait 10 to 15 minutes for temperature stabilization.
Success sign: Water flows normally and indicator lights return to default. If the issue persists, gather your serial number, order confirmation, and a short video of the problem before contacting support.
Reset the Filter Replacement Alert

After changing the filter, if your Brio dispenser keeps beeping or flashing the filter icon, the system hasn’t reset. The timer is still counting down the old filter’s life.
How to Clear the Filter Alert
- Unplug the unit.
- Locate the filter reset button, usually on the front or side near the display.
- Press and hold the button.
- Plug the dispenser back in while holding the button.
- Keep holding until the exclamation mark disappears and the display stabilizes.
- Release the button.
Critical: Do not let go too early. Wait for the screen to fully reset before releasing.
Why the Beeping Returns
Common causes include a filter not fully seated, the reset button released too soon, or moisture near the sensor.
Pro Tips for a Successful Filter Reset
- Use a pen or paperclip for firm pressure on the reset button.
- Confirm the filter clicks into place before resetting.
- The alert should vanish immediately after a successful reset.
- Repeat the process if beeping returns within 48 hours.
This reset must be done every time you replace the filter.
Fix the F6 Overflow Error Code

The F6 error means the overflow sensor has detected water in the base. It’s a safety feature, not a malfunction. The dispenser shuts off water flow to prevent leaks and internal damage.
What Triggers the F6 Error
- Splashed water under the drip tray
- Leaking filter or hose
- Condensation buildup
- Misaligned glass platform
Even a small splash can set off this sensitive sensor.
Step-by-Step F6 Reset
1. Unplug the Unit
Always disconnect power before accessing internal parts for safety.
2. Locate the Overflow Sensor
The sensor sits at the bottom of the unit near the back. It’s a small gray or white switch inside a plastic housing.
3. Remove and Dry the Sensor
- Unscrew the single screw holding the sensor.
- Gently pull out the assembly.
- Dry every surface with paper towels.
- Use a cool hair dryer for 2 to 3 minutes to ensure 100% dryness.
4. Reinstall and Wait
- Reattach the sensor and screw.
- Leave the unit unplugged with the cabinet open for 1 hour.
- Plug back in.
Success sign: F6 error disappears and water flows normally.
Quick-Dry Method Without Tools
For minor spills, follow these steps:
1. Unplug the unit.
2. Wipe the sensor area thoroughly.
3. Use a cool hair dryer for 3 minutes.
4. Wait 60 minutes before plugging back in.
Do not skip the waiting period, as residual moisture can retrigger the F6 error.
Prevent Future F6 Errors
- Place glasses only on the designated dispensing spot.
- Clean the drip tray weekly.
- Check filter seals every 3 months.
- Keep the sensor area dry and unobstructed.
Clear Air from Water Lines
No water coming out, but you hear the pump running? You likely have air trapped in the lines, which is common after replacing the water bottle.
How to Purge Air from the System
- Push the intake hose firmly into both the bottle probe and pump until you hear a click.
- Hold down each water button (hot, cold, room temp) for 2 to 3 minutes.
- Let the pump run; it will work hard, but this is normal.
- Repeat if water flow is weak.
Success sign: Steady water stream with no sputtering. This fix solves about 35% of startup issues.
Common Mistakes to Avoid
- Not seating the hose fully
- Releasing buttons too soon
- Using a damaged or kinked hose
Always ensure the hose is straight and fully connected at both ends.
Replace a Failed 12V Water Pump

If no water comes out and the pump is silent, the 12V diaphragm pump may be dead, especially if the unit ran dry recently.
Symptoms of Pump Failure
- No sound when pressing buttons
- Weak or no water flow
- Pump gets hot but doesn’t engage
Replacement Guide
- Unplug the unit.
- Remove the back panel with a Phillips screwdriver.
- Disconnect the old pump and note wire positions.
- Install a 12VDC GMBD 23,130 pump ($9 to $19).
- Connect red wire to positive, black to negative.
- Secure the pump and reassemble.
Warning: Never use a 110V pump, as this will destroy the control board.
Time and Skill Required
- Time: about 30 minutes
- Skill level: Beginner with basic tools
- Cost: Under $20
This is the most common repair for non-working Brio dispensers.
Thaw a Frozen Water Reservoir
If the cold water button is stiff or no water comes out, the reservoir may be frozen solid, especially if cooling is set too high.
Signs of a Frozen Reservoir
- Ice visible inside the tank
- Cold button hard to press
- Unit seems “dead” when cold is selected
How to Thaw and Reset
- Turn off cooling and unplug the unit.
- Wait 4 to 6 hours for frost, or 12 to 24 hours for solid ice.
- Restart with cooling set to medium, not maximum.
- Test cold water flow.
Prevent Refreezing
- Avoid setting cooling to maximum.
- Ensure 8 inches of space around the unit for airflow.
- Replace the thermistor ($2 to $10) if freezing recurs.
Thermistor replacement requires opening the control panel and basic DIY skill.
Fix Loose or Stuck Dispensing Buttons
If one button feels loose or doesn’t dispense water, the internal plastic lever has likely shifted during shipping or use.
How to Realign the Button
- Remove the two screws on the back of the top cover.
- Lift the cover gently.
- Reseat the plastic lever into its guide tray.
- Replace the cover and screws.
- Test the button.
Success sign: Button clicks smoothly and dispenses water. This fix takes about 10 minutes and solves 5% of mechanical failures.
Only seek professional help if plastic tabs are broken.
Brio Dispenser Troubleshooting Flowchart
Follow this order to fix 95% of issues:
- Check hose connections and reseat, then prime for 5 minutes.
- Test the pump; listen for noise and replace if silent.
- Inspect for ice; thaw completely and restart on medium cooling.
- Address F6 error; dry sensor and wait 1 hour.
- Check button alignment and reseat lever under cover.
Skip ahead only if you’re certain of the specific issue.
Repair Cost Breakdown
Most fixes are low-cost:
| Part | Cost | Fix Rate |
|---|---|---|
| 12V Water Pump | $9 to $19 | 25% of failures |
| Thermistor | $2 to $10 | 20% of cooling issues |
| Float Switch | $13 to $15 | Rare |
| Leak Sensor | Free | Just dry it |
About 95% of repairs cost under $20, so there’s no need to replace the entire unit.
Prevent Future Issues
Keep your Brio dispenser running smoothly with these habits:
- Leave 8 inches of space around the unit for proper airflow.
- Never turn on cooling or heating until the reservoir is full.
- Ensure the reservoir cap clicks securely into place.
- Inspect filters and hoses every 3 months.
- Clean the drip tray weekly to avoid sensor triggers.
- Use the correct spot for glasses and never place them on the sensor zone.
Quick Reset Reference Table
| Problem | Reset Type | Key Action |
|---|---|---|
| General failure | System Reboot | Unplug 2 hours, restart |
| Filter beeping | Filter Reset | Hold button during power-up |
| F6 error | Sensor Dry Reset | Dry sensor, wait 1 hour |
| No water, pump running | Air Purge | Hold buttons 2 to 3 min |
| Frozen cold water | Thaw Reset | Wait 12 to 24 hours |
| Loose button | Mechanical Fix | Reseat internal lever |
| No water, silent pump | Pump Replacement | Install 12VDC pump |
Frequently Asked Questions About Resetting a Brio Water Dispenser
How long do I need to unplug my Brio water dispenser to reset it?
For a full system reboot, unplug the dispenser for 2 hours. This allows the internal memory to fully discharge and clears temporary errors. For minor issues, a 60-second unplug may help, but the 2-hour method is most reliable.
Where is the filter reset button on a Brio dispenser?
The filter reset button is usually located on the front or side of the unit near the display. You may need a pen or paperclip to press it firmly. Hold the button while plugging the unit back in to clear the alert.
Why does my Brio dispenser keep showing the F6 error after drying?
Residual moisture in the sensor housing is the most common cause. Use a cool hair dryer for 2 to 3 minutes, then leave the cabinet open for a full hour before plugging back in. If the error returns, the sensor itself may need replacement.
Can I use any 12V pump to replace a failed Brio pump?
Use only a 12VDC pump with the model number GMBD 23,130. Installing a 110V pump will destroy the control board. Connect red wire to positive and black to negative, like a car battery.
How do I know if my Brio reservoir is frozen?
Signs include a stiff cold water button, visible ice inside the tank, or a unit that appears dead when cold is selected. Allow 12 to 24 hours to thaw completely, then restart on medium cooling to prevent refreezing.
Is it worth repairing an old Brio water dispenser?
Yes. About 95% of repairs cost under $20, and most issues involve inexpensive parts like pumps ($9 to $19) or thermistors ($2 to $10). Replacing the entire unit is rarely necessary.
Key Takeaways for Resetting Your Brio Water Dispenser
Most Brio water dispenser problems are resettable, not permanent. Whether you’re dealing with a filter alert, F6 error, frozen tank, or silent pump, the fix is usually quick, cheap, and doable at home with basic tools.
Start with the simplest solution: a full system reboot by unplugging for 2 hours. If that doesn’t work, match your specific symptom to the matching reset procedure in the reference table above. Keep your serial number and order confirmation handy in case you need to contact support.
Save this guide for future reference. With the right reset procedure, you can restore your Brio dispenser to full functionality in minutes and avoid unnecessary service calls or replacements.



