If your Primo water dispenser delivers cloudy water or strange odors, it likely needs immediate attention. Regular Primo water dispenser maintenance prevents harmful bacteria and mineral scale from ruining your water quality.
This guide shows you how to clean your unit in under 45 minutes using common household items. You will learn the exact steps to sanitize reservoirs, clear hidden buildup, and ensure every glass tastes fresh.
Follow the Three-Month Cleaning Schedule
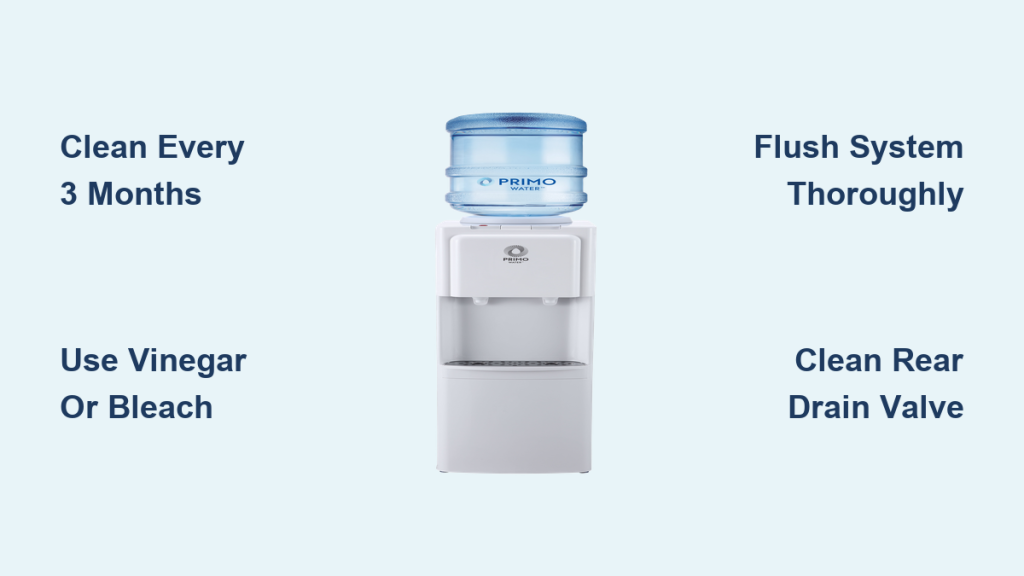
Cleaning your unit every three months is the most critical rule for long-term performance. This specific timeframe stops mineral deposits from hardening into difficult scale and prevents bacterial colonies from forming in stagnant water lines.
Even if you use the machine lightly, water sits inside 24/7. Waiting longer than six months often leads to persistent bad tastes and clogged internal components that are hard to fix later.
When to Clean Sooner Than Expected
You must increase your cleaning frequency if your home or office has high traffic. Look for these specific warning signs that indicate immediate action is required:
- Water tastes stale or has a musty odor
- Dispensed liquid appears cloudy or discolored
- Flow rate has slowed down noticeably
- The unit sits unused for more than one week
- Multiple people use the dispenser daily
Gather Essential Supplies Before Starting
You need specific tools and a chosen cleaning agent to begin the process effectively. Selecting the right solution depends on your preference for natural cleaners versus strong chemical sanitizers.
Select Your Preferred Cleaning Solution
Choose only one method per session to avoid dangerous chemical reactions. Both options work well when mixed with hot water.
- White Vinegar: Mix 2 cups with 2 gallons of hot water. This is the recommended choice for removing odors without harsh chemicals.
- Bleach: Mix 2 tablespoons with 2 gallons of hot water. This kills bacteria quickly but requires extra rinsing cycles.
- Commercial Kits: Use pre-measured packets designed for top-load models if you prefer guided instructions.
Warning: Never mix vinegar and bleach together. This combination creates toxic chlorine gas that is dangerous to inhale.
Required Tools and Materials
Gather these items before you start to ensure a smooth workflow without interruptions.
- Empty 5-gallon water bottle for mixing solution
- Secondary jug holding 2 gallons of clean hot water
- Bucket or large pitcher to catch drained liquid
- Phillips screwdriver for the rear drain cap
- Dish soap and clean cloth or sponge
- Mr. Clean Magic Eraser for stubborn stains
- 4 Q-tips for detailed spout cleaning
- Soft brush or pipe cleaner for deep lines
Execute the 15-Step Cleaning Process
This procedure works for both top-loading and bottom-loading Primo models. Follow each step carefully to ensure complete sanitation of the internal system.
Power Down and Prepare the Unit
Safety is your first priority before handling any liquids or internal components.
- Turn off the energy switches located on the back panel.
- Unplug the power cord from the wall outlet completely.
- Remove the water bottle or disconnect the tubing for bottom-loaders.
- Move the unit away from the wall to access the back and taps.
- Press both hot and cold taps to drain remaining water into your bucket.
Mix and Circulate the Cleaning Solution
Proper mixing ensures the solution is strong enough to break down scale but safe for the machine components.
- Combine your chosen cleaner (2 cups vinegar or 2 tbsp bleach) with 2 gallons of hot tap water in the empty bottle.
- Secure the bottle onto the intake valve until it clicks firmly into place.
- Plug the unit back in and turn the energy switches to ON.
- Let the system fill until bubbling stops, which usually takes about 1 gallon.
- Turn on the hot switch if using vinegar to boost sanitization power with heat.
- Turn switches OFF and unplug the unit to let the solution soak for 10 minutes.
Pro Tip: Do not skip the 10-minute soak time. This dwell period is essential for breaking down tough biofilm and mineral buildup.
Drain and Flush the System Thoroughly
Rinsing removes the dissolved minerals and any remaining cleaning agent from the internal lines.
- Press both dispensing buttons fully until no liquid flows out the front taps.
- Rinse your 5-gallon bottle and fill it with 2 gallons of fresh hot tap water.
- Reattach the bottle, plug in the unit, and dispense water through both taps until empty.
- Install a fresh water bottle and run 1–2 full cycles to ensure purity.
Note: If you used bleach, repeat the rinse cycle 2–3 times to eliminate all chemical aftertaste. Vinegar users usually only need one rinse.
Deep Clean Hidden Areas and Components
Front flushing misses critical spots where mold and scale often hide. You must manually clean these areas for a truly sanitary machine.
Open the Rear Drain Valve
This step removes sediment that settles at the bottom of the reservoir and cannot exit through the front taps.
- Unplug the unit and rotate it to access the back panel clearly.
- Use a Phillips screwdriver to remove the plastic cover over the drain.
- Pull out the red silicone plug and place your bucket directly underneath.
- Let all remaining liquid and dark particles drain out completely.
- Reinsert the red plug firmly and screw the cap back on tightly to prevent leaks.
Detail Spouts and Drip Tray
Biofilm frequently builds up in the narrow exit points of the spouts, affecting taste quality.
- Remove the drip tray and wash it with soapy water.
- Use a Magic Eraser to scrub away sticky residues or stains.
- Take 4 clean Q-tips to swab inside each spout exit carefully.
- Wipe the interior cavity and needle area with a damp cloth.
Ensure all parts are completely dry before reassembling to prevent immediate mold growth.
Verify Success and Troubleshoot Issues
Check your work immediately after restarting the unit to confirm the cleaning was effective.
Diagnostic Checks for Clean Water
Perform these simple tests to ensure your water is safe and tasty.
- Clarity: The first few dispenses may have air bubbles, but water must quickly become clear.
- Taste: Sample the water. It should not taste like vinegar or bleach.
- Leaks: Inspect the rear drain plug area for any dripping water.
Fix Common Post-Cleaning Problems
Water Still Tastes Bad
This usually means incomplete rinsing, especially if you used bleach. Run additional flush cycles with fresh hot water until the taste disappears.
Low Flow Rate Persists
Check for an air lock in the lines by waiting 15 minutes. Ensure the bottle is seated correctly and re-clean spots with a Q-tip if blockage remains.
Unusual Noises Occur
Gurgling is normal as air escapes during the first refill. If knocking persists, ensure the unit is level and has space behind it for ventilation.
Prevent Buildup Between Cleanings
Adopting simple daily habits extends the time between deep cleans and keeps water tasting great.
Daily and Weekly Maintenance Habits
Wipe the exterior daily with a damp cloth to remove dust and spills. Clean the drip tray weekly to stop mold from growing in standing water. Replace empty bottles promptly and store spare bottles upright in a cool, dark place.
Optimize Unit Placement
Avoid placing the dispenser near ovens, radiators, or direct sunlight. Excessive heat encourages bacterial growth inside the reservoir. Always leave 3–4 inches of space behind the unit for proper airflow.
Replace Filters and Know Professional Limits
Some Primo models have inline filters that require separate attention from the main cleaning schedule.
Filter Replacement Schedule
Replace inline filters every six months regardless of how often you clean the unit. Filters improve taste but do not sanitize the internal reservoirs or spouts. Track these dates separately to maintain optimal performance.
When to Call a Professional
DIY cleaning works for most homes, but seek professional service if:
* The unit serves a high-traffic office or clinic
* Health regulations require documented sanitization
* Repeated cleaning fails to fix taste or flow issues
* You are uncomfortable handling electrical components
Stay Safe and Dispose of Waste Properly
Handling cleaning agents requires basic safety precautions to protect yourself and your home.
Chemical and Electrical Safety
Always ventilate the room when using bleach. Wear gloves if you have sensitive skin. Never mix different cleaning chemicals together. Always unplug the unit before moving it or accessing the rear drain to prevent electrical shock.
Eco-Friendly Disposal Methods
Pour vinegar solutions directly down the drain. They can even help clean your garbage disposal. Dilute bleach solutions with extra water before pouring them down the drain to protect your plumbing and local water systems.
Frequently Asked Questions About Primo Water Dispenser Maintenance
How often should I clean my Primo water dispenser?
You should clean your unit every three months to prevent bacterial growth and mineral scale. Increase this frequency if the dispenser is in a high-traffic area or if you notice changes in water taste.
Can I use bleach instead of vinegar for cleaning?
Yes, you can use 2 tablespoons of bleach mixed with 2 gallons of hot water. However, you must rinse the system 2–3 times afterward to remove all chemical traces and aftertaste.
Why does my water taste funny after cleaning?
This usually happens if the unit was not rinsed thoroughly enough. Run additional flush cycles with fresh hot water until the taste returns to normal.
Do I need to clean the back drain valve every time?
Yes, opening the rear drain valve is essential to remove sediment that front flushing cannot reach. Skipping this step leaves dirty water and scale at the bottom of the reservoir.
Is it safe to drink water immediately after cleaning?
Only drink the water after you have completed all rinse cycles and verified there is no residual taste of vinegar or bleach. A final taste test ensures the water is safe.
What happens if I mix vinegar and bleach?
Never mix these two chemicals as they create toxic chlorine gas. Always choose one method per cleaning session and rinse tools thoroughly if switching between them in the future.
Key Takeaways for Effective Primo Water Dispenser Maintenance
Consistent care every three months keeps your water fresh and your machine running efficiently. Focus on the often-missed rear drain valve and use Q-tips to clean inside the spouts for total sanitation.
Start your next maintenance session today by gathering vinegar and a screwdriver. Your health and the longevity of your dispenser depend on this simple routine.